Yoga

Deepen your yoga practice with free full class videos. Learn more about the physical asanas (poses) as well as the spiritual and mental sides of yoga.

  • Meet My Favorite Yoga Teacher: Elka Haeckel

    I’m so excited to introduce you today to my yoga teacher and mentor, Elka Haeckel!

    I call her the best because she really is. Elka Haeckel changed yoga for me. I’ve been practicing since I was 15, but I’ve yet to come across another teacher who’s as knowledgable about both the physical asana (“poses”) practice as she is about living yoga.

    In addition to knowing about the deep history and philosophies of yoga and its sister science Ayurveda, Elka radiates authenticity. She speaks with intention, and teaches from her heart. This is what she teaches to her yoga teacher trainees, which is why I found her YTT so transformative.

    I first met Elka by pure intuition.

    I was in a really painful period of my life, deep in the process of trying to learn about the body to heal my chronic pain. Elka Haeckel had just opened her new studio in San Diego, Elka Yoga & Wellness Center, which has a gorgeous outdoor aerial yoga deck. I was newly into aerial yoga and went to her studio for a class in Dec 2015.

    I hadn’t even met Elka herself yet when a Facebook ad popped up for their upcoming yoga teacher training that coming Jan-Feb. I’d thought about doing a yoga teacher training before, but not seriously. But after reading about the training on her website, a voice inside me (my intuition) whispered loud and clear: Do it.

    So I did, and it set me on a path that would change everything.

    I wanted to do yoga teacher training partially because I knew I might teach it (I was already teaching barre, spin, and Pilates at that time), but mostly because I was seeking the deeper side of yoga. I knew my pain was worsened by my lifelong anxiety, and that yoga was supposed to be good for that.

    I’d taken yoga classes all my life but really knew nothing about its rich history, about the teachings that help bring mental peace. I wanted to go beyond doing Warrior 2 pose and find out what the real juice was behind yoga. What gives it its healing power.

    And let me tell you: Elka brings the juice.

    Keeping life juicy is one of Elka’s most common sayings—and she fully embodies this. I learned so much from Elka, not only how to teach yoga to others but also about who I am and how I want to live through a yogic lens.

    She continues to be a powerful mentor and friend for me, and I know you’ll love her as much as I do. If you’re in San Diego, be sure to visit her incredible studio/wellness center and learn from her in person! Otherwise, read to the bottom for ways to work with Elka online from around the world.

    So without further ado, enjoy my interview with Elka Haeckel:

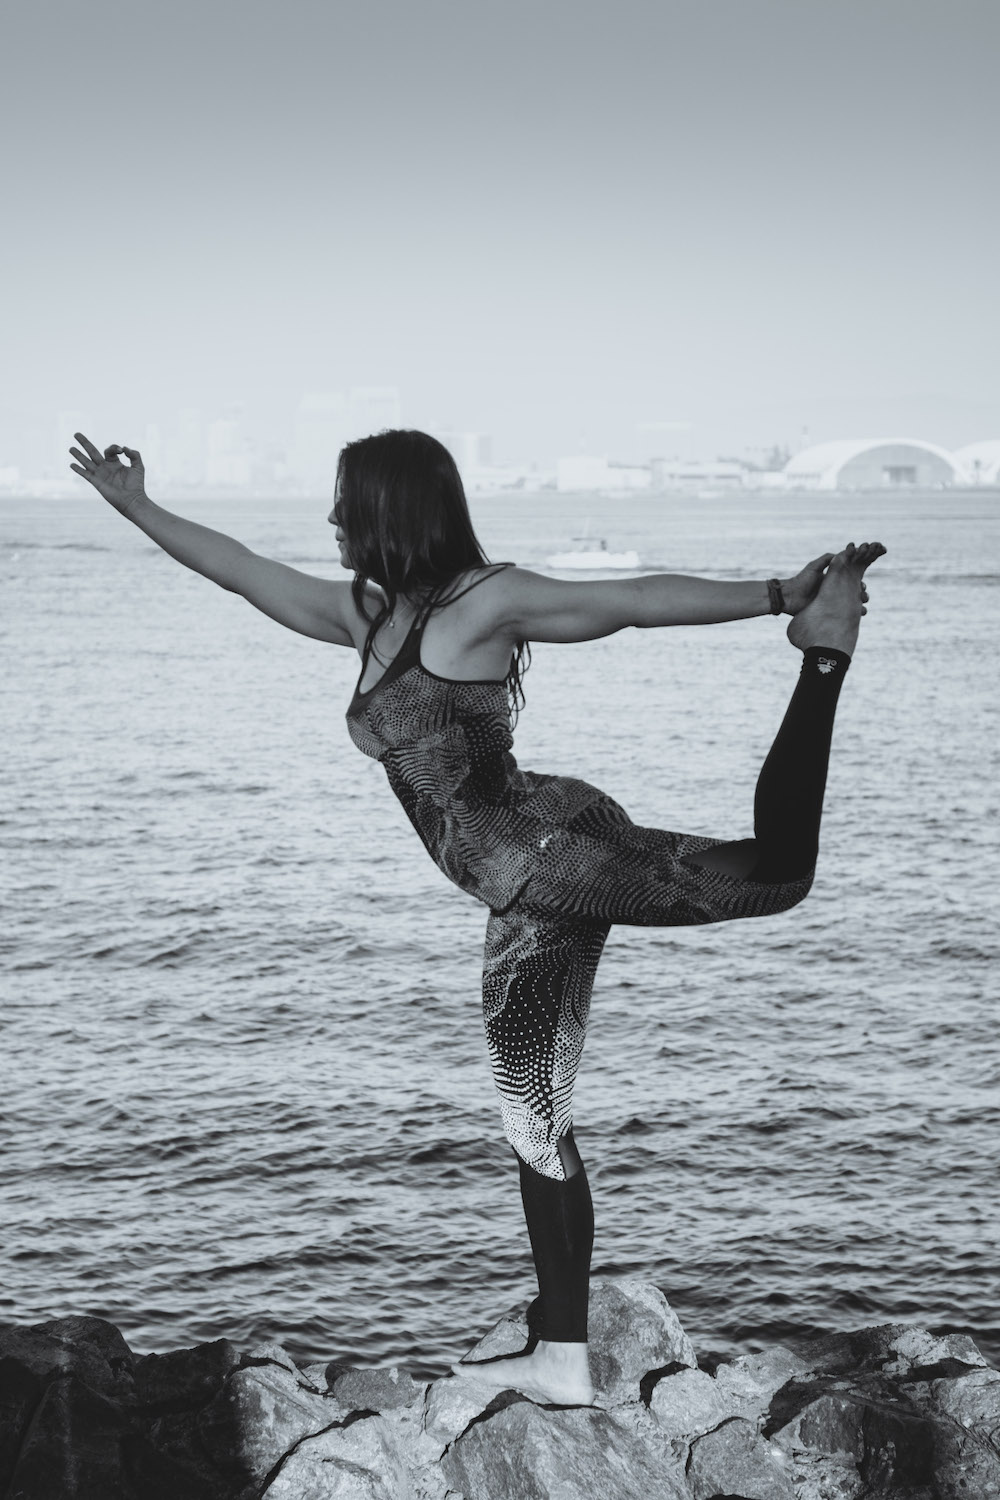
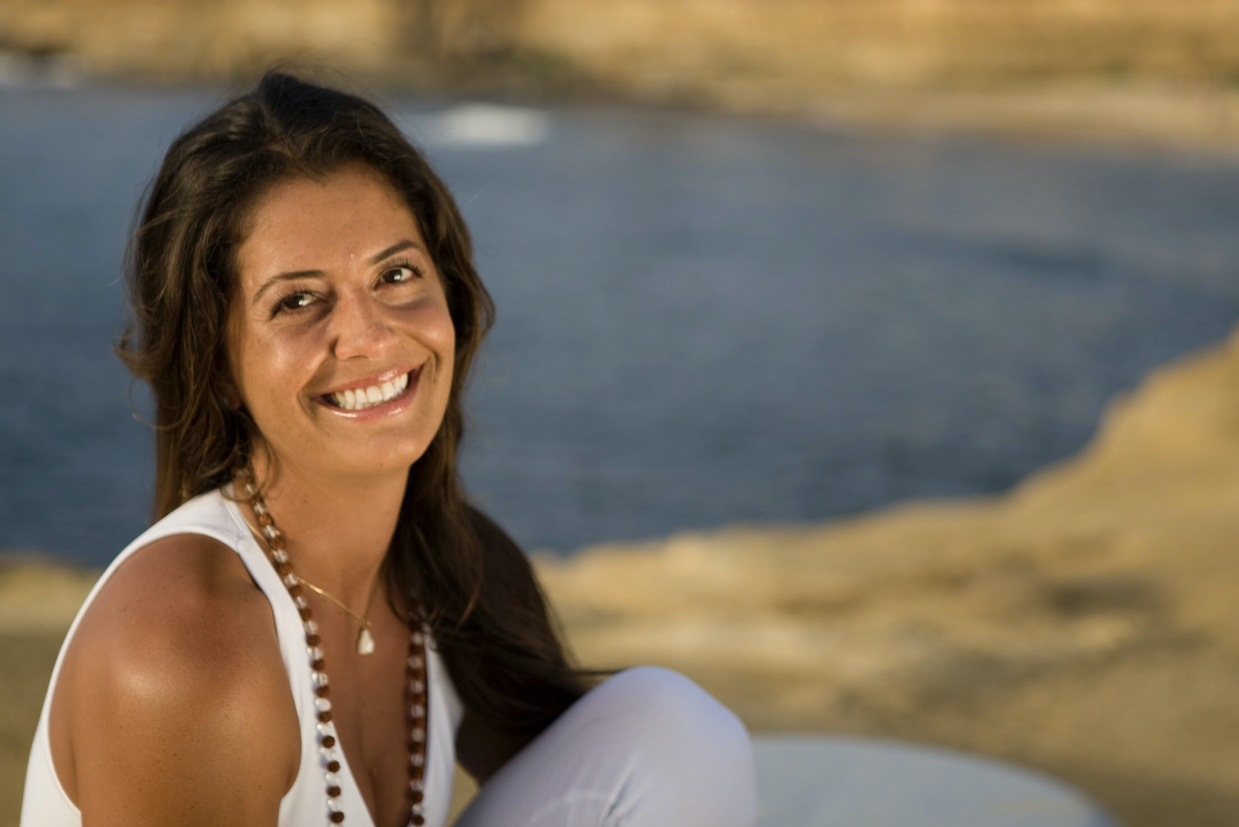
    Elka Haeckel is the founder of Elka Yoga and Co-Owner of Elka Yoga & Wellness Center in San Diego.

    Elka has been teaching yoga since 2004. She is a worldwide yoga instructor who has developed her own juicy, unique yoga practices in addition to traditional styles. Follow Elka on Instagram for free classes and teachings!

    She’s a certified Yoga Alliance E-RYT 500 Hatha Yoga instructor with additional certifications in Ayurveda, Reiki, Prana Flow, Restorative Yoga, Tantra Yoga, Vinyasa Flow, SUP Yoga, Yoga Therapy and Thai Medical Massage. She is also a certified life coach.

    Elka’s exuberance and passion for teaching, extensive knowledge of yoga philosophy, and holistic health, combined with her experience of owning a successful San Diego yoga studio, international training, workshops, retreats and teacher training makes her a positive force to be reckoned with. Elka’s friendly approach to students, friends and business partners inspires an inner transformation within everyone she meets. As she likes to remind everyone:

    “We are just getting started on this journey, so open your heart and your mind to see your true possibilities!”

    Hi Elka! Tell me about how you began your yoga journey—what got you into yoga?

    My journey with yoga started when I moved here to the USA in 1999. I was born in northeast Brazil.  Today I’ve been in the U.S. for half of my life.

    When I was 23 years old I had my first episode of a panic attack and consequently, I suffered severely from depression and anxiety.

    It was then I found yoga. After years of treatment with medication along with doing yoga and meditation, I was able to get off of the medication and I continued my path as a holistic health practitioner.

    Yoga was an awakening for me.

    I was very wild in my 20’s, partying too much and very disconnected to my sacred temple: my body. Yoga brought me a strong connection to the ground of my being, as well as led me to my purpose which is to LOVE by helping others.

    When did you decide to train to be a teacher yourself?

    I took my very first teacher training in 2003, but the training I did was about following a script. I wasn’t really thinking about teaching yoga, but I was doing yoga every single day.

    One day, my teacher offered to train me for free if I would teach at his studio. And that was the moment when the seed of teaching yoga was planted in my heart.

    In 2003 I also got married, and my husband and I took one semester off to surf in Costa Rica, Peru, and Brazil. We stayed 4 months in Costa Rica, but we spent all of our money in the first month. So we both had to start working in Costa Rica.

    I started teaching yoga in a gym in Costa Rica for trade, so I could use their gym. It worked out great as I was practicing my yoga teaching as well as my Spanish.

    In 2004 we came back to the U.S., and I started teaching the right way—from the heart. In 2005 I took an amazing teacher training with Kathy Lee (in memory) and Diane Ambrosini where I became ERYT (Experienced Registered Yoga Teacher with the Yoga Alliance). Since then I have continued my path as a yoga student as well.

    How did you build your career as a teacher in San Diego?

    After a few months teaching for a few studios in San Diego, I started to teach yoga by the bay outdoors, and it became very popular.

    However, when the winter came, it got too cold to continue. I decided to take the risk and open my own yoga studio, called Namaste Yoga Center in Ocean Beach, San Diego.

    The space was very small but very cozy and warm. The studio became popular fast in the community. In 2007, I had to expand for a bigger location.

    What led you to create the Elka Yoga & Wellness Center?

    In 2012, I went through a divorce and decided to sell Namaste Yoga Center to have some time for my personal life. I was still teaching yoga in a few different places in San Diego, and leading teacher trainings.

    I was also learning more about additional wellness therapies. I had become a holistic health practitioner specializing in Thai Medical Massage in 2008. I did many other wellness trainings as well, including Ayur-Yoga, Craniosacral, and Prenatal.

    In 2015, me and Anna Fernandez (my soul sister and business partner) decided to open a center that would offer both yoga and wellness. And Elka Yoga & Wellness Center was born!

    What do you enjoy most about teaching?

    I always say “teaching is healing for me”. When I am teaching, I am so present with each one of my students. Even nowadays, connecting with each other virtually, I can still feel them.

    Teaching is a feeling. Sometimes I think about how many years I’ve been teaching and it never gets old to me. I am always inspired to learn more, to serve more.

    And mostly, it is priceless to me to witness the healing process of my students. I have a range of ages of students, from 15-90’s, and I absolutely love all of them. I learn from all of their differences and limitations. They are my greatest teachers.

    I always say during the training, “Your best teachers are your students, so practice teaching people who have never done yoga before. They will challenge you to think with the beginner’s mind.”

    My passion is not only teaching yoga but also leading yoga teacher trainings. I’ve been leading YTTs since 2011 and this Fall will be my number 22, including one in Brazil.

    I’ve trained over 200 people and it only gets juicier every time. The program that I’ve created for the last decade is beyond becoming a yoga teacher. For me it is rewarding to see the way those beautiful souls unfold themselves into a powerful, life-transformational experience. I absolutely LOVE doing the trainings. And what I love about it the most is the community we create.

    How can we practice with you online if we’re not in San Diego?

    I have a YouTube Channel with short yoga videos for those who don’t have a full hour but at least 15-20 minutes.


    I currently offer life-coaching sessions through Zoom—find out more here.

    I also lead yoga retreats once a year somewhere around the globe. I’ve done them in Mexico, Costa Rica, Bali, and Spain. 2021 will be Brazil if the Universe allows.

    About Elka Yoga & Wellness Center:

    Elka Yoga and Wellness Center (EYWC) is an educational sanctuary in Ocean Beach, San Diego.

    From the beginner student to the advanced teacher, we offer the tools to become the best version of oneself. Students discover how to empower themselves to live their most healthy life and teachers come to further their knowledge and skills, not only allowing them to become better teachers, but healthier and happier individuals.

    The intention of EYWC is to assist students and teachers in their continued development of physical, mental, and spiritual well-being.  We offer daily yoga classes (both mat & aerial) in addition to workshops (many offering certified CEUs), 200-hour RYT teacher training, specialty training, events, and retreats (300-hour teacher training coming soon!).  We are also passionate about giving back to our community… We offer many free community classes and workshops to help support Casa Hogar, an orphanage in Tijuana, Mexico with over 50 children.

    Elka Yoga & Wellness Center features the most professional, compassionate teachers who are leaders in their fields and love what they do. Additionally, we host workshops and training from world-renowned teachers who are masters at their crafts, bringing the highest quality curriculum to Point Loma and Ocean Beach in San Diego!

    » Song Vibes «

    Enjoy Elka’s juicy yoga playlist!

    Have you gotten to take class with Elka Haeckel? I’d love to hear about it in the Comments below!

    xo,

    Amy

    This post is not sponsored, but it does contain affiliate links. I truly love these products and know you will, too. Thanks for supporting the blog!

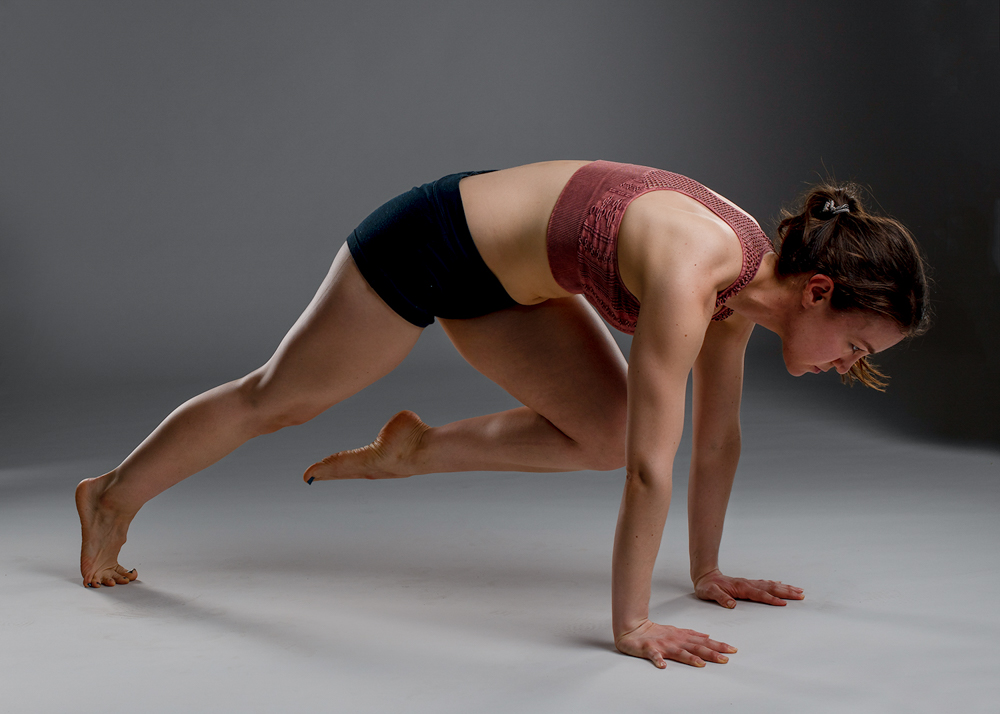
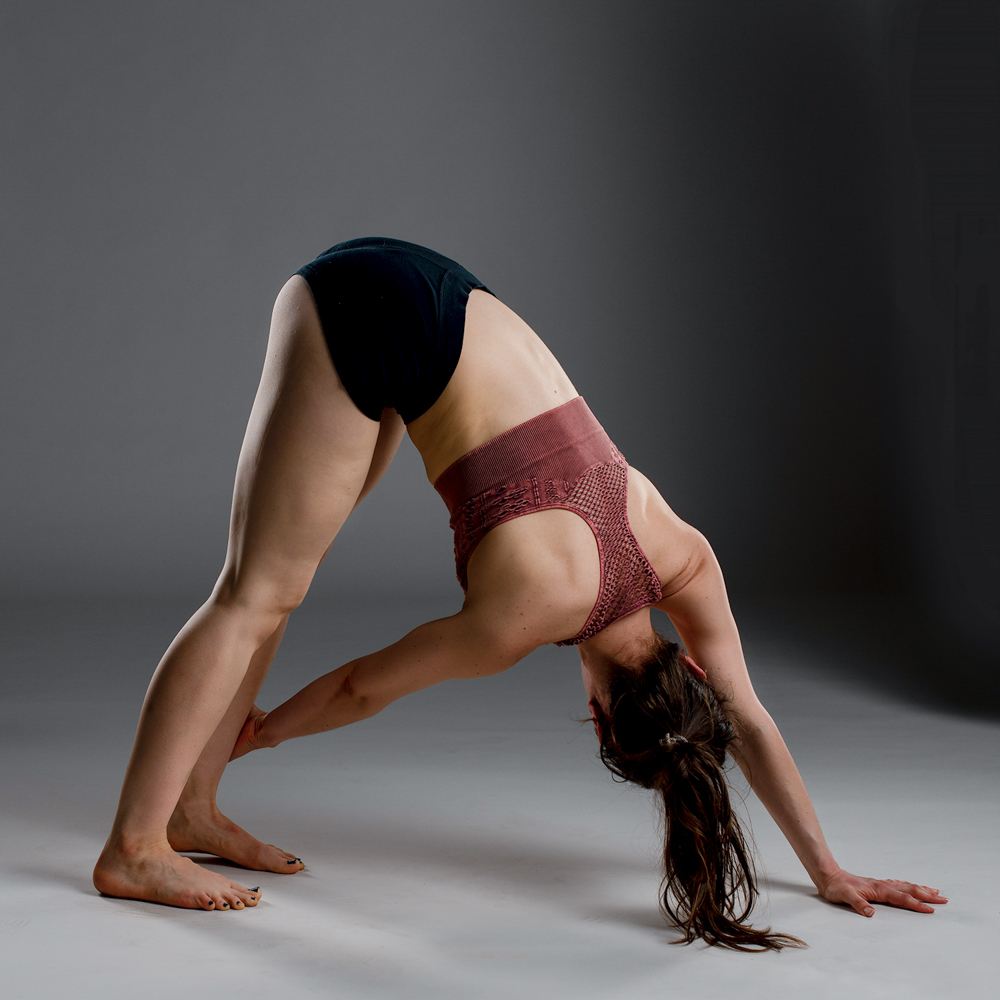
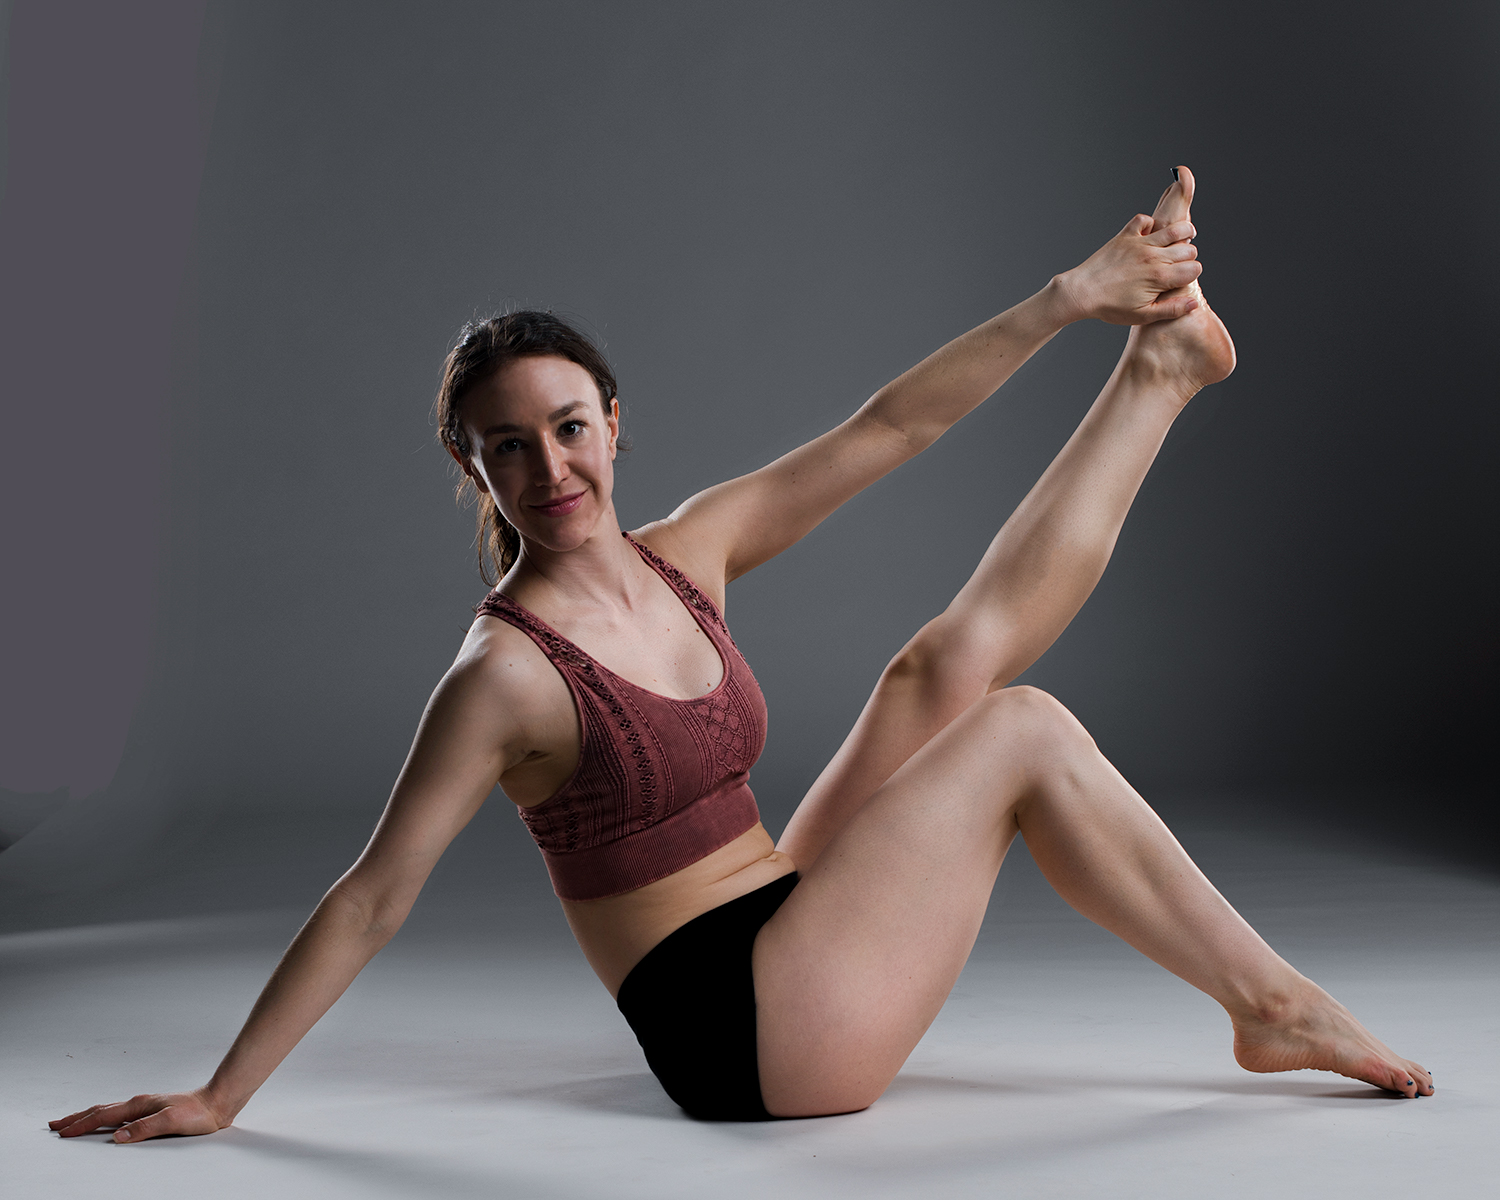
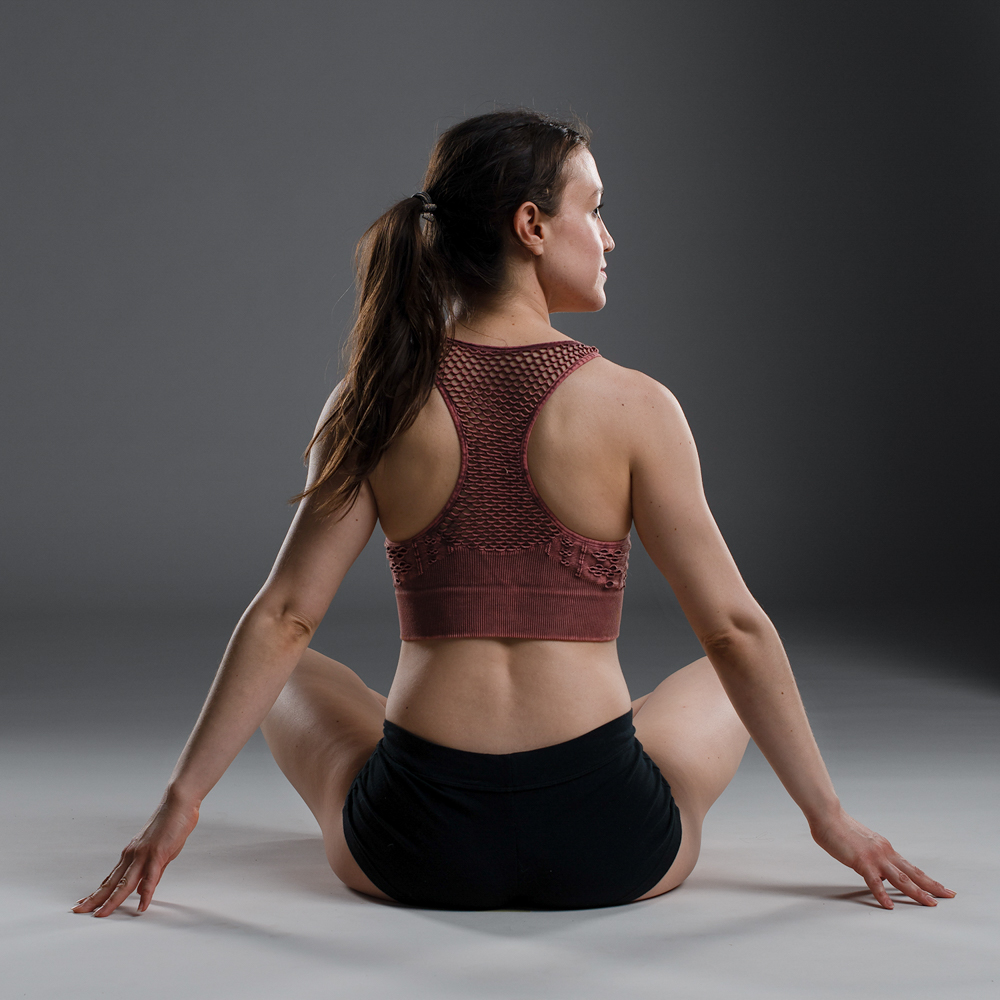
    Photos courtesy of Elka Haeckel

  • The Different Types of Yoga Explained, Finally

    Different Types of Yoga

    You’ve probably noticed by now that there are MANY different types of yoga.

    I remember feeling completely bewildered when I first wanted to get into yoga. It was 2013, when my chronic pain was fresh. I’d done yoga before, but only at school and 24 Hour Fitness where it was just called, simply, “yoga.” I knew the practice was supposed to be able to help me feel better, and I wanted to dive deeper.

    But I didn’t understand which type of yoga I should try. Do I want Vinyasa? What does Ashtanga mean? What’s like the basic, you know, standard, yoga? Who can explain these words to me?

    It doesn’t help that yoga literally uses a different language: Sanskrit, a language we in America generally aren’t exposed to outside of the yoga sphere. So trying to figure out what it all means can feel a little intimidating, especially to the newbie.

    I’m here to help you decode all of it so you can decide which type of yoga is best for you.

    I did a LOT of exploring on my path to now being a full-time yoga instructor. (Btw—You can learn more about my teachings here!)

    To start, there is no “standard” for yoga. I know that can make things a little confusing, but it’s a thousand-year old practice that originated in India, with many lineages of gurus (teachers) over the years who have all developed their own style. It’s constantly evolving—we practitioners continue to make changes as we learn more about the body and the ways we can use yoga to heal.

    So there’s lots to choose from! And all forms offer different benefits. There’s not one that’s necessarily better than the others—it depends on what your specific needs are. Whichever of these different types of yoga you’re drawn to is a great place to start.

    » Want me to recommend what I think might be best for you? Post in the Comments section below and I’ll be happy to let you know my thoughts!

    It might take some trial and error to find the style that fits your needs. Keep in mind that your yoga experience will vary greatly depending on your teacher, and which studio you go to, so explore around a bit and try a variety of classes. You’ll always learn something new in every practice, no matter where you go.

    Try out multiple types of yoga and decide what’s right for you!

    Different Types of Yoga

    Vinyasa Yoga

    This is the most common and popular form of yoga here in the U.S. It’s probably what comes to your mind when you think of modern yoga.

    Vinyasa yoga is a more vigorous practice that focuses on movement, flowing your body in sync with your breath through sequences that build. Each sequence ends with a Vinyasa, which is the action of going from Plank to Chaturanga to Upward Facing Dog to Downward Facing Dog.

    The Vinyasa action itself is, by the way, a pretty challenging and advanced movement. It takes a lot of strength to do a proper Chaturanga, and enough openness to safely go into Upward Facing Dog. These are often taught without much warm-up, because this style is so popular. But I cannot tell you how many wrong Vinyasas I’ve seen students do. It hurts my heart.

    I recommend, if you’re newer or not sure if you’re nailing it, to practice this motion with your knees down on your mat, and modify with a low Cobra until you feel warm enough to go into Upward Facing Dog. Like I said, that’s hard. Don’t sacrifice form just because other people in class are! Yoga is not about how you look, it’s about how your body feels. So set ego aside, no matter what you practice, and move more mindfully.

    Hatha Yoga

    This one is a little tricky because Hatha is a very wide umbrella. Most forms of yoga are a branch of Hatha yoga. It focuses on postures (asana) and breath. You can think of it as the foundation of Vinyasa, which is a style of Hatha. (I know it’s a bit of a web lol)

    You move from one pose to another, sometimes in sequences. Nowadays, this label usually refers to a class that has none or much less Vinyasas. It typically moves slower than a Vinyasa style class, with longer holds (which is sometimes more challenging!).

    Ashtanga Yoga

    Ashtanga is a form of yoga created by yoga master K. Pattabhi Jois. It’s super structured: you do a traditional series of postures performed in the same order every time. There are six series that have various advancement options to work up to.

    The class flows like a Vinyasa class but even more so—you move nonstop, with zero pausing for adjustments. The result is a solid and challenging cardio workout. The nonstop flow is also helpful to quiet a nonstop mind.

    Different Types of Yoga

    Power Yoga

    Power yoga is new to the yoga world, created in 1995 by Beryl Bender Birch. She wanted to introduce Ashtanga to the Western world, so she rebranded it and gave it an American-friendly spin in a smart move that made it more accessible. Remember, even though it’s super common now, yoga was still considered new and weird and different in the 90s! But people could get down with a good workout, which is what Power Yoga delivers.

    These days, Power Yoga can kind of mean… kind of anything. The term has branched outside of Birch’s practice and now can refer to basically any form of vigorous Vinyasa yoga class. You’ll want to clarify with the teachers and studios you find to see how exactly they define Power Yoga.

    Yoga Sculpt

    Yoga Sculpt is basically a new level up from the Power Yoga branch. This style has been popularized by the megastudio brand CorePower. It usually incorporates hand weights while flowing through a Vinyasa style class. It may also involve other functional movement exercises, like jumping jacks, squats, and an abdominal series.

    Many Americans are introduced to the yoga practice through this style, but I encourage you to branch out. With such a strong focus on the body and getting a workout, these classes often are too far away from the real foundations of yoga that they don’t give you many of the benefits of mind-body connection and stress relief. I know, because I began my yoga practice going to CorePower! Yoga is so much more than a workout—while it definitely is great for that, there are many ways to go deeper. And that’s where the magic lies.

    Iyengar Yoga

    Iyengar Yoga was created by B. K. S. Iyengar, and is hyper-focused on alignment. Which I love! Poses are usually held much longer than other Hatha style classes to really perfect them, and you’ll use alllll the props. (you know how I’m a fan)

    This style is especially beneficial for those with injuries, the elderly, or anyone new to yoga/movement. It really builds the mind-body connection as you become more aware of exactly how you’re holding your body in space. Practicing Iyengar will improve your form when you practice other types of yoga, keeping you healthy and mobile.

    Hot Yoga

    I don’t want to even bring it up, but you may have heard of a little something called Bikram yoga. Well, Bikram is an evil dude, so let’s just stay away from supporting him or his schools.

    Instead, look for Hot Yoga! That’s basically what Bikram is, anyway (essentially it’s its own specific, highly branded form of hot yoga). And hot yoga is exactly what it sounds like—yoga in a heated room.

    Temperatures vary, with studios ranging from 90-120 degrees F (that’s right!). Some people swear by it. And if you don’t sweat very often through other means, it can be great to get in a hot yoga session, since the sweat can be detoxifying for the body.

    But I’ll be honest, this is firmly NOT my jam. I’m not a fan. For me too much sweat can be dehydrating and inflammatory for my body, and I have a stronger practice at room temp. But if you love hot yoga or want to try, then awesome! Whatever brings you to your mat. (which you’ll want to clean)

    Kundalini Yoga

    Kundalini is a unique style that I haven’t tried yet. Like Hatha yoga, Kundalini involves poses (asana) and focuses on breath, but also takes it a step further and incorporates mantra chanting and meditation. This style was introduced to the Western world in the 1970s by Yogi Bhajan.

    The name derives from the Sanskrit word kundal, which translates to “coiled energy.” It centers on the concept that we each have energy in the base of our spine that we can release through the seven chakras, up the spine, by practicing Kundalini. A typical class “is comprised of three parts: an opening chant (known as “tuning in”) followed by a brief warm-up for your spine, a kriya (which is a sequence of postures paired with breathing techniques), and a closing meditation or song.” (via MindBodyGreen)

    Restorative Yoga

    Restorative Yoga is the relaxing and therapeutic form of yoga. Instead of focusing on a workout, the goal is exactly as the name suggests: to restore the body back to health. This style uses props, like Iyengar, in poses that are held for a long time to align and gently stretch the body. You do most if not all of the practice on the ground. This style is best for post-workout recovery and to relieve stress and insomnia. It’s great to heal and prevent injuries!

    I love teaching Restorative Yoga, because I think that in today’s go-go-go world, we all need more slowing down.

    Yin Yoga

    Yin is a specific type of Restorative Yoga. It boasts the longest asana holds of all the different styles, with poses typically held anywhere from 5-20 minutes, usually using props, all on the ground. It’s super relaxing and slow, so again a wonderful option if you feel stressed, overloaded, or unwell. I practice this late at night, because I always want to fall asleep afterward.

    There are tons of other types of yoga, too!

    These are just the main ones, but there are tons of styles that I didn’t get to here. There are now even variations on yoga that include aerial yoga (which I teach and is amaaaazing), acro yoga (where you and a partner+ work together to create shapes), SUP yoga (yoga on a Stand Up Paddleboard, which I also have taught). If you ever run into me, ask me about my days teaching SUP yoga at the Oahu Disney resort Aulani. I have the best story.

    I’ve seen yoga that uses a special prop wall, and there’s even goat yoga—which is exactly what it sounds like, yoga with goats. (I’ve done it and it was rad fun.) The variations are becoming endless!

    When you’re choosing which yoga practice is right for you, be sure to look for a studio and teachers with proper education credentials (200 or 500 hr RYT with the Yoga Alliance) and a strong knowledge of anatomy and the body. Because there are so many types of yoga now, there are just as many types of teachers, and the industry’s not really regulated or standardized. I’ve seen plenty of people teach yoga with zero training at all.

    Don’t automatically trust that your teacher is an expert—you and your body are always the best guide. Listen to it and do what feels right for you! And if something in class ever doesn’t vibe with you or feel good, Child’s Pose, Savasana, and the word “no” are always available to you.

    Yoga is an incredible methodology that has the power to heal and strengthen both your body and mind.

    Whatever variation you choose, you’ll be giving back to yourself in a powerful way!

    » Song Vibes «

    What’s your favorite type of yoga? Share your thoughts with me in the Comments section below!

    xo,

    Amy

    Photos by Scott Bennion

  • The Cultural Appropriation of Sage + Smudging

    Sage Cultural Appropriation

    Sage

    Do you love using Sage as much as I do? Then we should talk about smudging and the cultural appropriation of Native Americans (Indigenous People).

    I think we can all agree that this year has started to shift some foundations to open us up to ways we’ve been blind towards others. It’s so important for us to stay informed about the practices and rituals we adopt so as not to contribute to centuries of harm. We need to learn the origins of what we do and make sure we’re practicing in a way that honors roots and avoids cultural appropriation. This, of course, also applies to burning sage.

    Ahhh… do you love sage as much as I do? The way it smells, the calm energy shift in the air after its been burned… I’ve long been a fan.

    I admit that it took me a while to really think about what it means to burn sage. It’s hugely popular in the (predominately white) yoga and spiritual communities. But do we know why we use it? Do we know what it means?

    Because burning sage (smudging) is traditionally a Native American religious ceremony.

    I am only a small part Native American—15% Indigenous to be exact (thanks, AncestryDNA), as part of being half-Mexican, and half-white. So I don’t speak on behalf of Indigenous People, but rather as a person of privilege about something that needs to change.

    I felt very connected to this small part of my ancestry growing up in Albuquerque, New Mexico. Native American culture is a prominent part of the state (where there are 23 tribes). Growing up in NM, I assumed sage was pretty common stuff. Sage, dream catchers, and Kachina dolls are literally sold in kiosks in our small airport. Our school field trips included visits to the surrounding reservations. Since my family didn’t travel much, it wasn’t until I was older and moved to CA that I really realized how rare it is for a region’s Native American culture to be celebrated, especially to the degree it is in NM.

    Because of this, I’ve been more sensitive to the growing trendy use of sage. I’m a yoga teacher in Southern California—and I see it being used and sold everywhere. Like, I’m honestly very ashamed to admit I got this particular pretty sage stick from a vegan restaurant. It’s never sat right, but I didn’t look as closely as I/we should have.

    Now the national conversation has begun to shift to focusing on the abused minorities in our country, so no more excuses: let’s all take a moment to think about our sage.

    Sage

    What exactly is smudging?

    According to Indigenous Corporate Training Inc.:

    “Smudging is traditionally a ceremony for purifying or cleansing the soul of negative thoughts of a person or place.”

    It was illegal for Natives to practice their religion (including smudging) until 1978 in the U.S. It’s something they’ve had to fight for. They’re still currently battling to be allowed to perform smudging in hospitals.

    Sage is not the only sacred medicine used for smudging. Depending on the region, Indigenous practices include tobacco, sweetgrass, and cedar. But sage is currently by far the most common in the wellness world.

    My theory? White sage grows in Southern California, where yoga, holistic health, and spirituality are booming, along with cultural appropriation of the origins of those practices.

    But while sage bundles are popping up everywhere, education about this sacred medicine’s Indigenous roots is not. As this article in the Huffington Post puts it: “there’s a problem when retail chains sell the idea behind smudging completely separate from the practice.” Businesses are profiting while we co-opt Native American culture.

    Sage is being over-harvested and not sustainably grown.

    Due to its current trendiness, white sage is being over-harvested along the Southern California coast, harming the land and making it harder to find, thus increasing its cost. It’s also not always harvested correctly, in a way that leaves the roots and allows the plant to regrow.

    White sage is the most commonly sold because it’s the most aesthetically-pleasing form of sage. It’s what’s in these photos. Very soft and clean and Instagram-y. I’ve gotten most of the sticks I’ve used when visiting home in NM, and those not-white-sage bundles look much more like regular leaves. Not as pretty, not as popular.

    So we’re destroying something of sacred importance for its beauty and making it less accessible for the Native American peoples, who were using it first. This is continuing systemic racism and oppression against Indigenous People. And we’ve already done enough.

    Sage

    There are two solutions: first—you CAN continue to use sage.

    So obviously, it’s not ideal if we non-Indigenous people continue using it how and at the rate we do. We must respect it and what it symbolizes, and less is more. But if you want to continue burning sage, the good news is, you still can—

    But there are a few things you need to do:

    • Stop calling burning sage smudging. It’s kind of like if I, a non-Jewish person, bought myself a chic little menorah with some long pink glitter candles for it that I lit every night before dinner to set the vibe, a practice I call Hannukah.

    Picking up what I’m putting down? You’re not smudging unless you’re smudging.

    • Avoid white sage. I know it’s pretty—but give other varieties of sage some love!
    • Make sure the sage you do buy was sustainably grown. This means it’s not wild and was grown specifically to be harvested, organically. It should also be harvested correctly for regrowth.
    • Buy directly from Native American sources if you can! Travel to reservations. Learn more about the history and source of smudging. And here’s an Indigenous-owned store on Etsy that sells organic, reservation-grown sage sticks.
    • Grow your own. The best way to keep your sage sustainable is to grow your own and make your own bundles. You’ll also gain a greater appreciation for the plant. Plus more plants = happier planet.

    Or, you can try burning other smoke sources!

    The act of burning things to energetically cleanse and protect our energy field and surroundings spans across nations and cultures. You don’t need sage to do it. So keep burning away! (Responsibly, of course.)

    You can practice smoke cleansing with different kinds of wood and herbs. Some alternatives include cinnamon, juniper, lavender, pine, rosemary, and clove. Burning incense is also awesome.

    A quick side note on Palo Santo, another popular source to burn: it’s also being over-harvested and near being endangered, so please avoid and do not buy! I have this one piece that was gifted to me that I don’t burn out of symbolic respect.

    You can also try energy-clearing practices for your space that don’t require any burning, like Himalayan salt lamps, crystals, and diffusing essential oils!

    Sage Palto Santo Yoga

    Sage must be respected for the sacred plant it is.

    It really is magical. (All plants are!) It can be used as a spice, as medicine, and even to connect to spirit.

    The most important takeaway from this post is to respect sage and the original Native American practice of burning it to smudge. The first step is educating yourself—so thanks for taking the time to read this article! Now share it with your friends and community.

    And can we all agree that sage should no longer be sold at the checkout counters of expensive (white) clothing boutiques?

    (If you live in SoCal, you know)

    Respecting sage and the practice of smudging means we are respecting Native Americans. It brings us one step closer to healing as a collective. One step closer to unity.

    » Song Vibes «

    Have you thought about these issues with cultural appropriation and sage before? This is a judgment-free zone—share your thoughts with me in the Comments below!

    xo,

    Amy

  • Master List: Black Wellness Leaders

    Black Lives Matter is an issue of wellness.

    We are all one. This is the core teaching of Yoga, which means “unity.” When one of us hurts, all of us hurt—whether or not we realize it.

    As a non-Black person in America, I have woken up further and realized that unless I step up and become actively anti-racist, I am part of a system that delivers oppression and pain. I have always considered myself “not racist” (I put in quotes because unfortunately we have all been programmed by our societies to be a little bit racist, which is something we must shine a light on), but being just not racist is not enough if we want to change this world for the better.

    By the way, you should read How To Be An Anti-Racist by Ibram X. Kendi, and why not buy it from this Black-owned local Los Angeles small bookstore.

    The mental health effects of generations of trauma runs deep in the Black community. This means that none of us are well until this massive suffering ends. It will take time, and dedication, and real thoughtful action on our parts. It’s a big ask, actually. We’re being called to get uncomfortable.

    ut that’s where all the magic in life occurs.

    We must fight in the name of LOVE.

    I am a POC (Latina, half), and if we can begin to break down the oppression in our country of Black Americans, all minorities will rise up. Including women and the LGBTQIA community! It’s like blowing up a huge dam that will return nourishing water to dying riverbeds, making the way for more equality.

    Baby steps of progress. We must stay committed to asking: What would Love have me do?

    If we do not do something to change what IS, we are allowing systemic racism and violence to continue.

    Please share this list of Black leaders in the Spiritual + Wellness space.

    This is a small but hopefully helpful way I can help start to make change. The Wellness world is flourishing, and has also become a mostly white space, especially here in Southern California. Every yoga teacher training, every class I’ve led, every yoga festival I’ve attended, has been a sea of predominately white faces. That absolutely must change. Wellness should be accessible and inclusive to everyone. We should all be entitled to have the freedom to life, liberty, and the pursuit of happiness. Black voices need to be amplified!

    Please use the following Black teachers as valuable resources to help you continue your growth and health journey. They all have a wealth of wisdom to share.

    This is my personal list, and I would love for it to grow beyond my admittedly small scope of my Black colleagues. Please Comment below with additional leaders that I missed!

    I’ve divided them by the same categories as this blog: Mind (helping mental health and spiritual/wellbeing growth), Body (helping the physical body heal), and Yoga (helping through the specific lens of the Yoga practice).

    Please take advantage of their wisdom and teachings so that we may collectively learn, evolve, and heal.

    BLACK WELLNESS LEADERS LIST

    You can find their Instagrams by clicking on their names, which are alphabetized by first name.

    MIND

    Rev. Angel Kyodo Williams

    Reverend / Zen priest rockstar, Radical Dharma co-author

    Alex Elle

    Writer, mental health artist, and wellness consultant

    Cleo Wade

    Writer, poet, wise self-love champion

    Justin Michael Williams

    Meditation writer, speaker, musician

    Lama Rod Owens

    Self-liberation writer, the next generation of Buddhism and Dharma teachers

    Light Watkins

    Meditation teacher and mindfulness speaker

    Meghan Watson

    Registered Psychotherapist specializing in mood, anxiety, and eating disorders

    Morgan Harper Nichols

    Artist creating work that offers self-help wisdom

    OlanikeeOsi

    Self love teacher, Selfish Babe, and creator of Goddess Detox

    Preston Smiles

    Personal Freedom Coach and inspirational writer

    Rha Goddess

    Self-Help/Spiritual writer and creator of coaching source Move the Crowd

    Tori Washington

    Spiritual lifestyle educator and business strategist, energy healer

    BODY

    Psst: Here’s an awesome list of Black Healthy Chefs and Food Bloggers from Melanin Is Life

    BLK+GRN

    Non-toxic, all-natural online marketplace by all Black artisans

    Chrissy King

    Personal Trainer and Body Image/Lifestyle Coach

    Jasmine Marie

    Breathwork facilitator at Black Girls Breathing (offering virtual circles)

    Maryam Ajayi

    Energy healer, entrepreneur, writer, activist, speaker, creator of Dive In Well

    Omikunle Ekundayo

    Creator of The Soulcare Collective, “initiating self + planetary multidimensional wellness via African + Indigenous healing modalities”


    YOGA

    Camai Brandenberg

    Yoga and Pilates teacher

    DaLette Anderson

    Yoga teacher, athlete trainer, dancer

    Gail Parker

    Psychologist, yoga educator, writer

    Jessamyn Stanley

    Yoga teacher, body positivity advocate, activist, writer,

    Koya Webb

    Yoga teacher, holistic health coach, writer

    Nicola Cardoza

    Mindfulness and yoga teacher, social entrepreneur, founder of both Yoga Foster and Reclamation Ventures

    Sara Clark

    Yoga teacher, mindfulness coach

    Shirley Johnson

    Kundalini Yoga teacher, Licensed Psychotherapist, energy worker, Tantra coach

    Tracee Stanley

    Yoga and Meditation teacher and transformation guide


    » Song Vibes «

    Who did I miss? Please share in the Comments below!

    xo,

    Amy

  • Adios, Germs — How To Clean Your Yoga Mat

    Stay healthy: don’t forget to clean your yoga mat!

    Our yoga mats sure get taken for granted, don’t they? I’ll be honest, I used to clean my mat maybe… once a month? And I typically use it every day, multiple times a day as I teach around San Diego. That sounds kind of horrifying in retrospect, but thankfully I’ve always stayed healthy. However, I think it’s safe to say most of us are extra conscientious about germs these days. That is, we want to keep them at a minimum. Whether you’re reading this during the current time of Coronavirus or just want to protect your health by keeping things fresh, it’s time to clean your yoga mat!

    Think about it: when we practice yoga, we put our entire bodies all over our mats, including our faces and bare feet. We often sweat all over them. Many of us take our mats around to practice in different spaces both out and inside. And while your yoga studio may clean regularly, there are still a lot of barefoot people in there, walking around on the same floor…

    Now, there’s no reason to feel afraid or paranoid about this. It’s just important to practice good hygiene after yoga practice to protect yourself. This 2020 pandemic has made us more aware of the fact that there are certain measures we can practice to prevent disease spread, like washing your hands. After class, you should wash your hands and feet, change your socks/clean your flip flops, and, of course, clean your mat!

    Plus, it’s so easy to do.

    And you already have what you need at home.

    You just need two ingredients to clean your yoga mat.

    Ready?

    Wait for it…

    SOAP + WATER.

    Boom! It’s just that easy. To be specific:

    • Use hot water and just one or two drops of dish soap (or any liquid soap you have access to).
    • Combine in a glass spray bottle and shake to mix.
    • Spray your mat down completely. Let sit a moment.
    • Run a clean cloth under hot water until it’s soaked and nice and hot.
    • Wipe down your mat with the wet washcloth.
    • Dry with another clean, dry cloth if you’re on the move.
    • Otherwise, let your mat air dry (avoid drying in direct sunlight, which can crack/break down your mat).

    I recommend using a natural, non-toxic, eco-friendly soap. We put our faces all over our mats! It’s best to use a formula that is gentle and free of chemicals and won’t irritate your skin. I’m not sponsored by Mrs. Meyers or anything, but theirs is my favorite soap to use, as you can see below.

    Using tinted glass spray bottles like the ones I have helps keep the contents fresh since they’re protected from light exposure. I use these bottles for all my essential oil sprays and cleaning products at home.

    If you need some new cleaning cloths, these are eco-friendly and made from sustainable bamboo, but are durable, easy to care for, and well-reviewed!

    (Sadly, this beloved yoga mat of mine is no longer made, but the Manduka Pro yoga mat is my other favorite if you’re looking!)

    There are other ways to clean your yoga mat, but why mess with the best?

    You could also clean your yoga mat using a blend of essential oils (a simple and effective combination is to use tea tree/melaleuca and lavender oils—mix with water in a spray bottle). Or you can buy a specially marketed “mat spray,” like this one from Manduka, which typically also include a formula of essential oils.

    Those work great, but they’re needlessly expensive. And they actually aren’t as effective at removing dirt and debris from your mat as soap is. It’s also common for skin to have irritated reactions to essential oils, so they don’t work for everyone.

    I’ve used essential oil blends in the past and they smell amazing and are indeed antibacterial and antimicrobial, but I’m just saying there’s an even easier way that works even better! So this is what I do now to keep my mat of 4+ years like new.

    If you’re on the go and don’t have access to water

    —you can use regular household sanitizing wipes to clean your yoga mat! I use these from Seventh Generation. You can even use body or face towelettes, which I talk about more below.

    If you’re at a yoga studio or gym, ask them where their yoga mat wipes are! They should have some available for their students to use, though they may not be readily visible.

    But again, you’ll want to clean your yoga mat with soap and water when you’re at home to make sure you’re getting a real, deep clean. You don’t have to do it every time, but depending on how often you use your mat, you’ll want to make sure you’re giving it some regular maintenance.

    You still need to clean your yoga mat even if you’re just practicing at home!

    I’m sure you have lovely clean feet, but our home floors can get dirty (as a dog owner, I know this to be exceptionally true). Even if you wash your hands prior to your yoga practice, our feet are easier to forget because they’re out of sight, out of mind.

    Plus, the oils from your skin and sweat can slowly break down your mat and cause breakouts on your forehead when you go into Child’s Pose. So, even if you’re the only one using your mat, and even if you’re only using it at home—clean it.

    Concerned about practicing inside a yoga studio?

    Don’t be! Soon we’ll be able to reintegrate back into social activity, but it will be a gradual process. There are a couple of extra measures you can take to keep yourself and your mat clean when you decide to back to your local yoga studio.

    The top suggestion I have is to wear socks! You can take your shoes off outside of the studio, helping to keep the public space clean, and then wear your socks inside of the studio. That way you won’t pick up anything as you walk around to set up your mat and get your blocks. Take your socks off before your step onto your mat, and you’ll keep it germ-free!

    Speaking of blocks, be sure to get some yoga block covers, which you can bring with you to cover your studio’s blocks. Or you can always bring your own blocks! You’ll want your own yoga strap, too, and bring a towel to drape over bolsters. Props are shared by many students. They are cleaned by the studio/gym, but even better to stay proactive!

    Wearing flip-flops and don’t have socks? Bring some disposable natural body wipes with you to yoga class. I use these vegan natural towelettes from Pacifica, perfect for both face and body! That way, after your set up your space, you can wipe your feet down before you step onto your mat. You can also use these wipes to clean off your mat.

    Be sure to clean your yoga mat after each practice!

    I know, you’re busy. You’ve got things to do, places to be. But our yoga practice reminds us to become present, so stay in your meditative post-yoga zone and mindfully care for your yoga mat. Make it part of your ritual and care for yourself and your props.

    Most importantly, remember not to get overly obsessed with all of this. Worrying about getting sick puts us in a low-vibrational state of fear, which can actually weaken our immune system. The key is not to worry, but to take easy steps like this to stay well.

    Sending you all virtual hugs and well-wishes!

    » Song Vibes «

    Be honest—how often do you clean your yoga mat? Share in the Comments below!

    xo,

    Amy

    This post is not sponsored, but there are affiliate links throughout this post. I genuinely love these products and know you will, too. Thanks for supporting the blog!

  • Full 60 Minute NO Hands Yoga Class Video

    Got an injury? This yoga class is involves NO hands or arms!

    And don’t worry, you won’t miss a thing—this class flows and challenges you just like any other Vinyasa or Hatha style class. Only, we will be completely hands-free, and arm movement is optional. That means no tabletop, downward facing dog, planks, or any other poses that put pressure on your upper body.

    This video is ideal for anyone recovering from an injury in the upper body: shoulder, chest, wrist, elbow, you name it. But it’s also fabulous to take if you’d just like a day to really focus on your core and lower body.

    Get ready for a full, 60 minute Hatha-style yoga class with a slower but powerful pace. Learn how to connect with your core stabilizing muscles for better posture and reduced future injury.

    Side note: these special handles are fantastic to help you put less pressure on your wrists during your regular yoga practice.

    I designed this class so you don’t have to feel limited during this time of healing. You can still move and get a killer workout! I recently had surgery and am still in the rehabilitation phase. Since I haven’t been able to do my usual yoga practice, I decided to create the flow I needed and share it with all of you!

    I hope this hands-free yoga practice helps you feel strong in both your body and your mind.

    Thank you for joining me, and be sure to check out my YouTube channel for even more FREE yoga classes and meditations.

    Let me know what you think of this class! Write me a note in the Comments below and let me know your favorite part.

    xo,

    Amy

  • My Favorite Sustainable Activewear Brands

    Best Sustainable Activewear » From the Infinite Embers blog

    Want to help the planet? Choose sustainable activewear!

    All the activewear featured the collage above is all eco-friendly and made out of recycled materials, proving that you don’t have to sacrifice fashion for sustainability. I’m super passionate about the environment—I believe the health of our planet is directly linked to OUR health. After all… if the earth is poisoned, then the plants that grow in it become sick, and then the animals that eat those will become sick—including us. It just trickles up the chain. But the good news is that small changes can make a huge trickle-down impact as well: like where you choose to buy your leggings. Sustainable activewear is the next cool trend, merging fashionable clothing with a commitment to clean up our planet.

    Unfortunately, the fashion industry is one of the worst current destroyers of our planet.

    In fact, it’s the second-largest polluter in the world. These four sustainable activewear companies have chosen to fight this problem. All the ones featured below use post-consumer recycled materials to create their clothes. among other green practices. They turn trash like plastic water bottles into super cute and high-performance activewear in the form of recycled polyester! Plastic bottles can take 400 years to fully biodegrade when thrown away. (Don’t worry—these brands always make sure there is no BPA or toxins in the materials they use.)

    As a full-time yoga and former fitness instructor, I’ve tried just about every brand of activewear out there to put their clothes to the test. I’m always in search of activewear that’s stylish, form-flattering, and can hold up through a lot of wear and tear (and sweat). I also tend to like a little compression, which adds a flattering lift to your booty.

    And the great thing is, these sustainable activewear brands hold up against their less-earth-friendly competitors!

    I genuinely love their products—it’s like the fact that they’re helping to save the planet is a beautiful cherry on top. The clothes truly sell themselves.

    To show you what I mean, I’ve gone through all of their websites and picked out my top picks in their current designs! I know, you’re welcome—such a hard job, but someone had to do it.

    By the way, online shopping is even more fun when you’re choosing brands that are leaving a positive impact on the environment, rather than hurting it.

    So, without further ado, here are my…

    Favorite Sustainable Activewear Brands

    Yoga Democracy

    Yoga Democracy was my first sustainable activewear love. They even featured me once on their Instagram! That’s where I first came across their leggings—I was drawn in by how cute they were on a fellow yogi, and then when I saw that all of their activewear is made from recycled materials, I had to try them. As you might be, I was skeptical at first. But the leggings I bought quickly became one of my favorites.

    The best thing about their leggings is that they’re incredible at wicking away moisture—I used to wear them when I taught spin, which is the ultimate leggings endurance test. And let me tell ya: Yoga Democracy holds up. I’ve owned four pairs of their bottoms so far, two leggings and two crops.

    And another major plus: they really hold you UP. Their leggings are slightly compressive, which I LOVE. It gives you a lift and support in all the right areas.

    ALSO—I  got the hookup and have a code for you guys to get

    20% OFF any purchase!

    Just enter code INFINITE20 at checkout to save on your order.

    Here are my top picks:

    Bottoms:

    Just a Dark Moon Phase Printed Yoga Legging

    Third Eye Chakra Printed Yoga Legging

    Yoga Democracy Legging » From the Infinite Embers blog

    Essential Legging in Cool Cirebon/Jet Black

    Yoga Democracy Legging » From the Infinite Embers blog

    Tops:

    Free Range Sports Bra in Just a Dark Moon Phase

    Yoga Democracy » From the Infinite Embers blog

    Perfect to go with the Just a Dark Moon Phase Leggings above for a super cute set. Definitely top of my wish list!

    Peaceful AF Bamboo Muscle Tee

    Yoga Democracy » From the Infinite Embers blog

    From the Yoga Democracy website:

    Virtually everything we produce is made from recycled polyester or nylon. We source all of our fabric in Italy from a supplier that even by European standards is ahead of the game when it comes to wastewater treatment and green energy. By sourcing from somewhere with strict labor and health and safety standards already in place we can be sure people as well as the planet are not left short changed.

    The process starts with PET bottles being shredded into flakes, which are then converted into pellets and melted down. That material is then spun into new polyester yarn which is used to create the recycled polyester that goes into brands like ours.

    Our supplier uses a type of yarn called ECONYL® to produce our nylon. That yarn comes from a process carried out by a company called Aquafil SpA which reforms fishing nets collected from the world’s oceans, carpet fluff and other nylon containing material that would otherwise end up in landfill into new fabric.

    Science is so cool.


    Girlfriend Collective

    In terms of quality, it really doesn’t get much better than Girlfriend Collective. Seriously, this brand blows me away. They’re doing everything right. The material of their compression leggings is nice and thick and really well-constructed.

    When they first launched a few years back, they did a campaign that I saw on Facebook giving away free leggings. Genius. I got mine (the Compressive High-Rise Legging in Black below—I’m wearing them in the collage at the top of this page) and have been in love since.

    I also really love this brand for their INCLUSIVITY. They use a variety of bodies for their models—all ages, races, and sizes! (Girlfriend Collective offers a large range of sizes from XXS-6XL) They are definitely paving the way for the future of sustainable activewear.

    As a bonus, when you’re done with your Girlfriend Collective clothes, you can recycle them again with their new ReGirlfriend program! They give you a $15 credit to use on future purchases when you send them your worn out clothing—and the clothes get re-recycled for use #3 (and 4… and 5…). Even still, my leggings still have a few years to go. I have had them for 4 years now, worn them a lot, and they’ve held up incredibly. Like, they still look brand new.

    Did I mention Girlfriend Collective provides free shipping on everything you order online? Boom.

    Bottoms:

    Compressive High-Rise Legging in Black

    Girlfriend Collective Legging » From the Infinite Embers blog

    These are Girlfriend Collective’s flagship leggings—the tried-and-true unbeatable staples. These leggings are also pictured on me in the collage at the top of this page! I’m absolutely in love with them.

    I’m particularly living for these leggings in this set with the:

    Olympia Compressive High-Rise Legging and Olympia Topanga BraGirlfriend Collective » From the Infinite Embers blog

    Olympia’s the color and I’m in love—it’s the perfect shade of teal blue.

    Tops:

    Lola Bra in Black

    Girlfriend Collective » From the Infinite Embers blog

    Bodysuit:

    Black Flex Bodysuit

    Girlfriend Collective » From the Infinite Embers blog

    From the Girlfriend Collective website:

    Here’s a breakdown of each of our products and how it stacks up.

    Packaging: Our packaging is 100% recycled and recyclable, so don’t throw it away!

    Compressive Leggings + Bras: Made from 79% recycled polyester (or RPET) and 21% spandex, our leggings are made from 25 recycled post-consumer bottles and our bras are made from 11.

    LITE Leggings: Made from recycled fishing nets and other waste using ECONYL® yarn, our LITE fabric is made up of 83% recycled nylon and 17% spandex.

    Cupro: Our tees and tanks are 100% cupro, a delicate fiber made from waste the cotton industry leaves behind. Our yarn is made in a zero-waste, zero-emission facility in Japan, then constructed at our SA8000-certified factory in Hanoi.


    Wolven Threads

    Wolven Threads‘ main campaign is to Make Sustainability Sexy, and I am here. for. it. They probably have my favorite designs out of the group—super fashionable cuts and trend/sexy designs. I’ve only tried one piece by them as well (the jogger pants below), and absolutely adore them!

    As if they weren’t already sustainable enough, Wolven Threads aims to be completely carbon neutral and donates 1% of sales to organizations that do important work to create positive environmental change.

    ALSO—I have a discount code for you to use for their clothes, as well!

    Use my code INFINITE20 for 20% all purchases.

    Happy shopping!

    Bottoms:

    Alpine Line Jogger Pants

    Wolven Threads » From the Infinite Embers blogSo comfortable you’ll never want to take them off.

    Indigo Legging

    Wolven Threads » From the Infinite Embers blog

    Tops:

    Onyx Pyramid Top

    Wolven Threads » From the Infinite Embers blog


    Wolven Threads » From the Infinite Embers blog

    Available in a variety of beautiful colors—I just have a thing for black.

    Indigo Double Cross Top

    Absolutely love the back on this bra.

    Bodysuit:

    Astral Ranger Reversible One Piece

    Wolven Threads » From the Infinite Embers blog

    From the Wolven Threads website:

    We believe that beautiful fashion should not come at the expense of our planet. Our garments are made with OEKO-TEX certified Recycled P.E.T fabric (RPET), a fabric made from recycled plastic water bottles. This certification ensures that our material is free of harmful and toxic chemicals. Over 6.4 million tonnes of plastic trash enters the world’s oceans each year. RPET creates a second life for plastics, helping to keep plastic out of our planet’s delicate eco systems.

    When we say we want to Make Sustainability Sexy, we truly mean it. We are a team of artists and activists, working to erase the negative footprints on our earth. Our sustainability practices are rooted in mindfulness and the power of choice—from day-to-day decisions to major resolutions. We believe that a collective effort of sustainability has the ability to change the trajectory towards a healthier, more verdant planet. See? Sexy.

    Sustainable activewear: it’s the way to go. I hope you all fall in love with these companies as much as I have!

    » Song Vibes «

    Did I miss any great sustainable activewear brands out there? Let me know your favorites in the Comments below!

    xo,

    Amy

    This post is not sponsored, but I am an ambassador for Yoga Democracy and Wolven Threads, meaning I get a commission if you use my discount code. Win-win! I genuinely love these brands and know you will, too. Thank you so much for supporting the blog!

  • Improve Your Practice: The Benefits of Using Yoga Blocks

    Benefits of Using Yoga Blocks » From the Infinite Embers blog

    This post is basically a PSA I’ve been wanting to make for a while: we all need to use yoga blocks more often!

    I always feel bad for yoga blocks. They usually remain gathering dust stuffed into the cubbies at the back of the studio. One or two people per class may be bold enough to grab a pair. The yoga blocks on the bottom row? Practically untouched.

    How do I know? I’m a near-full-time yoga instructor here in San Diego! And I see how frequently they go unused. Most teachers don’t suggest them, especially for most Vinyasa flow classes. Students won’t usually get them unless I tell them to. And sadly I can’t even have my students use blocks at some of the studios I teach at, because they only have enough blocks for a handful of people, not a full class. They’re highly undervalued.

    But yoga blocks aren’t just for rare modifications or injuries.

    I feel like yoga blocks have a stigma attached to them. Our fear brains project the false belief that blocks signal to everyone else in the class that you’re the inflexible one, that they make you stand out. This can make a newbie feel self-conscious and inferior if they’re already stuck in that fear mindset.

    And it can keep competitive Type As from furthering their skills because they don’t want to feel like they need assistance.

    I’d like to change that stigma.

    I’m telling you, using blocks is a mark of a strong yogi, not a weak one! Using them doesn’t make you a beginner, and it shouldn’t feel embarrassing. They’re just a really helpful tool so you can move your body properly in every pose. And based off of teaching hundreds of people over the years, I can say truthfully that nearly everyone can benefit from their use.

    Let me say this: Remember that no one else in the class is thinking about you or judging you—and if they are, that’s their problem, not yours! Stay in your own lane and commit to doing what’s best for your body. (That’s going through your yoga practice as healthfully and strong as possible.)

    Benefits of Using Yoga Blocks » From the Infinite Embers blog

    Yoga blocks can elevate your practice.

    There is a field of yoga called Iyengar (named after the man who developed this style of yoga practice) that is hyper-focused on alignment, and while I don’t teach it, I’m heavily influenced by the philosophy, based on my experiences in my own body.

    I’m not naturally flexible, and for a long time I was compensating in many stretches to appear more flexible than I actually was in class. For example, to go into the splits, I could hike my left hip up and forward of my right and get down to the floor. But when I started playing around with blocks and entering poses with perfect alignment, I found that I hadn’t been stretching correctly and was very tight in key areas that were leading to injury and immobility.

    Once I began using blocks, I never stopped. I now hate to practice without them.

    Also, there are so many amazing restorative yoga poses you can do using the blocks! I found this great list for you, which includes all of my favorites. You’ll be able to get so much deeper into these poses using the blocks. You simply can’t do them without them.

    I’m telling you, they’re the best.

    How To Use Yoga Blocks:

    It’s super easy, so don’t be intimidated. Just think of the blocks as extensions of your hands. They bring the ground closer to you. The key is to focus on maintaining proper alignment as you move through each pose and to not force any of the stretches.

    During your yoga practice, keep your blocks at home base: one on either side about halfway up your mat. It takes some getting used to, but you’ll soon get the hand of moving the blocks up or down the mat with you as you flow so they’re always a quick reach away.

    As with any practice, you’ll improve in yoga with dedication and consistency. You will get more flexible and stronger with time! Eventually, you won’t need the blocks at all—but you might just fall in love with them and keep using them anyway, since they promote the elongation of your body and thus improved mobility and form.

    Benefits of Using Yoga Blocks » From the Infinite Embers blog

    Which yoga blocks should you buy?

    As with anything, the most important tip is that you buy whatever blocks you like! There are a few different materials available, which will give the blocks different densities and degrees of hardness.

    Everyone will have their own preferences, and some blocks work better for different purposes. So explore and see what works for you. It won’t affect your practice or their function; different materials mostly vary your comfort level.

    These are the different types of yoga blocks to choose from:

    • Cork: My #1 favorite choice, for a few reasons. I love the heavy sturdiness of these blocks. They can hold some weight and feel solid underneath you, and they rarely slip around. The drawback is their heavier weight, so they’re not easy to transport. PLUS, cork is a much more environmentally-friendly and sustainable natural material than some of the other options. This 100% recycled cork block by 42 Birds is my favorite out there.
    • Wood: My opinion? Just, don’t. They’re more eco-friendly too but so unforgivingly hard and uncomfortable to use.
    • Foam: The other fantastic choice, and the far more lightweight one. I actually have both cork and foam blocks—I use the foam when I travel. These REEHUT blocks are the ones I recommend and am using in these photos—only $11 for a set of two and a super cute pink color! (Although they do have other colors to choose from—my second choice would be the black.) They’re ridiculously light and have a soft cushiony give to them, while still being firm enough to hold you.

    If you practice yoga at home, I recommend buying at least two blocks. They do come in different heights. Look for 4 inches, which is the standard. I don’t love the shorter or higher versions.

    So remember:

    The next time you take class, give those blocks in the back some love and start exploring your body and yoga practice in a whole new level of depth!

    And be sure to check out all my yoga posts for stretching routines and further advice, or visit my YouTube channel for full yoga workout videos.

    » Song Vibes «

    Do you ever use yoga blocks? What’s stopped you? Share your experiences with me in the Comments below!

    xo,

    Amy

    This post is not sponsored, but there are affiliate links throughout this post. I genuinely love these products and know you will, too. Thanks for supporting the blog!

    Photos by Matthew Hanley, edits by me

  • How To Do Yoga With A Wrist Injury: Meet the Perfect Pushup Tool

    Yoga with a Wrist Injury » From the Infinite Embers blog

    Got a wrist injury? Good news: I’ve got a secret weapon so you can keep practicing yoga!

    I have found a tool that ensures you don’t have to interrupt your yoga practice (or any workout that’s on your hands, really) because of a wrist injury.

    This information comes first-hand. I’ve had a wrist injury before and needed to find a solution. Back when I was working as a writers’ assistant on different television shows in Hollywood, I had to speed-type on a computer for hours and hours on end, taking notes for the writers.

    It fucked my wrists up and I developed a bad ganglion cyst in my left wrist.

    What’s a ganglion cyst? Why, thank you for asking! It’s a sexy sac of jelly-like fluid that forms over joints or tendons. They’re very common in your wrists because a lot of us have to work all day typing at our computers. Ganglion cysts are super painful, and because of the obstruction I basically couldn’t bend my wrist at all forward or backward. I tried everything to get rid of it—I had two surgeons extract some of the fluid (it filled right back up), and, I’m not kidding here—I even tried slamming my wrist against my car steering wheel to try to pop it.

    [Spoiler alert: that did NOT work and I do not recommend that OR the popular book-slam method (I wish I were making that up, but things get desperate, people).]

    Having a wrist injury can be incredibly frustrating, especially when it takes a while to heal.

    What DID work was actually resting my wrists and not putting as much pressure on my hands. Over time, the cyst eventually faded.

    I have always done yoga and strength training, both of which usually require a lot of hand-pressing. And I definitely was not about to give that up—working out has always been key to helping me manage my mental health.

    Yoga with a Wrist Injury » From the Infinite Embers blog

    » Squinting into the bright New Mexico sun on a recent trip back to my hometown of Albuquerque «

    Enter the Perfect Pushup Elite.

    Originally designed for bros who want to, you guessed it, achieve the perfect pushup, this unlikely tool became my best friend. I still use mine every single time I work out, because it makes my wrists feel better in general. I’m attached.

    I love to try all the weird health tools on Amazon, and the Perfect Pushup Elite does not disappoint. If you’ve got a hand or wrist injury, holding onto these handles is a possible solution to help you get in your flow without causing further pain or inflammation. For $27 bucks, that’s not too shabby.

    From the Perfect Fitness website:

    Innovatively designed, the rotating handles increase muscle activation as your body dips, which can result in more muscle strength and definition in arms, shoulders, back, chest, and abs.

    Ergonomic grips help distribute weight evenly, reducing pressure points and joint strain on wrists and elbows.

    I don’t know about you, but I’m here for all of that.

    Yoga with a Wrist Injury » From the Infinite Embers blog

    How to use the Perfect Pushup Elite handles:

    Set them at the top of your mat shoulders-distance, with the handles parallel to the sides of the mat. Then, grab onto the handles as you step back into plank, flow through chaturangas, etc! They have a nice grip on the bottom to ensure they don’t slide around.

    The handles do twist, so just be mindful of keeping your body aligned as you flow through. If you need, try dropping your knees to the ground for extra support when you’re using them.

    The only thing I don’t recommend them for for is arm balances, unless you’re extra advanced and want the unstable challenge.

    Let me know what you think if you give these a try! Sending all the healing vibes for your wrist injury.

    » Song Vibes «

    Do you have a wrist injury? What other tricks and tools have helped you in your recovery? Share with me in the Comments below!

    xo,

    Amy

    This post is not sponsored, but there are affiliate links throughout this post. I genuinely love these handles and know you will, too. Thanks for supporting the blog!

  • 10 Seated Chair Yoga Stretches

    Seated Chair Yoga Stretches

    Seated Chair Yoga Poses » From the Infinite Embers blog

    Stuck sitting for a long time? You need these chair yoga stretches in your life.

    Whether you’re on an airplane, spending hours in front of your computer, or waiting at the DMV, there’s bound to be a lot of sitting in your life. It’s just the modern way. Unfortunately, all those hours sitting can start to make the body tighten and stiffen, leading to loss of mobility and flexibility. I teach corporate yoga throughout San Diego, and oftentimes I work with my clients seated in suits around a conference table, which is how I came to create this chair yoga practice. I wanted to be able to help my clients feel better with stretches you can do any time in your chair.

    These stretches are, if I may daresay, a game changer.

    All of the following chair yoga stretches are done fully seated, making them perfect for when you can’t break out a full Vinyasa practice but still want to loosen up, regain energy and clarity, and relieve back and neck pain. These poses will move your spine in all directions to help keep you feeling great!

    Posture is everything when you’re sitting (try using a posture corrector for extra back support), and even more so when you’re stretching. These chair yoga poses require you to first sit up with your pelvis in neutral, reaching long through your spine to the crown of your head. Keep your ribs pulled in, your shoulders stacked on top of your hips, and your head up. Breathe deeply and relax. The goal is to feel good, so don’t force any of the stretches.

    Always, always, listen to your body!

    I should note: it is important to stand up at least once an hour and get some light movement in, if you’re able. Go pour yourself a glass of water or take a bathroom break! Also, if you’re interested, I highly recommend converting to a standing desk! I adore mine.

    Now to the chair yoga stretches:

    I go through the entire chair yoga flow with you in this video, or keep scrolling for the step-by-step sequence!

    You can hold each stretch for as long as you’d like. Repeat as often as possible.

    The Video:

    The Breakdown:

    1 » Cat/Cow

    Seated Chair Yoga Poses Cow » From the Infinite Embers blog

    Seated Chair Yoga Poses Cat » From the Infinite Embers blog

    • Begin seated, with your feet firmly planted on the ground at hips’ distance, hands on your knees.
    • Cow: Inhale, arch your back, and lift your head to the sky. Tilt your pelvis forward so your tailbone reaches back behind you.
    • Cat: Exhale, round your back, and tuck your chin to your chest. Tilt your pelvis backwards so your tailbone curls underneath you.
    • Flow between the two for as long as you want, moving with your breath. Be mindful to move more slowly through the part of your spine where you feel the most stiff.

    2 » Twists

    Seated Chair Yoga Poses Twist » From the Infinite Embers blog

    Seated Chair Yoga Poses Twist » From the Infinite Embers blog

    • Inhale and sit up as tall as you can.
    • Exhale and then rotate your torso to the Left. You can use your arms to help you. Try to lead the twist from your navel first, then ribs, then maybe neck.
    • Inhale and return back to center, slowly.
    • Exhale and repeat on the other side.

    3 » Side Stretches

    Seated Chair Yoga Poses Side Stretch » From the Infinite Embers blog

    Seated Chair Yoga Poses Side Stretch » From the Infinite Embers blog

    • Once again, sit up tall and reach your arms overhead.
    • Inhale and grab your L wrist with your R hand.
    • Exhale and stretch up and over to the R, breathing down the L side body.
    • Inhale and return back to center, grabbing your R wrist with your L hand.
    • Exhale and stretch up and over to the L, breathing down the R side body.

    4 » Overhead Stretch

    Seated Chair Yoga Poses » From the Infinite Embers blog

    • Sit up tall and interlace all 10 of your fingers.
    • Inhale and stretch your arms up as high as you can.
    • Exhale and relax your shoulders down away from your ears.

    5 » Eagle Arms

    Seated Chair Yoga Poses Eagle Arms » From the Infinite Embers blog

    Seated Chair Yoga Poses Eagle Arms » From the Infinite Embers blog

    • Cross your R elbow on top of the L. Wrap your forearms around to press your palms against each other.
    • Draw your shoulders down away from your ears and lift your elbows up, possibly to shoulder-height or as high as you can.
    • Press your hands away from your to increase the stretch.
    • Focus on stretching through the upper back, right between the shoulder blades. Breathe and try to relax!
    • If you want even more, try tilting backwards from your shoulder blades, reaching your heart up to the sky as you lift your elbows.
    • Switch sides.
    • Note: Can’t get your hands to wrap? Try pressing the backs of your hands against each other instead. I break down all the modifications in the video above, so be sure to watch it for help!

    6 » Hamstring Stretch/Half Splits

    Seated Chair Yoga Poses Hamstring Stretch » From the Infinite Embers blog

    Seated Chair Yoga Poses Hamstring Stretch » From the Infinite Embers blog

    • Sit on the edge of your chair, if you can.
    • Extend your R light out in front of you, as straight as you can get it. Flex your R foot.
    • Start to tilt forward from your hips, keeping your your chest open. Maybe take your hands all the way down to the floor if you feel open enough.
    • Focus on the stretch down the back of your leg, in your hamstring. Make sure not to lock out your knee and keep your foot flexed, extending out through your heel while pulling the R hip back.
    • Repeat on the L side.

    7 » Figure 4/Seated Pigeon

    Seated Chair Yoga Poses Pigeon » From the Infinite Embers blog

    Seated Chair Yoga Poses Pigeon » From the Infinite Embers blog

    • Start with your feet back on the ground at hips’ distance.
    • Flex your R foot and cross your R ankle over your L knee. Keep the foot flexed.
    • Maybe start to tilt forward at your hips to fold over your R shin and increase the stretch.
    • Repeat on the L side.
    • Note: If this is too intense for you, try simply hugging your R knee into your chest. Move it around in small motions if that feels good to help loosen up through the hips! I show you how in the video above. Also, try out these outer hips stretches when you’re back on your mat!

    8 » Neck Stretch

    Seated Chair Yoga Poses Neck Stretch » From the Infinite Embers blog

    Seated Chair Yoga Poses Neck Stretch » From the Infinite Embers blog

    • Adjust your posture again and sit up tall.
    • While reaching out through the crown of your head, tilt your R ear down to your R shoulder, stretching out the L side of your neck.
    • Be very gentle! Your neck is sensitive.
    • If you want more, you can place your R hand lightly on top of your head (do not pull down!) and extend your L arm out to the side and slightly behind you (you can play around with the placement of your arm to vary the stretch).
    • Return back to center with an inhale. I like to reset by rolling my shoulders out/shaking out my head.
    • Repeat on the other side.
    • Note: You can check out even more neck stretches here!

    9 » Wrist Circles

    Seated Chair Yoga Poses Wrists » From the Infinite Embers blog

    • Give your wrists some love! This isn’t so much a stretch as finding some mobility, moving your wrists around to prevent stiffness or pain.
    • Roll your wrists out in circles, shake them side to side, or flap them up and down. This is especially important if you’ve been spending a lot of time typing! (like yours truly—I literally just took a break to circle out my wrists for a second as I type this)

    10 » Child’s Pose

    Seated Chair Yoga Poses Childs » From the Infinite Embers blog

    • If you’re lucky enough to be seated at a counter (an airplane tray table works!), take a Seated Child’s Pose.
    • Stack your hands, with your elbows out to the side.
    • Rest your forehead down on your hands.
    • Soften your shoulders away from your ears. Try to relax all tension from your upper body.
    • Close your eyes and breathe.
    • This is an especially good posture to take if you feel stressed, tired, or unfocused.

    Bonus » End with Savasana for as long as you want!

    Seated Chair Yoga Poses » From the Infinite Embers blog

    • You can take Savasana in your Seated Child’s Pose, or simply sit up, close your eyes, and breathe.
    • Try to relax your entire body. I like to imagine my skeleton sitting with perfect posture, all my bones effortlessly stacked in alignment, with my muscles draping over the bones like wet clothes on a clothesline. For some reason that visual really helps me let go of tension in my body.
    • Don’t worry about where your mind wanders. Give yourself permission to simply be, in this moment. I meditate this way on most flights I take, because I find it’s the best time to give my mind a break.
    • It’s a benefit that you’re sitting, because your body can more easily go into a meditative state without much risk of falling asleep! If you have extra time and earbuds and want to dive into a full meditation, check out my favorite meditation apps.

    I hope you enjoy this sequence! Remember to do it as often as possible to keep your body and mind feeling great.

    » Song Vibes «

    Are there any other seated chair yoga stretches you love? Share them with the class in the Comments below!

    xo,

    Amy