Searching for "spin"

Number of results 45

  • The Neck Stretches I Swear By To Relieve Pain + Tension
    Daily Neck Stretches To Relieve Pain » From the Infinite Embers blog

    These neck stretches are key to keeping my pain under control.

    I’ve struggled with crippling pain radiating down the right side of my neck and shoulders for over 4 years now. One morning in 2013 I woke up unable to turn my head. The muscles in my neck, chest, upper back, and shoulders had completely seized up. I was in horrible pain, but because I took such poor care of my health at the time I ignored the problem. I figured it’d just get better on its own, that I’d simply slept funny (spoiler alert: it didn’t go away). But even though it’s taken a lot longer than I expected, I’ve recovered dramatically over the years and I owe a lot to consistently doing these neck stretches.

    The journey I’ve had in taking ownership of my healing process is what inspired me to write this blog. I want to share with you all the resources I wish I’d had when I was desperately searching the far corners of the internet for help, in so much pain I couldn’t think, unable to properly move my body. All of these neck stretches and mobility exercises were eventually taught to me by my physical therapists, and they help me a lot.

    » In fact, I actually just took a break from writing this post to do these neck stretches. It’s kind of hard to see them and not want to do them, too. Or at least that’s how I hope you feel also, because I promise these neck stretches are amazing! They may be able to help you relieve a lot of your pain and tension. «

    Btw – if you work long hours at a desk or computer, then you for sure need to pay attention! (This is part of the reason why I converted to a standing desk – I highly, highly recommend.)

    A LOT of us suffer from neck pain.

    In fact, according to Mayo Clinic, “neck pain is the fourth leading cause of disability, with an annual prevalence rate exceeding 30%.”

    So more than a third of us have some kind of neck pain?! Guys, I’m so sorry. I know how much it SUCKS. This is an epidemic that needs to be stopped.

    There are, of course, as many causes of neck pain as there are people who suffer from it. But any kind of pain is your body’s way of sending you a message that something is not right. Neck pain is usually the result of a chain of problems, so remember to look at your body as a whole to understand how to approach your own healing, and seek help when needed.

    And definitely add this quick less-than-5-minutes sequence to your daily routine!

    These neck stretches can help relieve much of the tension that can cause or worsen the pain.

    Our bodies tend to get stuck in these self-destructive loops – you might have an injury that causes your neck muscles to tighten, but then the muscle spasms can worsen the injury and delay healing, which makes the muscles tighten even more… and on and on it goes.

    Our bodies are really freaking incredible, but they ain’t perfect.

    This is where you come in. Stretching is important because you need to retrain your body to help it break out of that cycle and RELAX. Stretching your neck will loosen your muscles to relieve tension where they attach along your jaw and shoulders.

    Try to do these neck stretches as soon as you can after you notice your muscles start to tighten up. Hold each pose for at least 30 seconds. Remember to breathe and try to encourage your body to soften into each position. You never want to force things. Your neck muscles are fairly sensitive, so gentle is always best. You also need to maintain good posture along your spine while you do these exercises, so keep your ears in line with your shoulders, shoulders over your hips. Your low back should maintain its natural curve. Keep both your chest and back broad, and breathe deeply into your belly.

    And, as always, be smart, listen to your body, go slowly, and when in doubt please consult a physician before beginning any exercise program.

    I try to do these neck stretches every day, and I recommend the same for you as well. Consistency is much easier when it’s automated.

    Let’s do this:

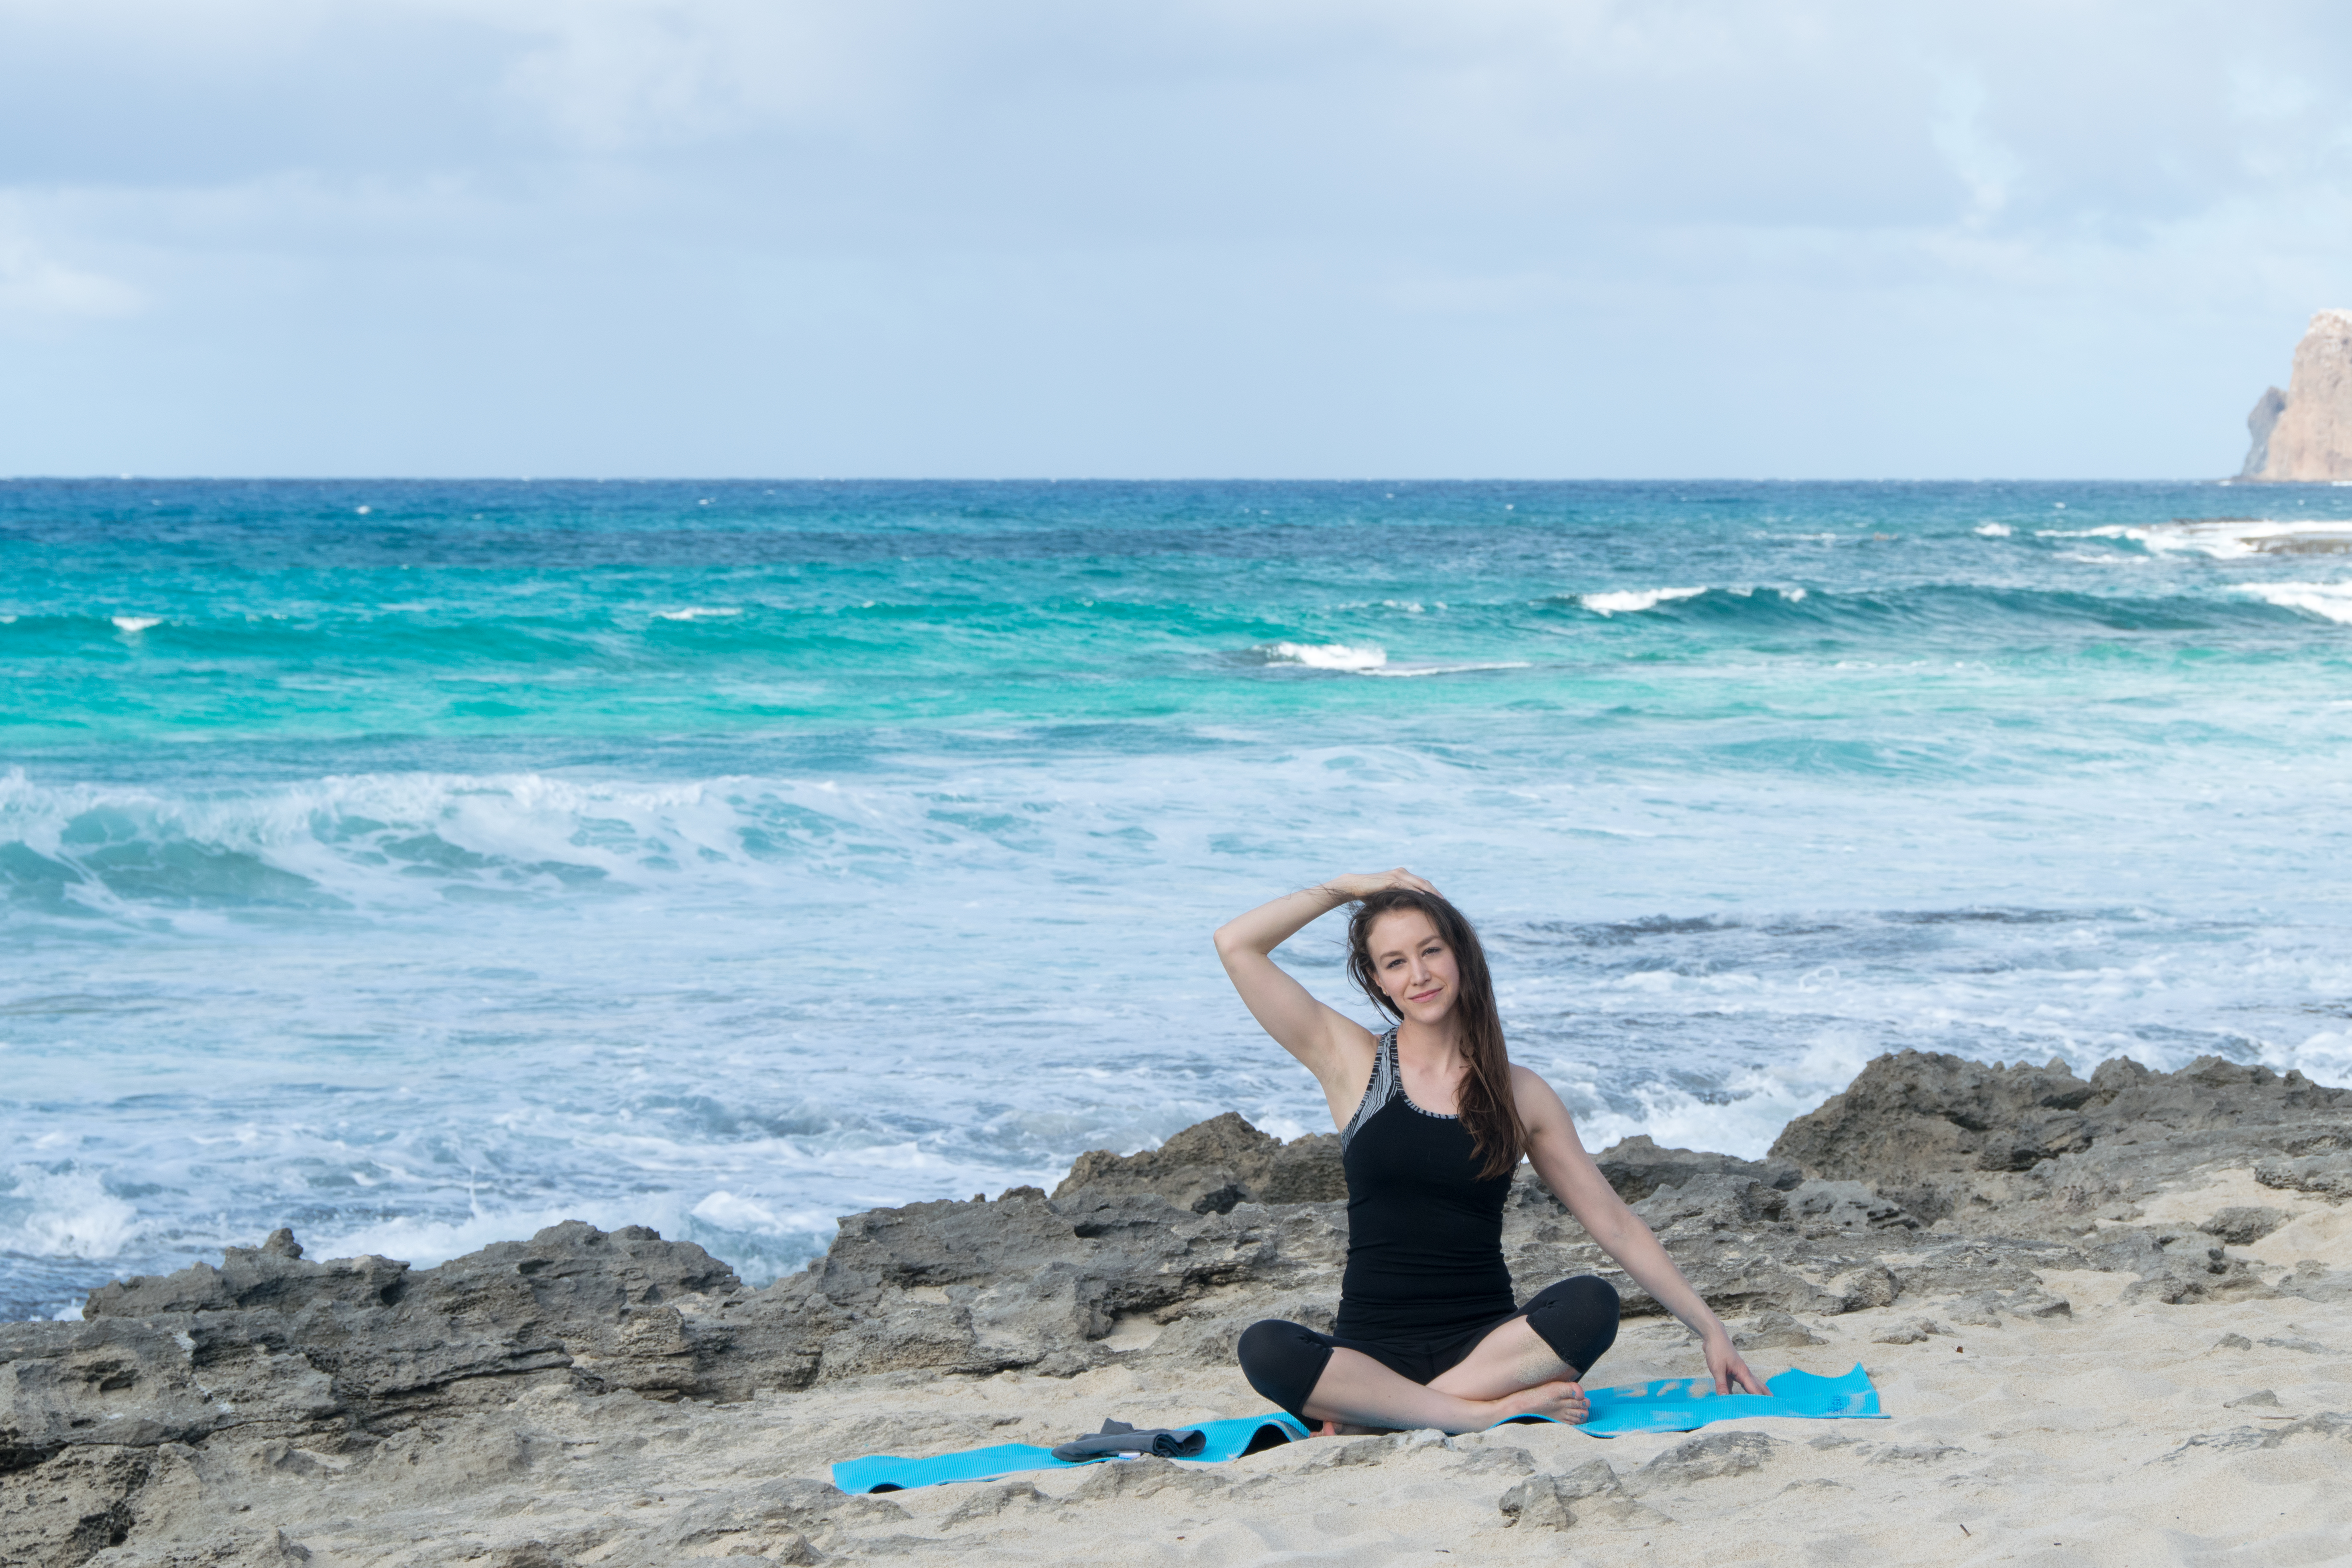
    1 » Side Stretch
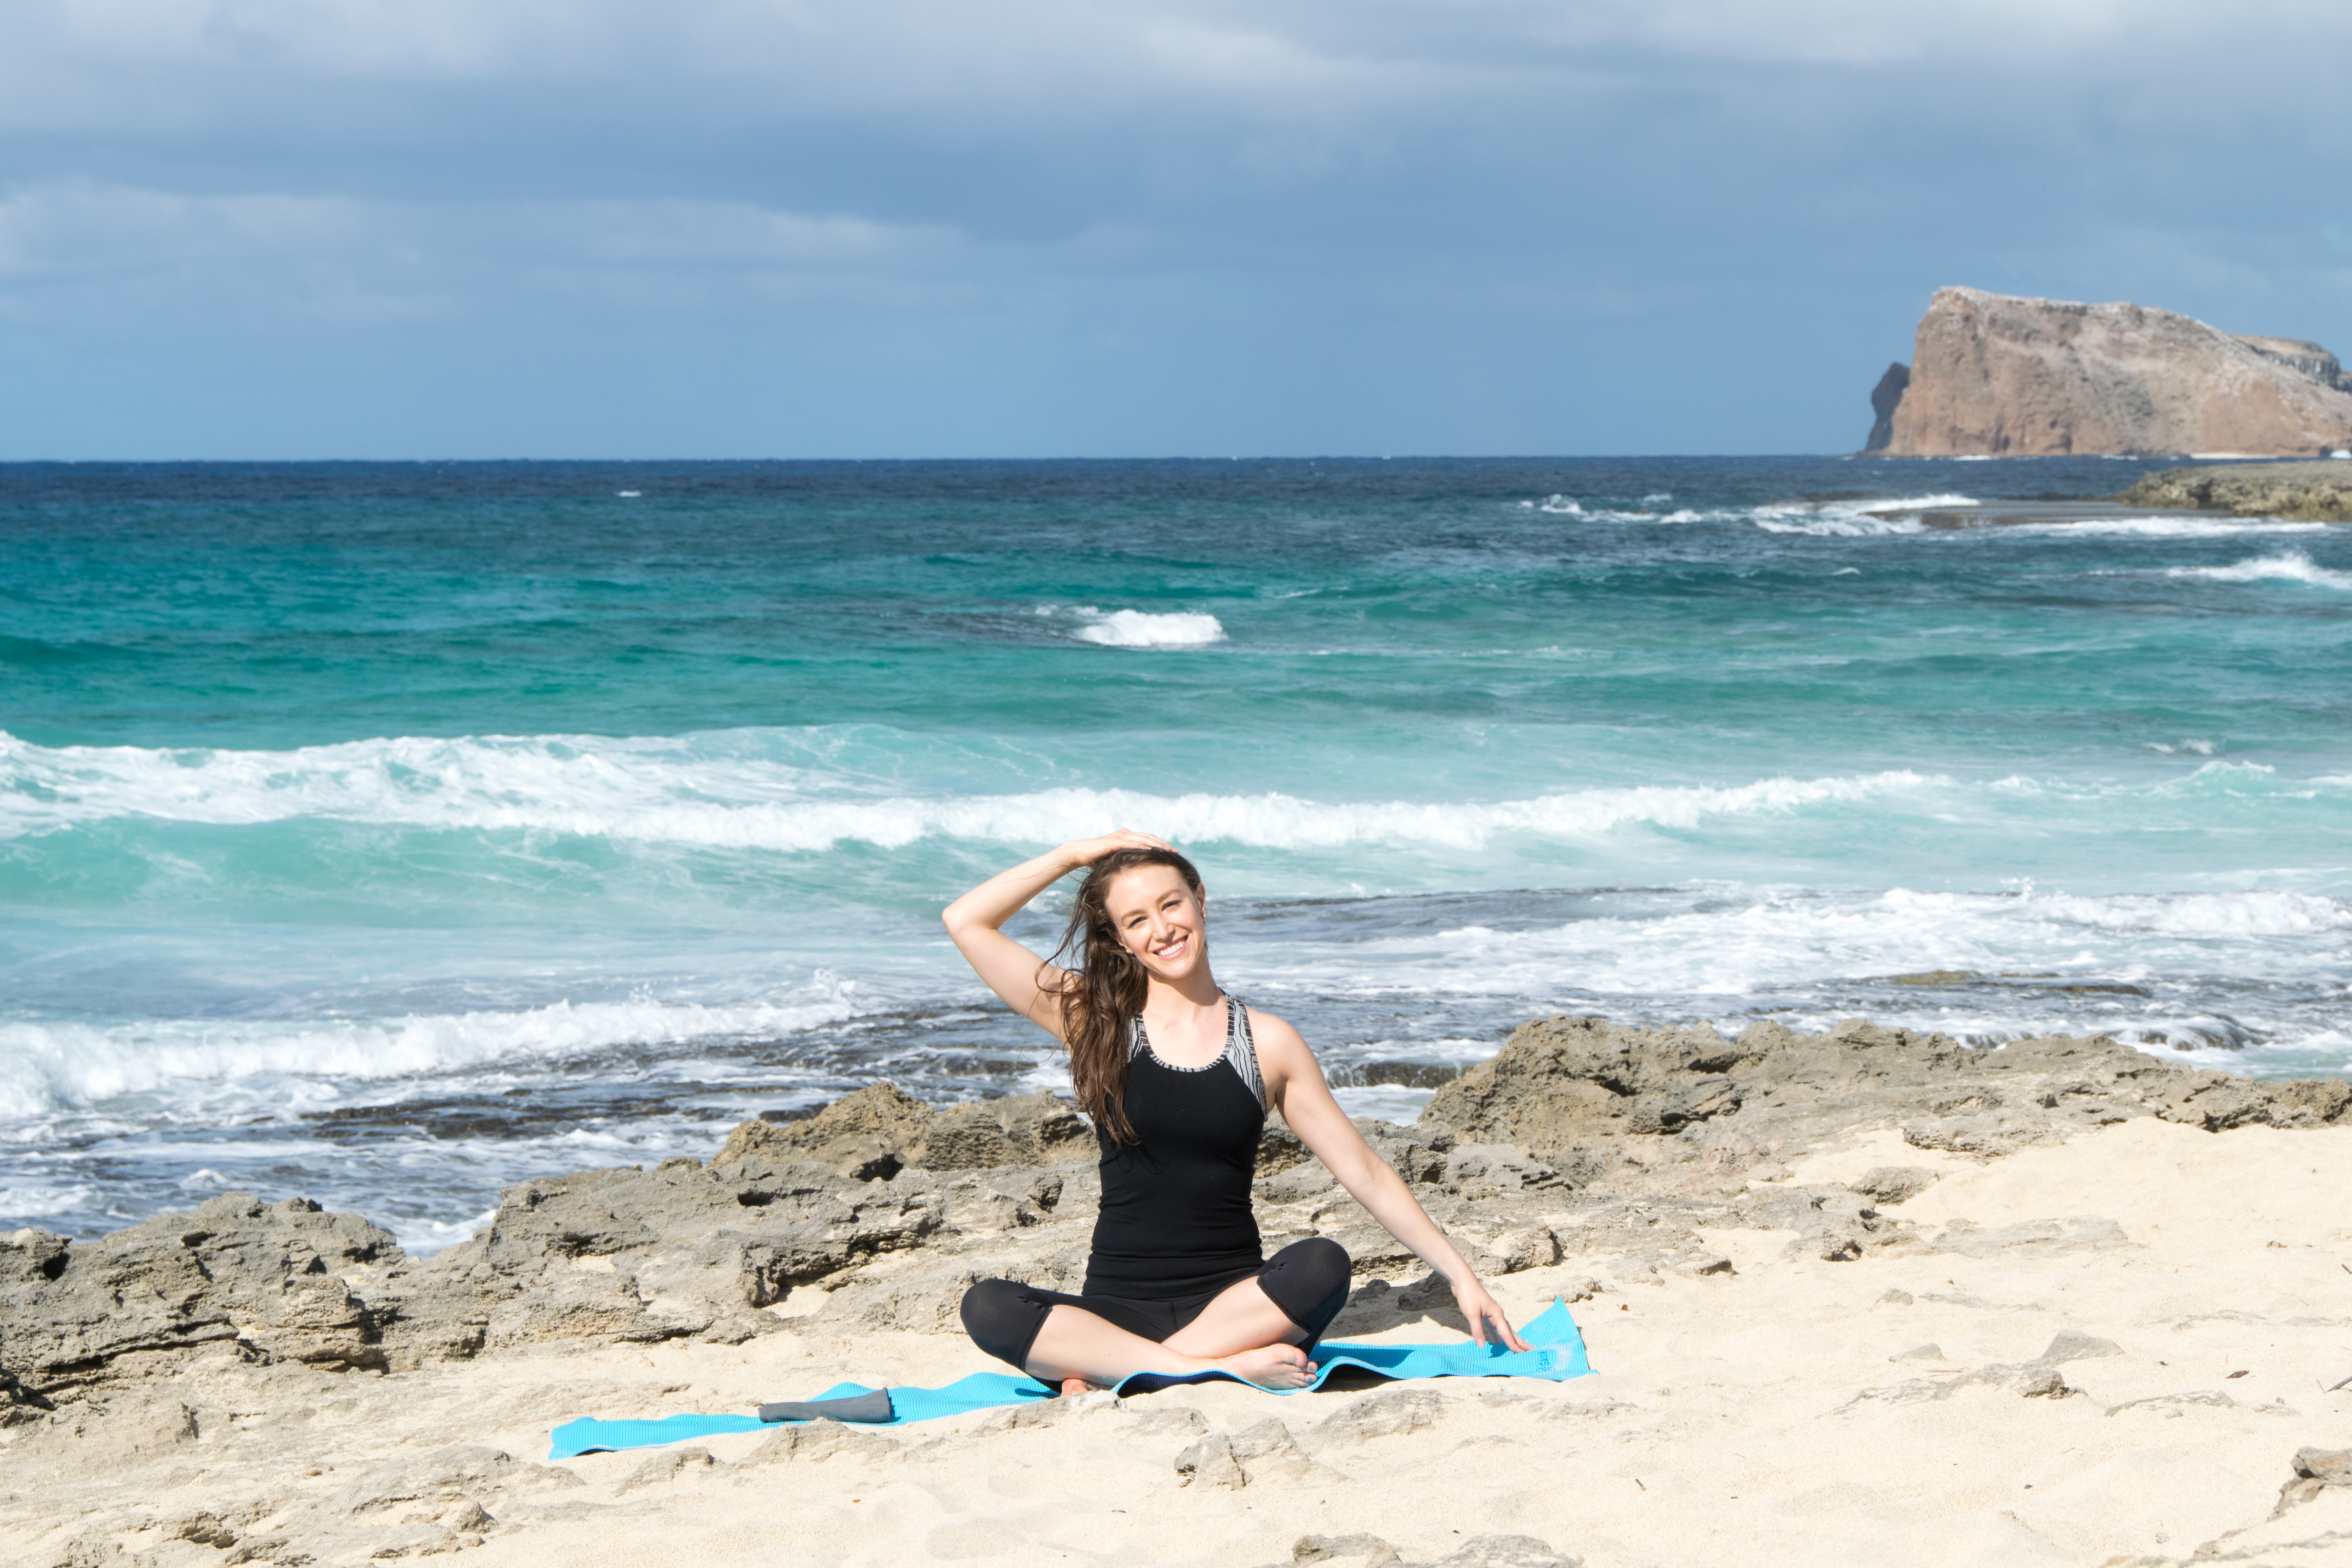
    Daily Neck Stretches To Relieve Pain » From the Infinite Embers blog

    • Begin by standing or sitting up tall. If you have trouble doing that in this crosslegged position, try sitting on a pillow or chair instead of on the ground, or stand instead.
    • Recruit your core muscles to support your posture by bracing your abdominals as if someone’s going to punch you in the stomach (really!).
    • Lift up through the top of your head.
    • Tilt your R (right) ear towards your R shoulder. You should feel a stretch down the L side of your neck.
    • Crawl your L (left) hand away from you to lengthen the L side of your neck further.
    • If you want more intensity, lay your R hand on top of your head. Do NOT pull down. Gently rest the hand so it acts as a subtle extra weight to deepen the stretch.

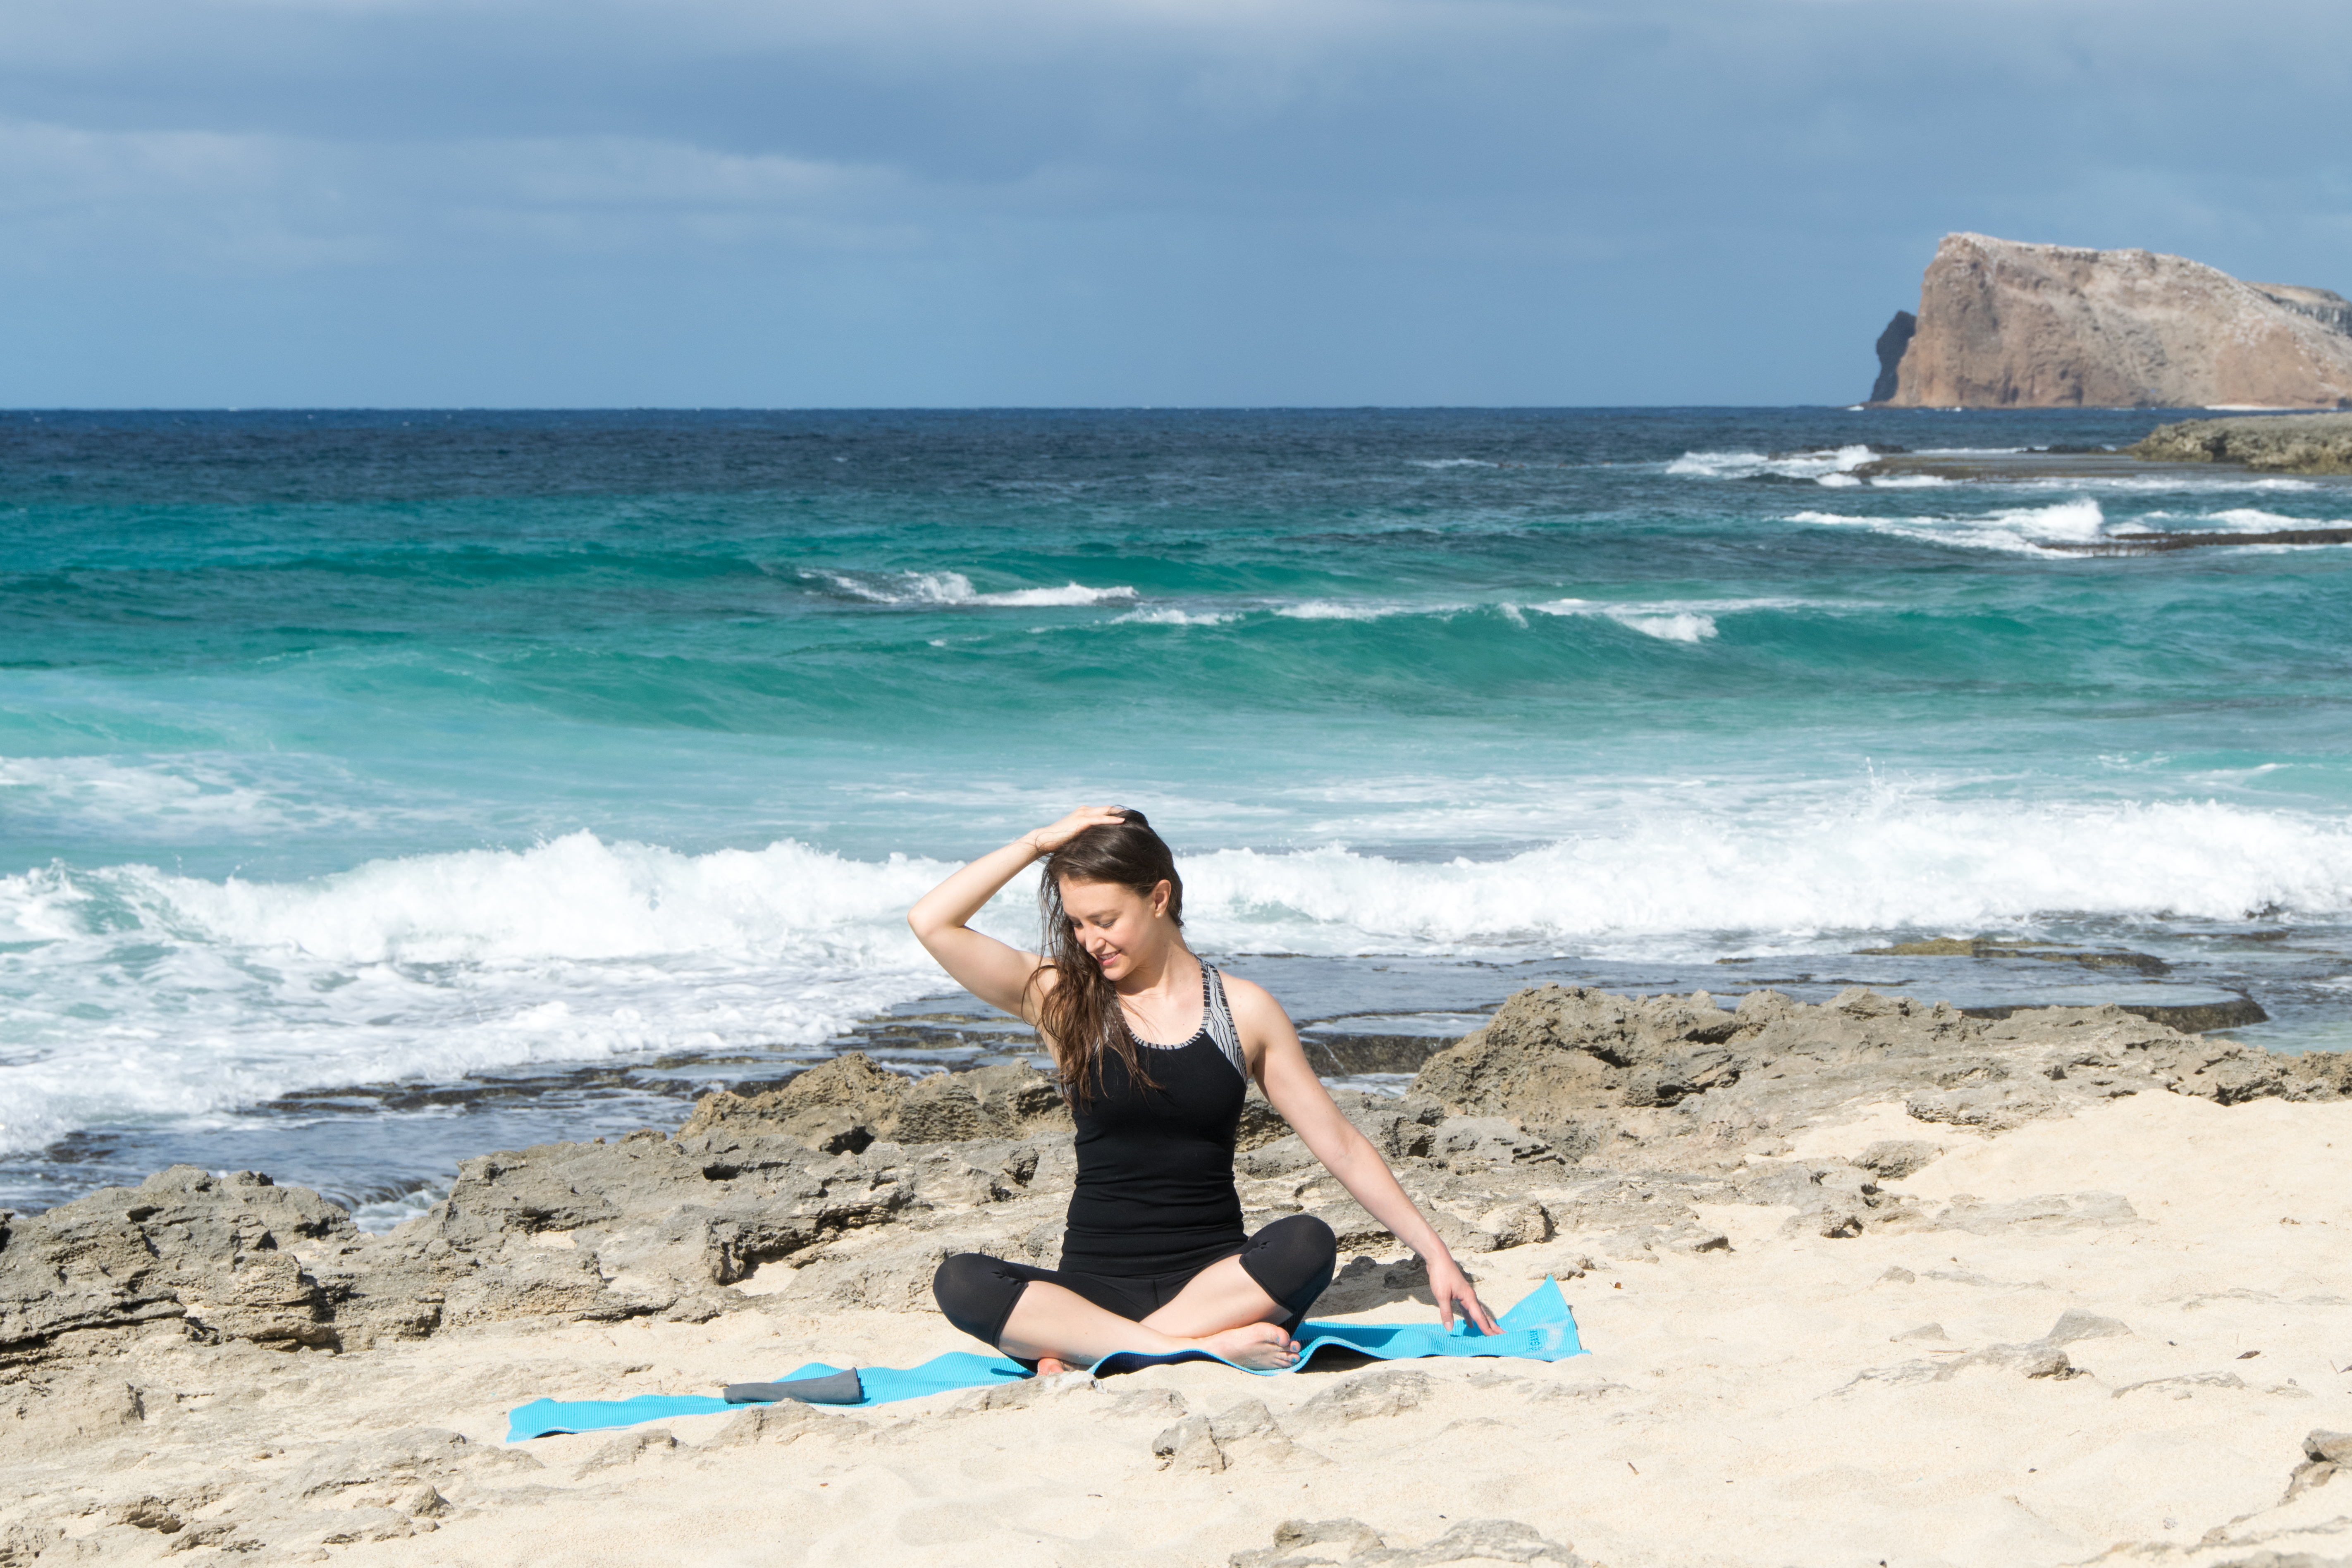
    2 » Side Tilted Down Stretch
    Daily Neck Stretches To Relieve Pain » From the Infinite Embers blog

    • From Side Stretch on the R side, tilt your head down and to the R. (Yes, it’s kind of like you’re smelling your armpit. You sexy minx you.)
    • Keep reaching your L hand away from you.
    • Keep your R hand on your head if you’d like to increase the intensity of the stretch.

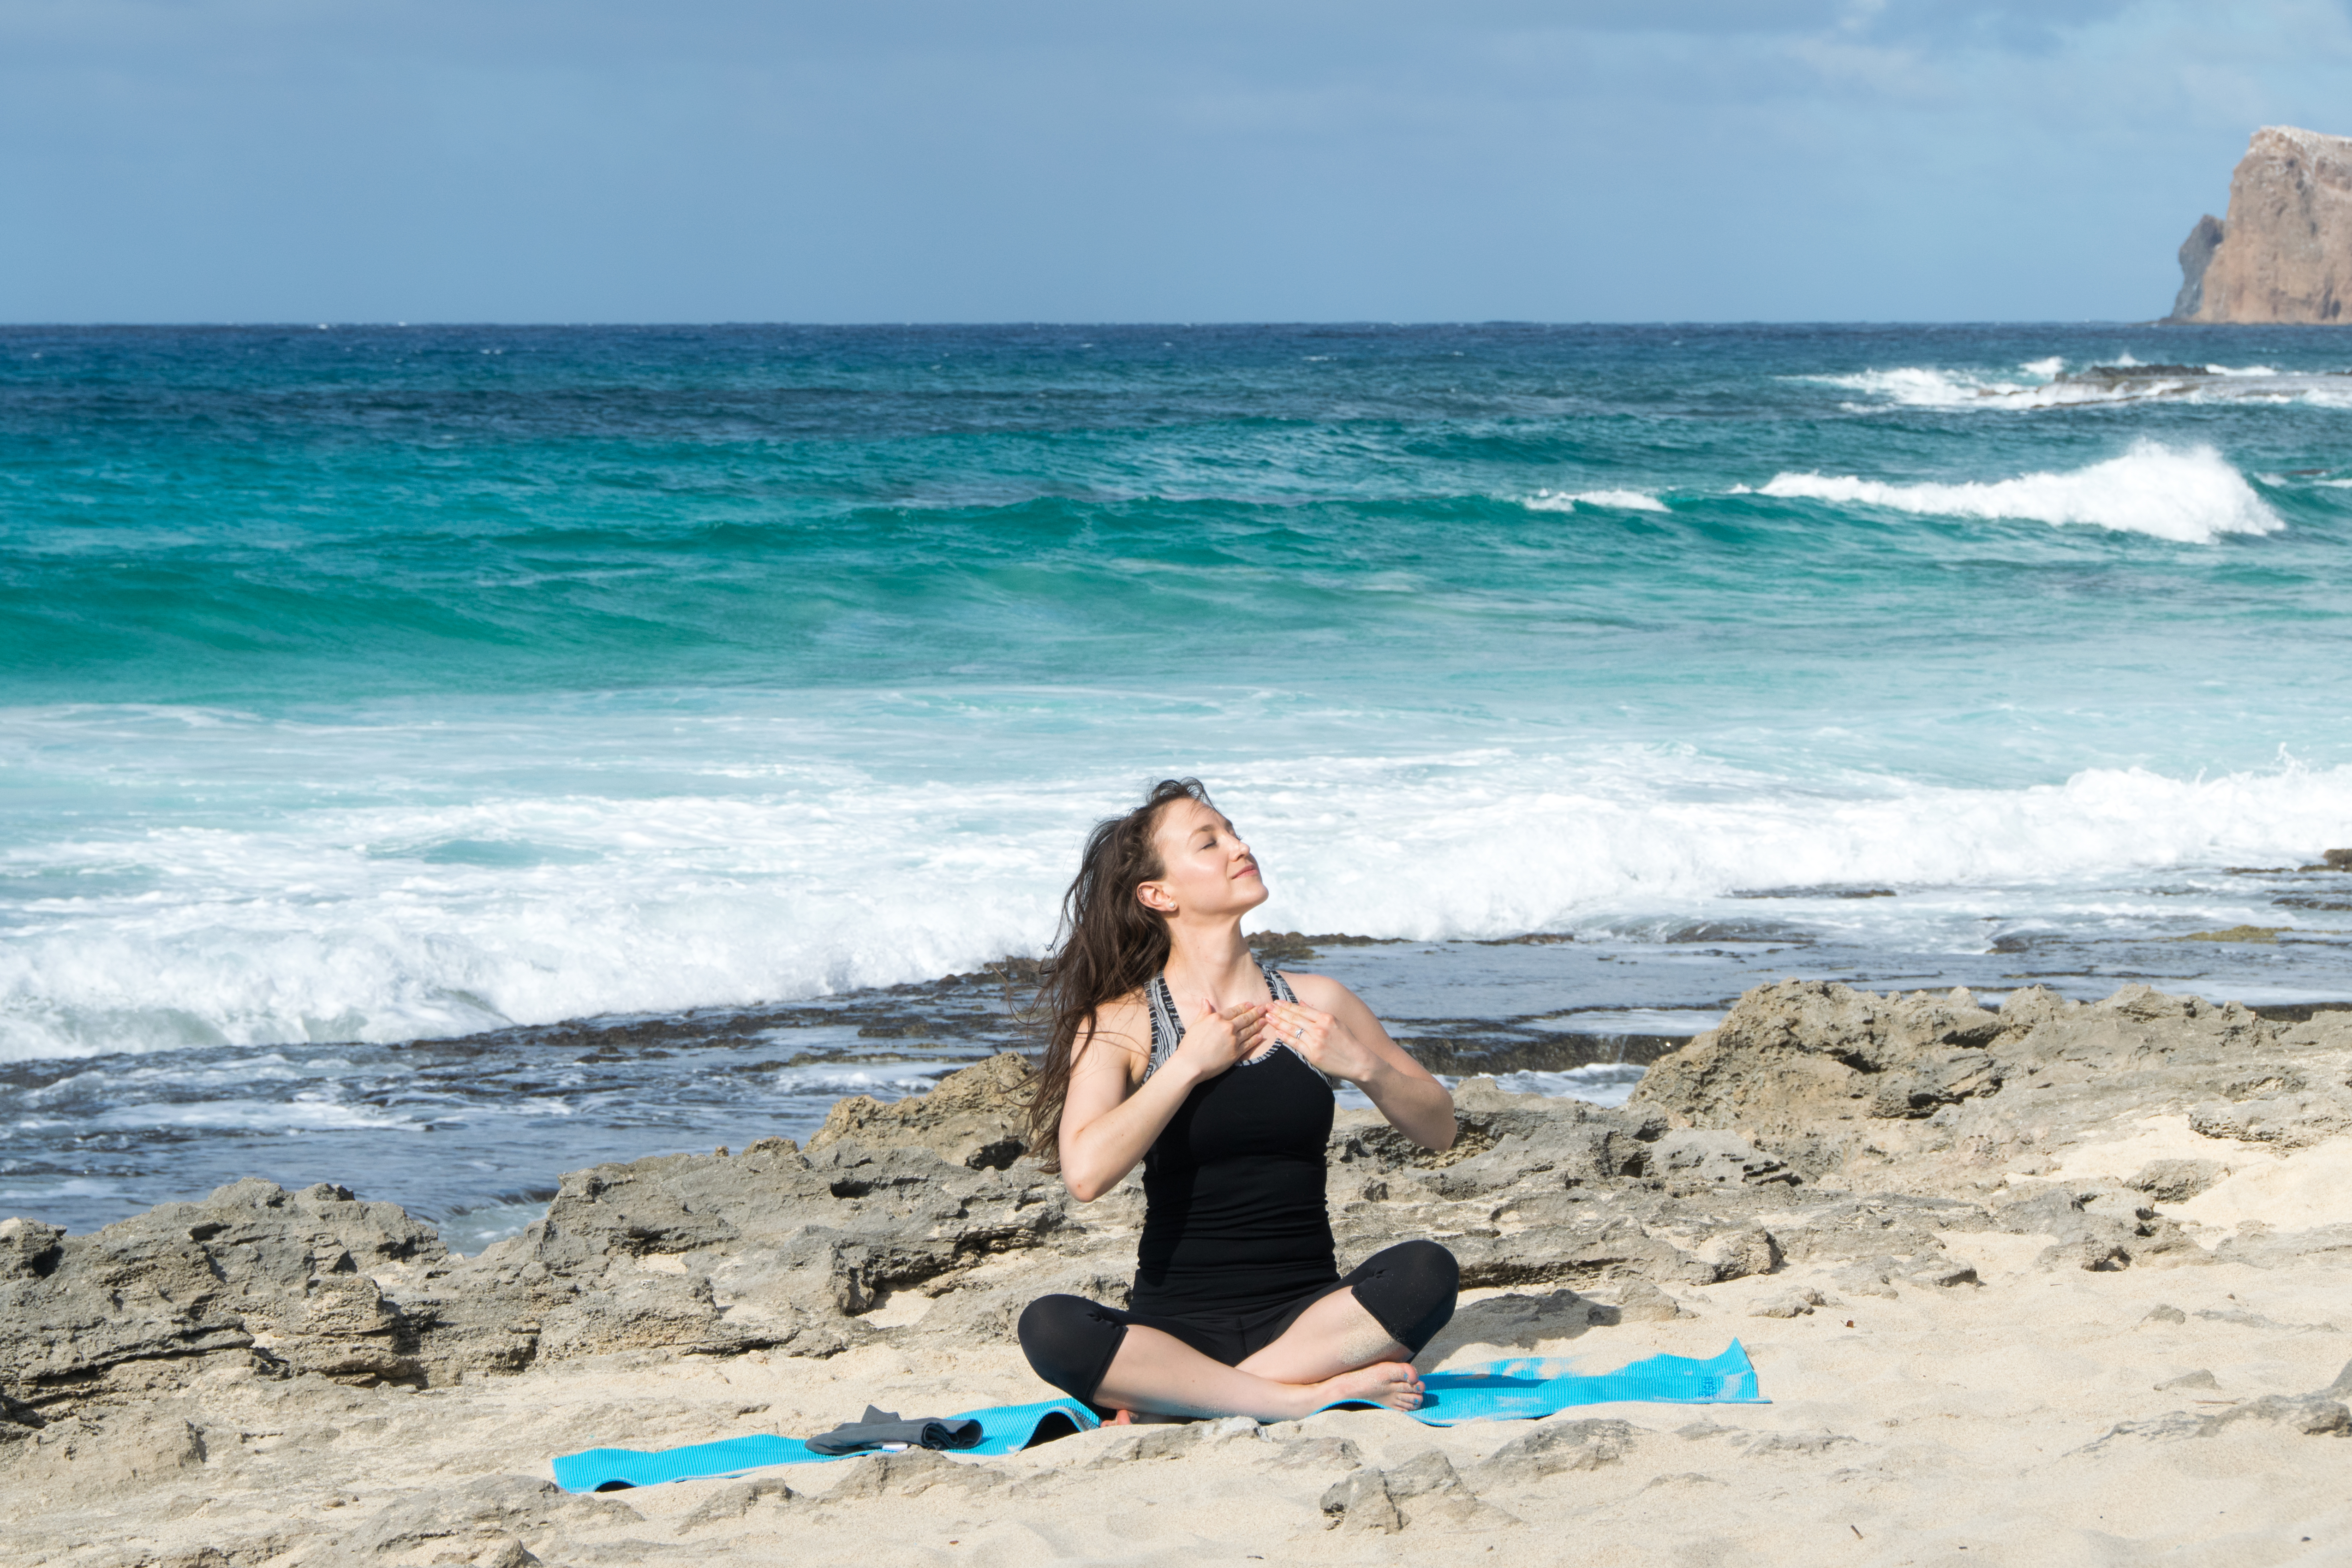
    3 » Side Tilted Up Stretch
    Daily Neck Stretches To Relieve Pain » From the Infinite Embers blog

    • From Side Stretch on the R side, tilt your head up towards the sky so you’re looking off to the L. You should feel a stretch in the front of your neck.
    • You can use your hands to gently increase the intensity of the stretch. Lightly place your fingertips under your collarbone and pull down slightly. (I recommend pulling down on both the R and L sides of your collarbone for different variations in the stretch.)
    • Btw – this stretch really helps if you have jaw tension or grind your teeth! It stretches out the Sternocleidomastoid muscle, which can pull our heads down and forward if it’s shortened from where it attaches at our jaw. It’s an important one to re-lengthen!

    » Repeat on the Other Side

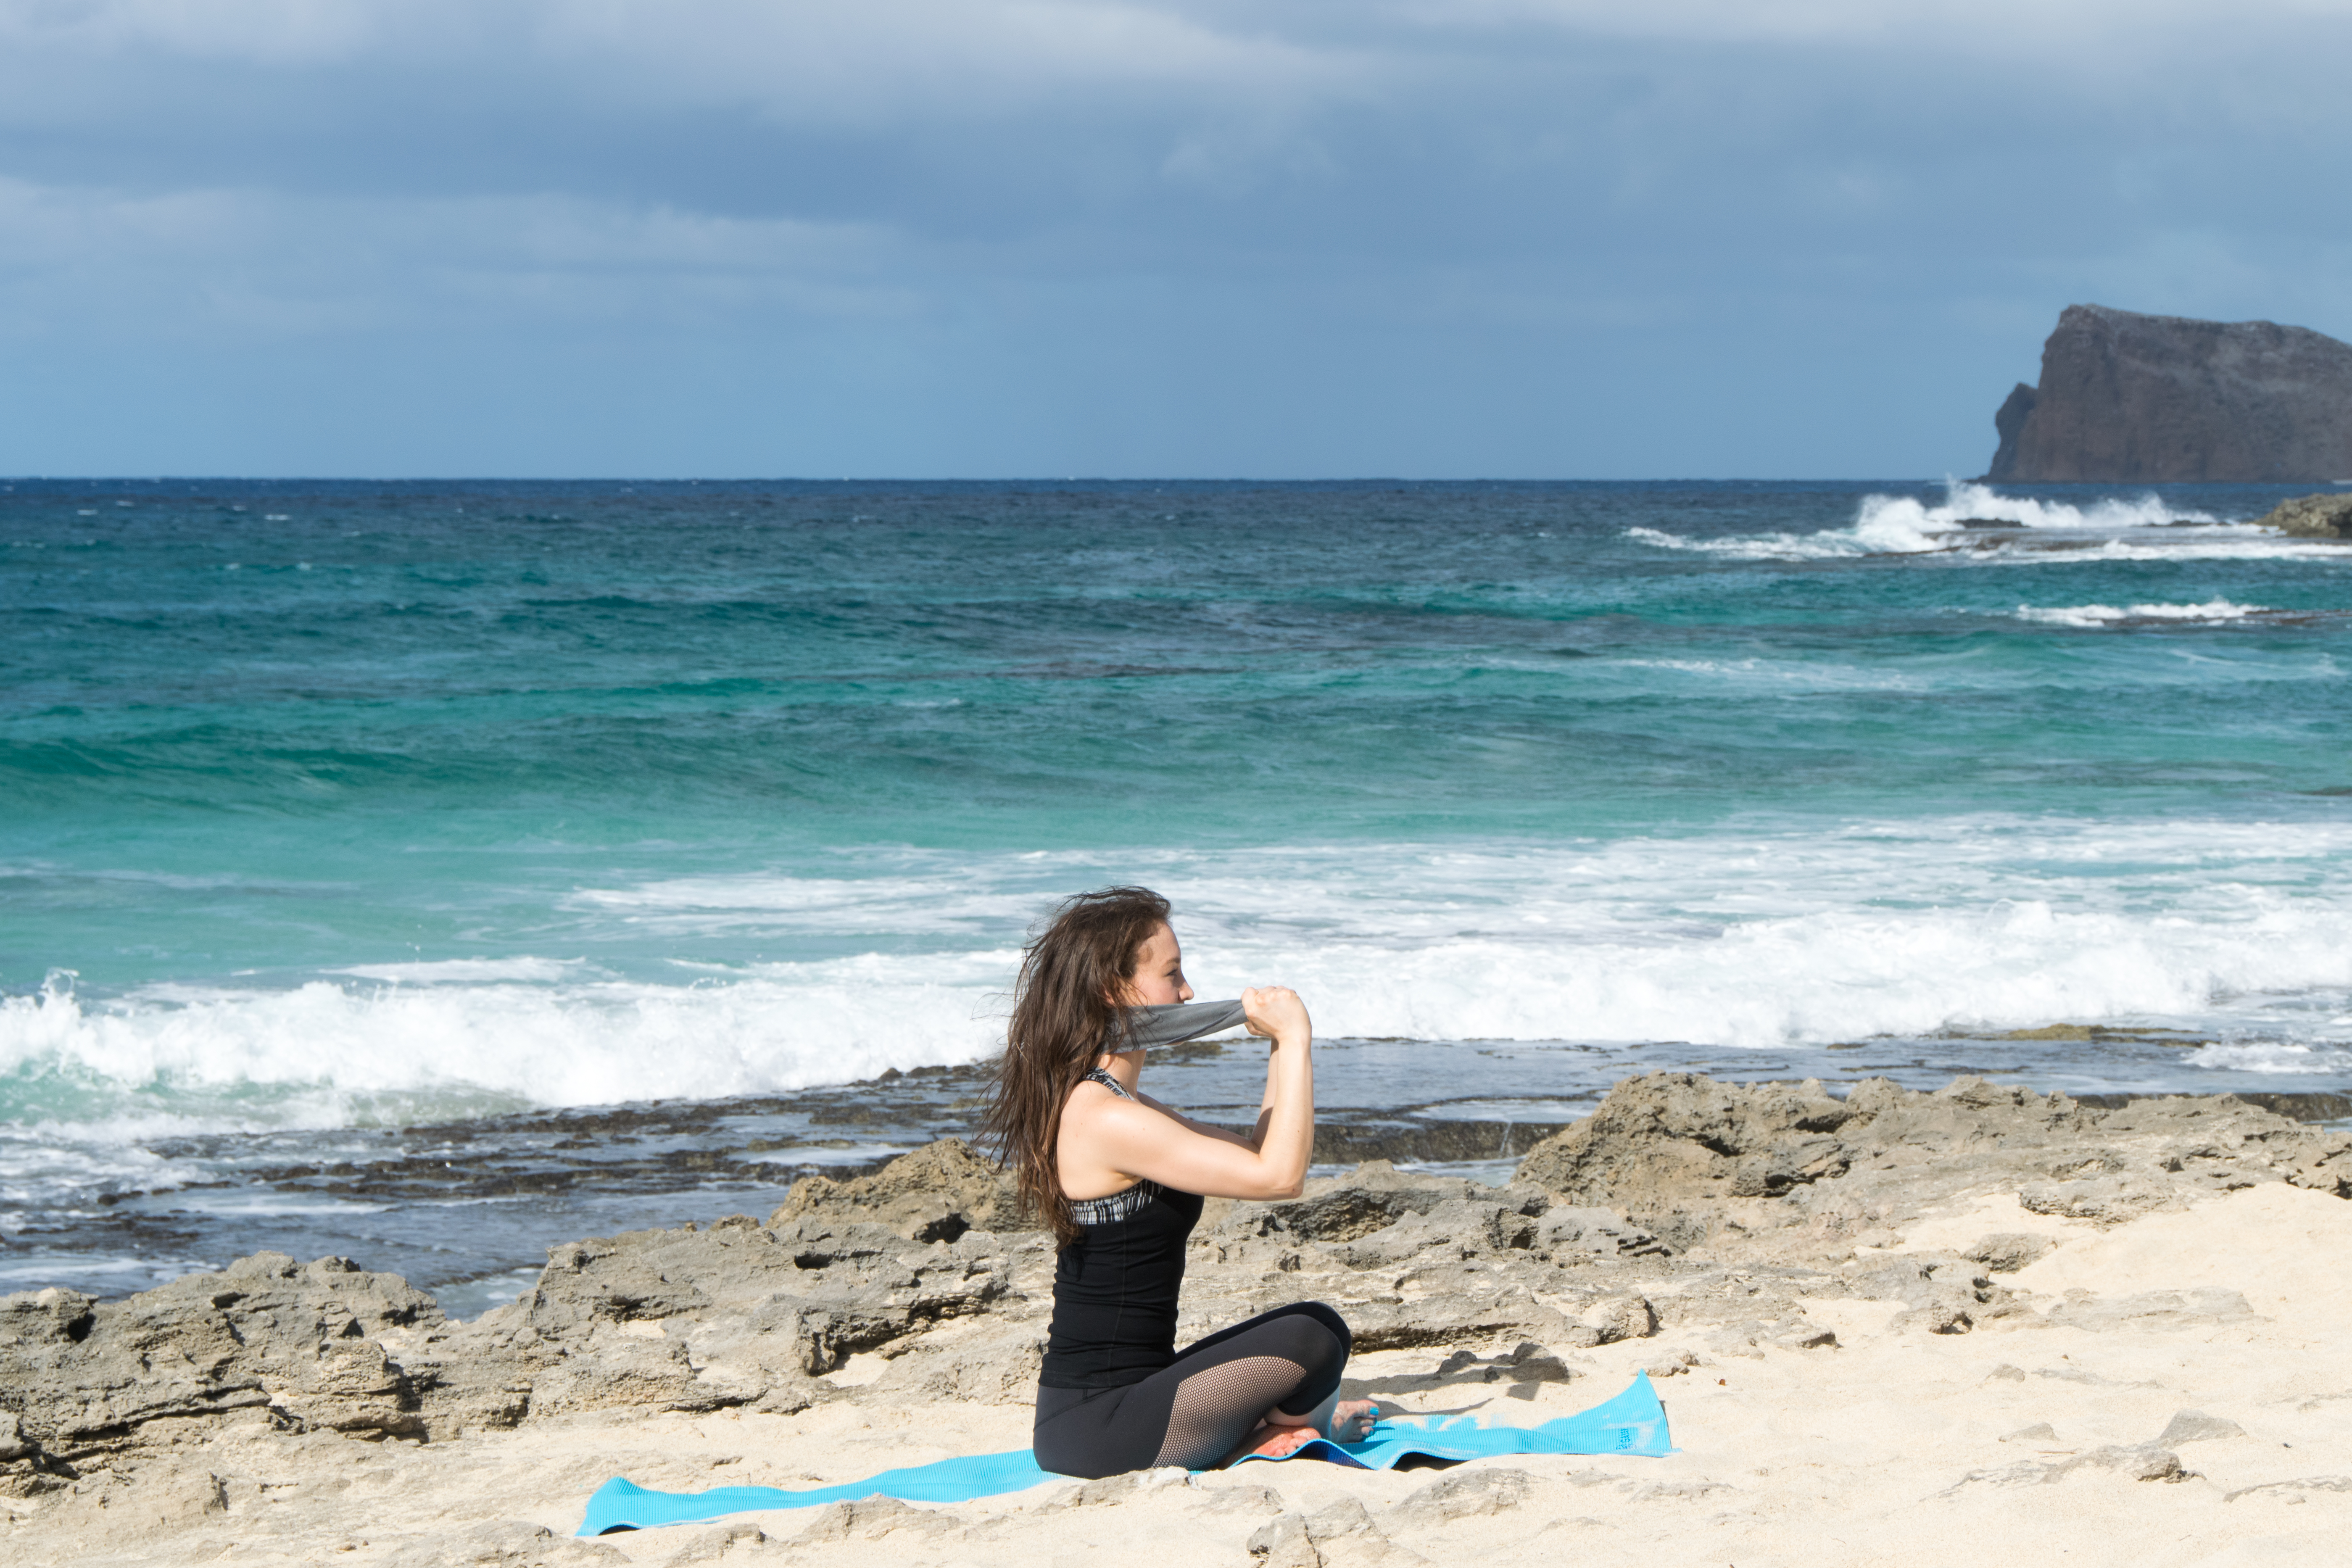
    4 » Towel Tilts Mobility Exercise
    Daily Neck Stretches To Relieve Pain » From the Infinite Embers blog

    Daily Neck Stretches To Relieve Pain » From the Infinite Embers blog

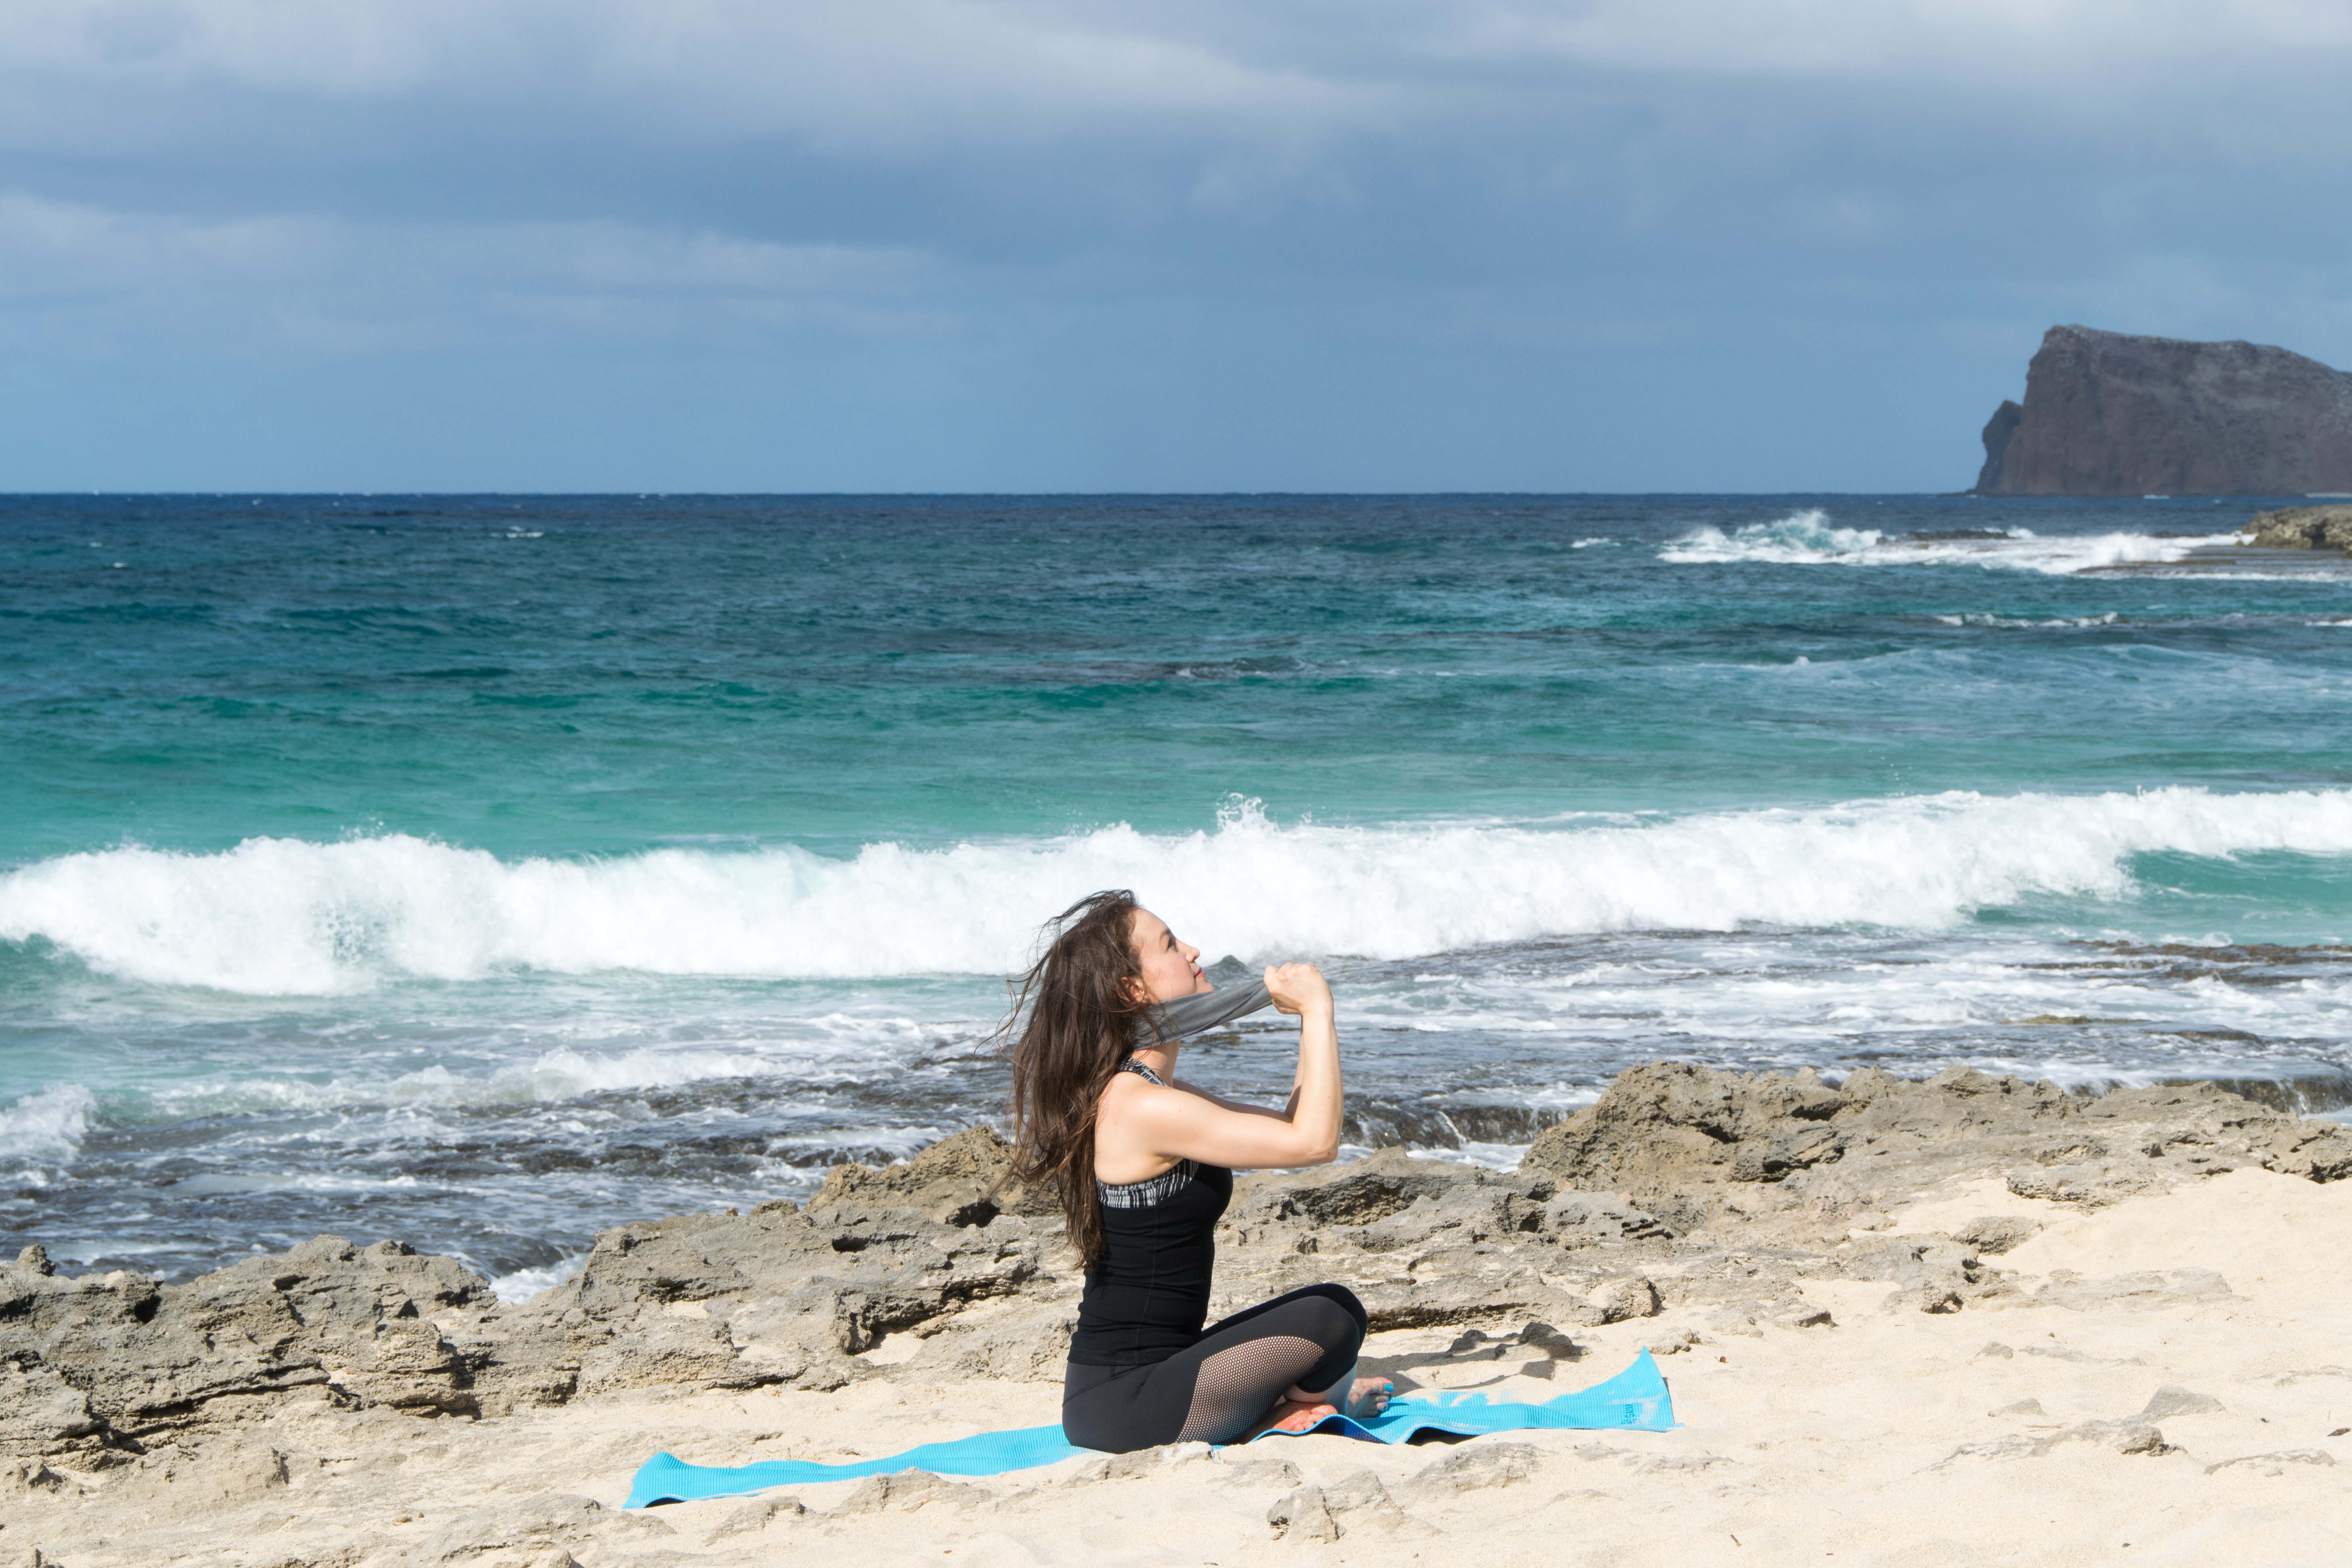
    • Get a hand towel.
    • Place the towel behind your neck at the base of your skull.
    • Grab one end of the towel in each hand. Hold your hands up in line with your jaw.
    • Sit or stand up tall and position your head and neck straight ahead.
    • Slightly pull the ends of the towel forward to increase pressure on the neck from the towel.
    • Keep the towel pulled taut as you tilt your head directly backwards. Only go as far back as you comfortably can.
    • Move your head up and down while maintaining the pull on the towel for 30 seconds.
    • This move helps your neck return to its natural curvature. Anyone here have a smart phone? Tech neck straightens out the bones in our neck and puts undue pressure on our joints as we jut our heads forward and down like cavemen. This will help you be less caveman-y and get those joints back to working properly.

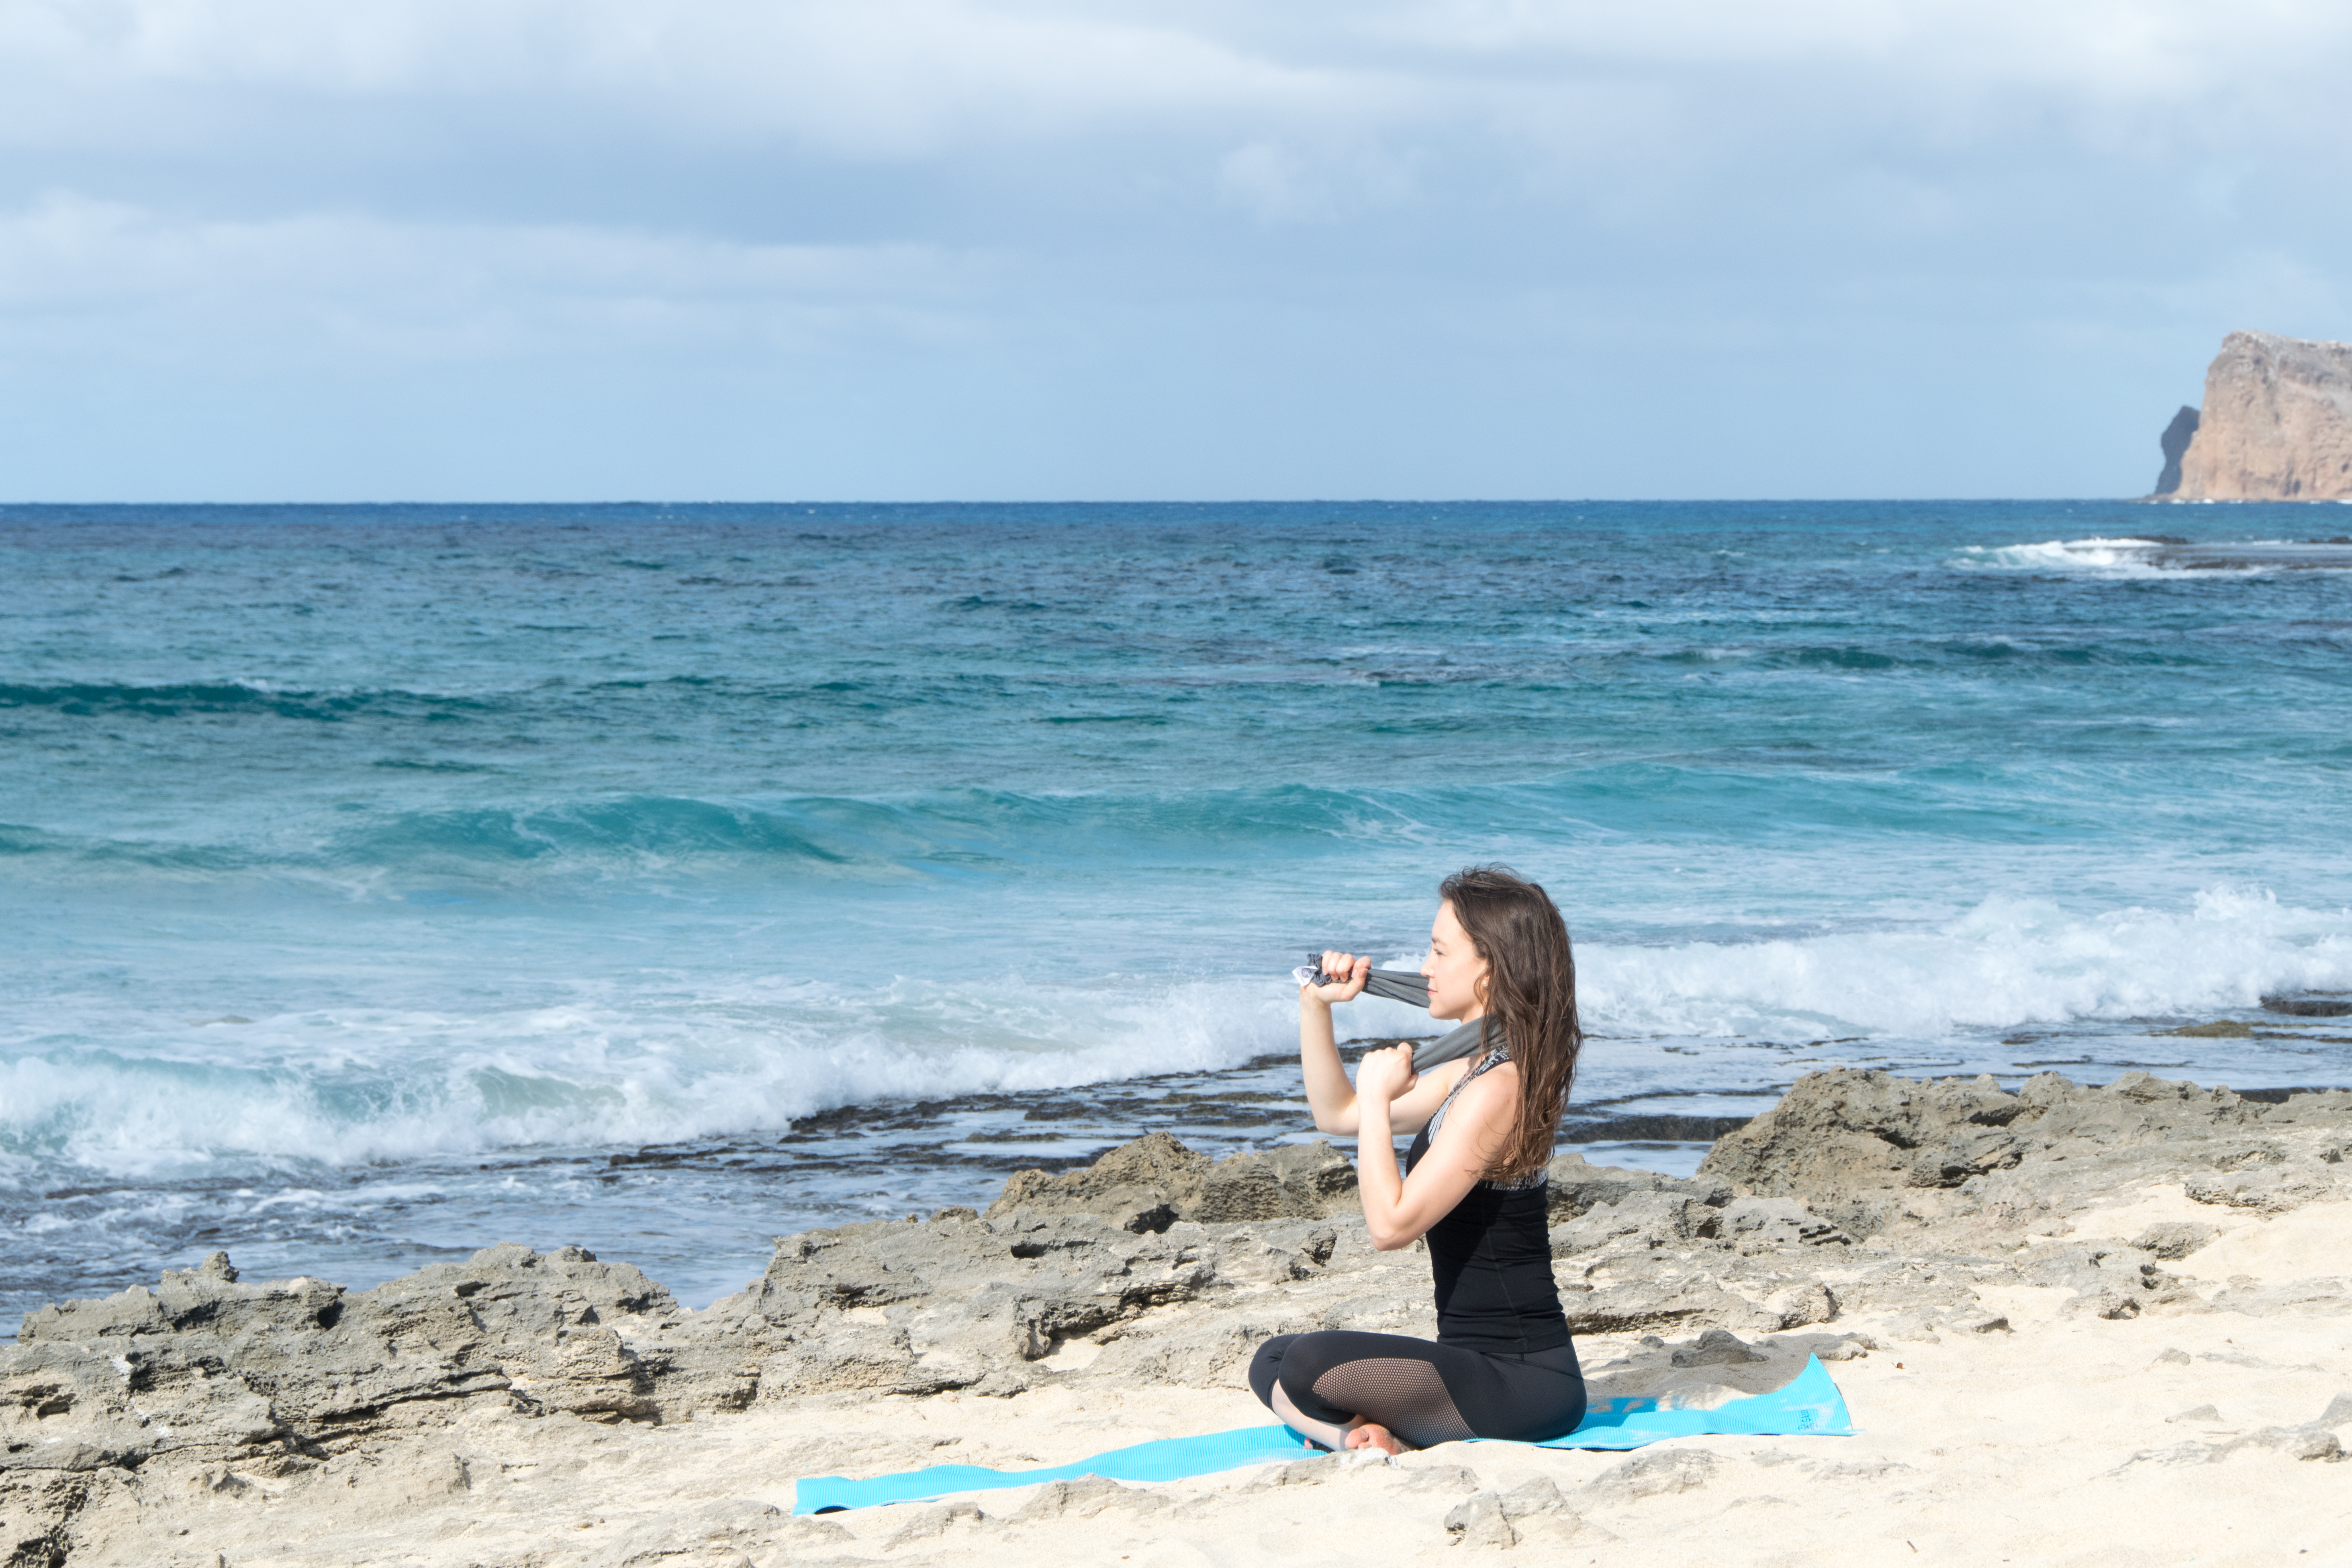
    5 » Towel Rotations Mobility Exercise
    Daily Neck Stretches To Relieve Pain » From the Infinite Embers blog

    Daily Neck Stretches To Relieve Pain » From the Infinite Embers blog

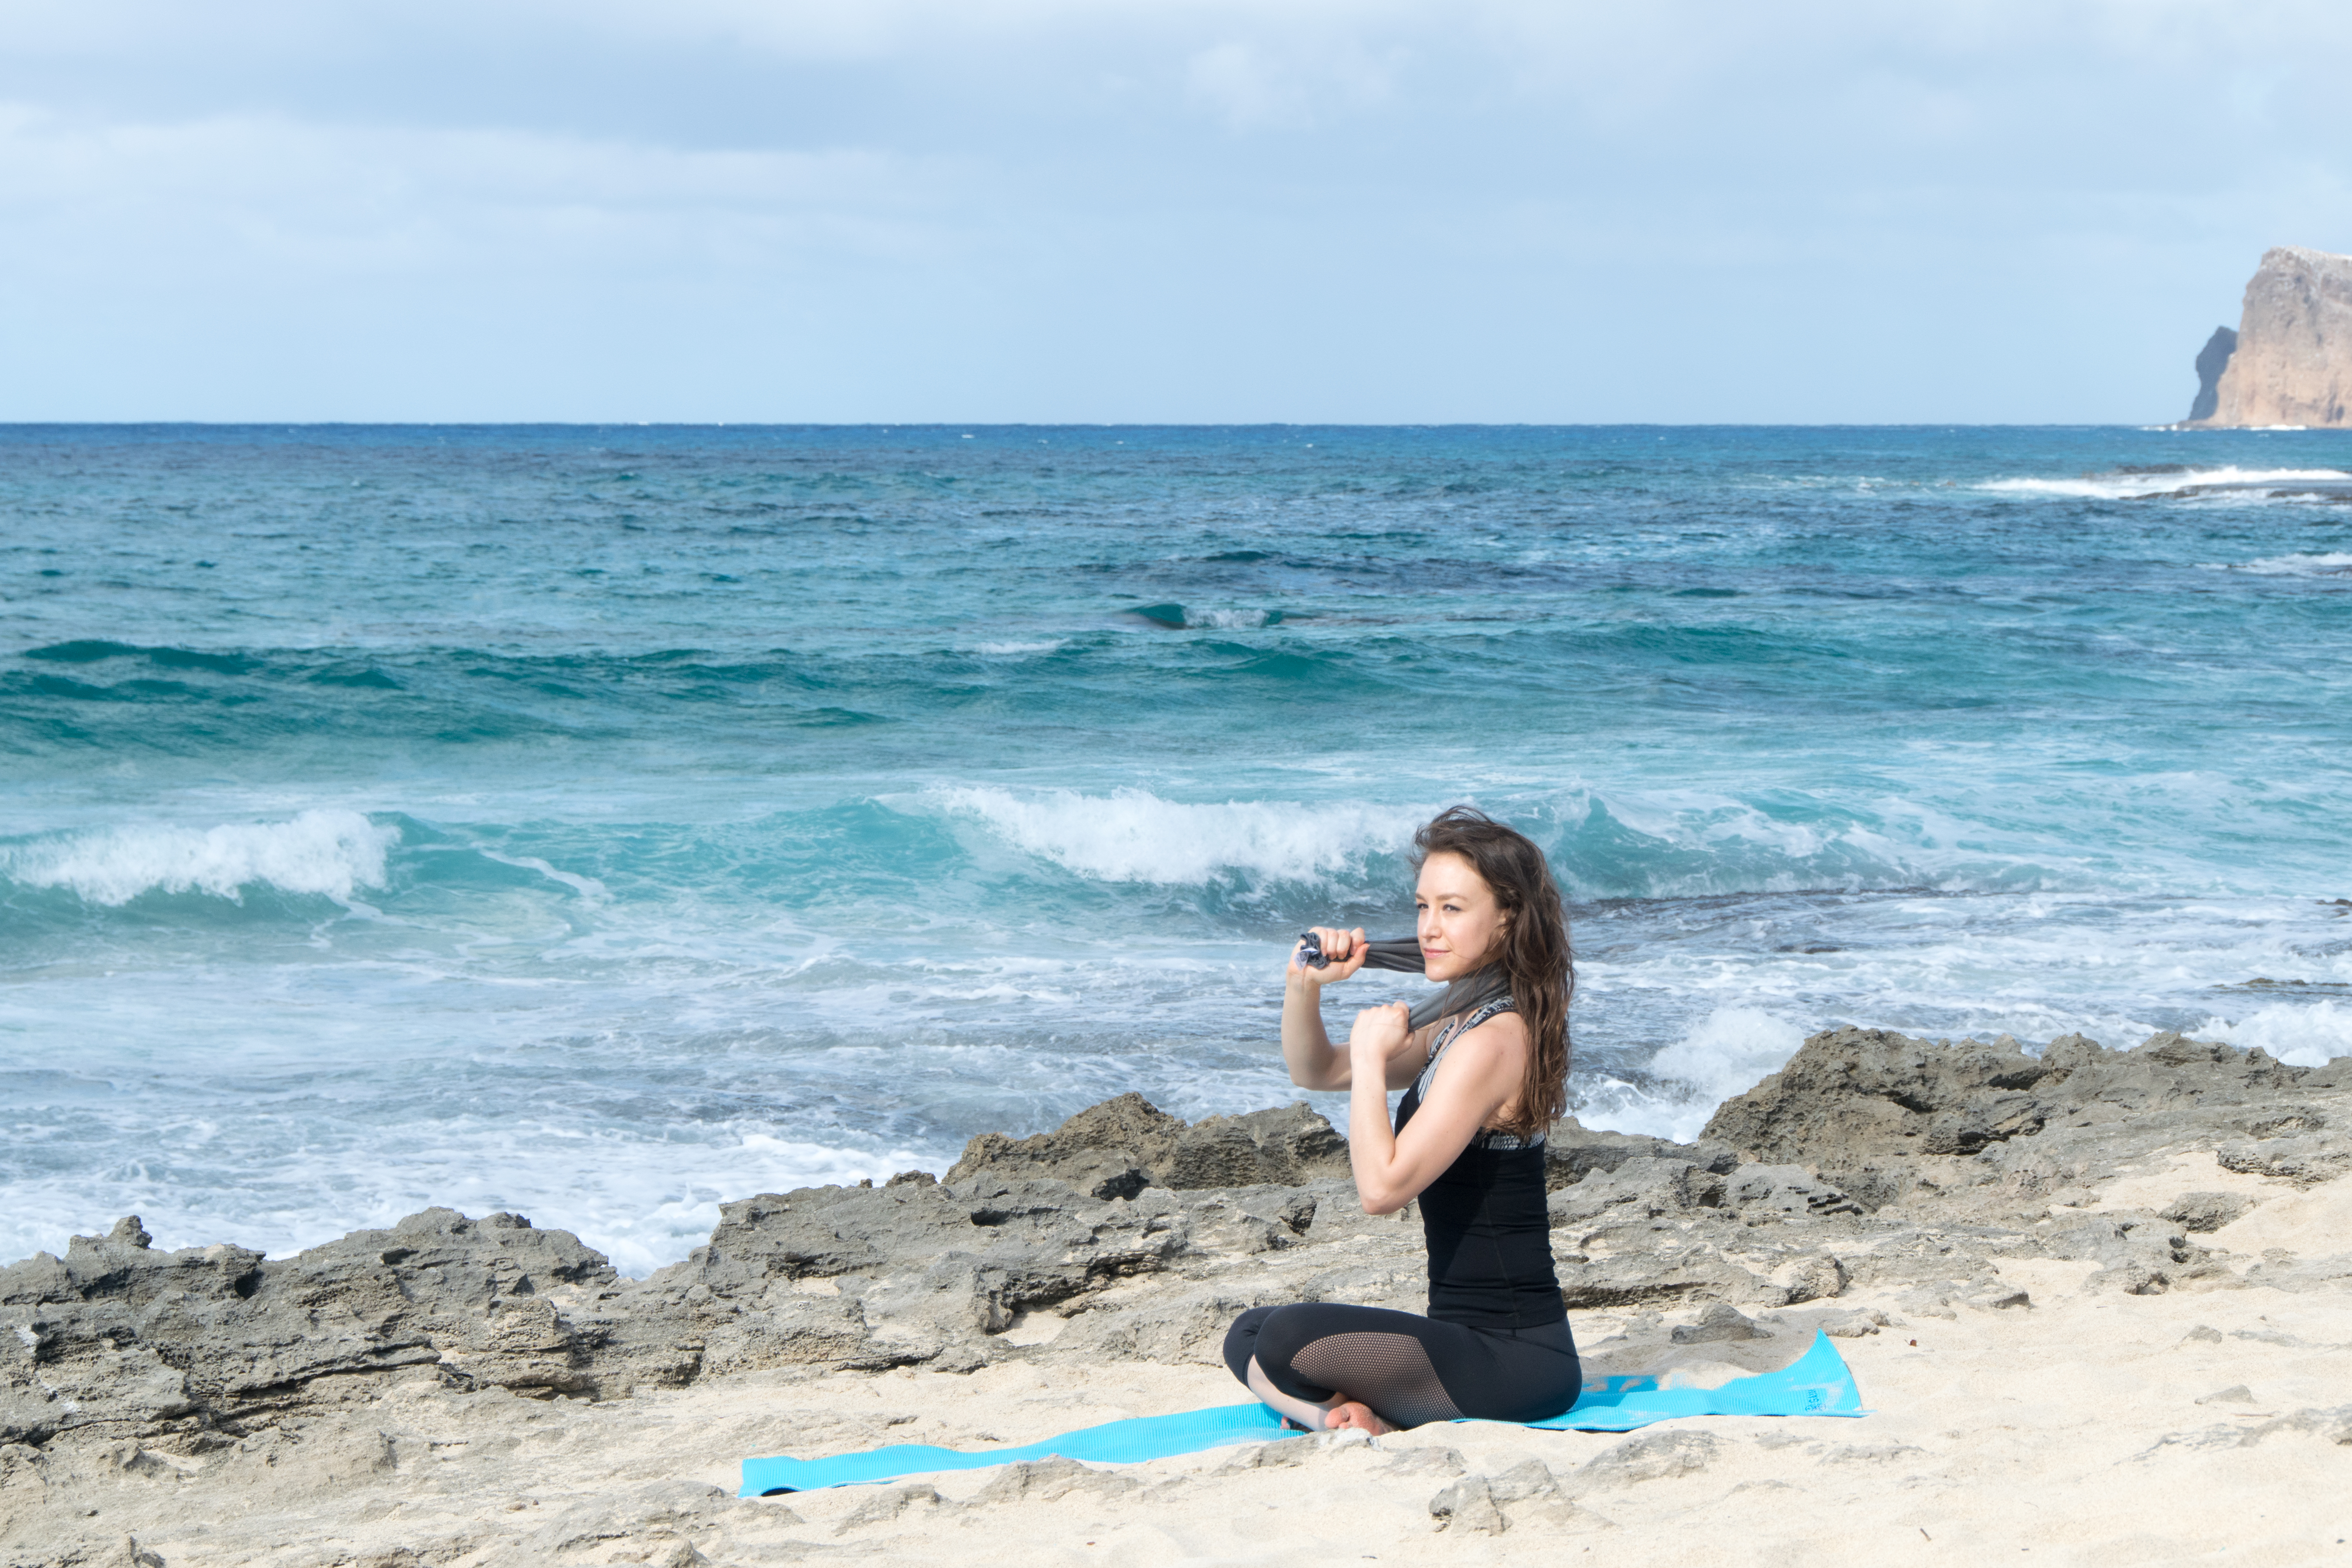
    • Keep your towel behind your neck.
    • Stay pulling the towel taut with both hands holding each end.
    • Sit or stand up tall and position your head and neck straight ahead.
    • Lift your R hand up in line with your jaw. Lower your L hand to hover just above your chest. So your R hand pulls forward, while your L hand pulls forward and down at an angle.
    • Use your R hand to pull the towel towards the L so you turn your head to look to the side. Keep pulling forward with the R hand and forward and down with the L.
    • Bring your head back to straight ahead and repeat.
    • Continue turning your head to the L while maintaining the pull on the towel for 30 seconds.
    • Again, this helps your vertebrae move correctly and glide smoothly as you turn your head.

    » Repeat on the Other Side

    One last thing I want to note: it’s not really the best thing for your neck to roll your head around in circles. I do it all the time, because I think it will help, but rolling your head backwards without a towel to guide your vertebrae can actually just put a lot of pressure on your spine and aggravate it further. Thankfully these stretches stretch the muscles all the way around your neck without that extra irritation!

    Alright, after all this talk about muscle tension, I’m off to unwind with a hot bath! (I maybe went a little crazy with the push-ups in my workout today?) I hope you’re all having a lovely week so far. My husband is in our old home city of San Diego for the month for work so I’m in Hawaii alone, which has been a little rough. But I also always try to remember to cherish any time I get to just be with myself. Which is another good reason for the bath – it’s nice to spoil yourself! I feel like you are probably overdue to do the same, so remember to carve out some time for yourself this week!
    Do you have neck pain? What neck stretches or other tips and treatments have helped you find relief? Please share with me in the Comments!

    xo,
    Amy

  • Why You Should Use A Standing Desk

    Why You Should Use A Standing Desk » Infinite Embers blog

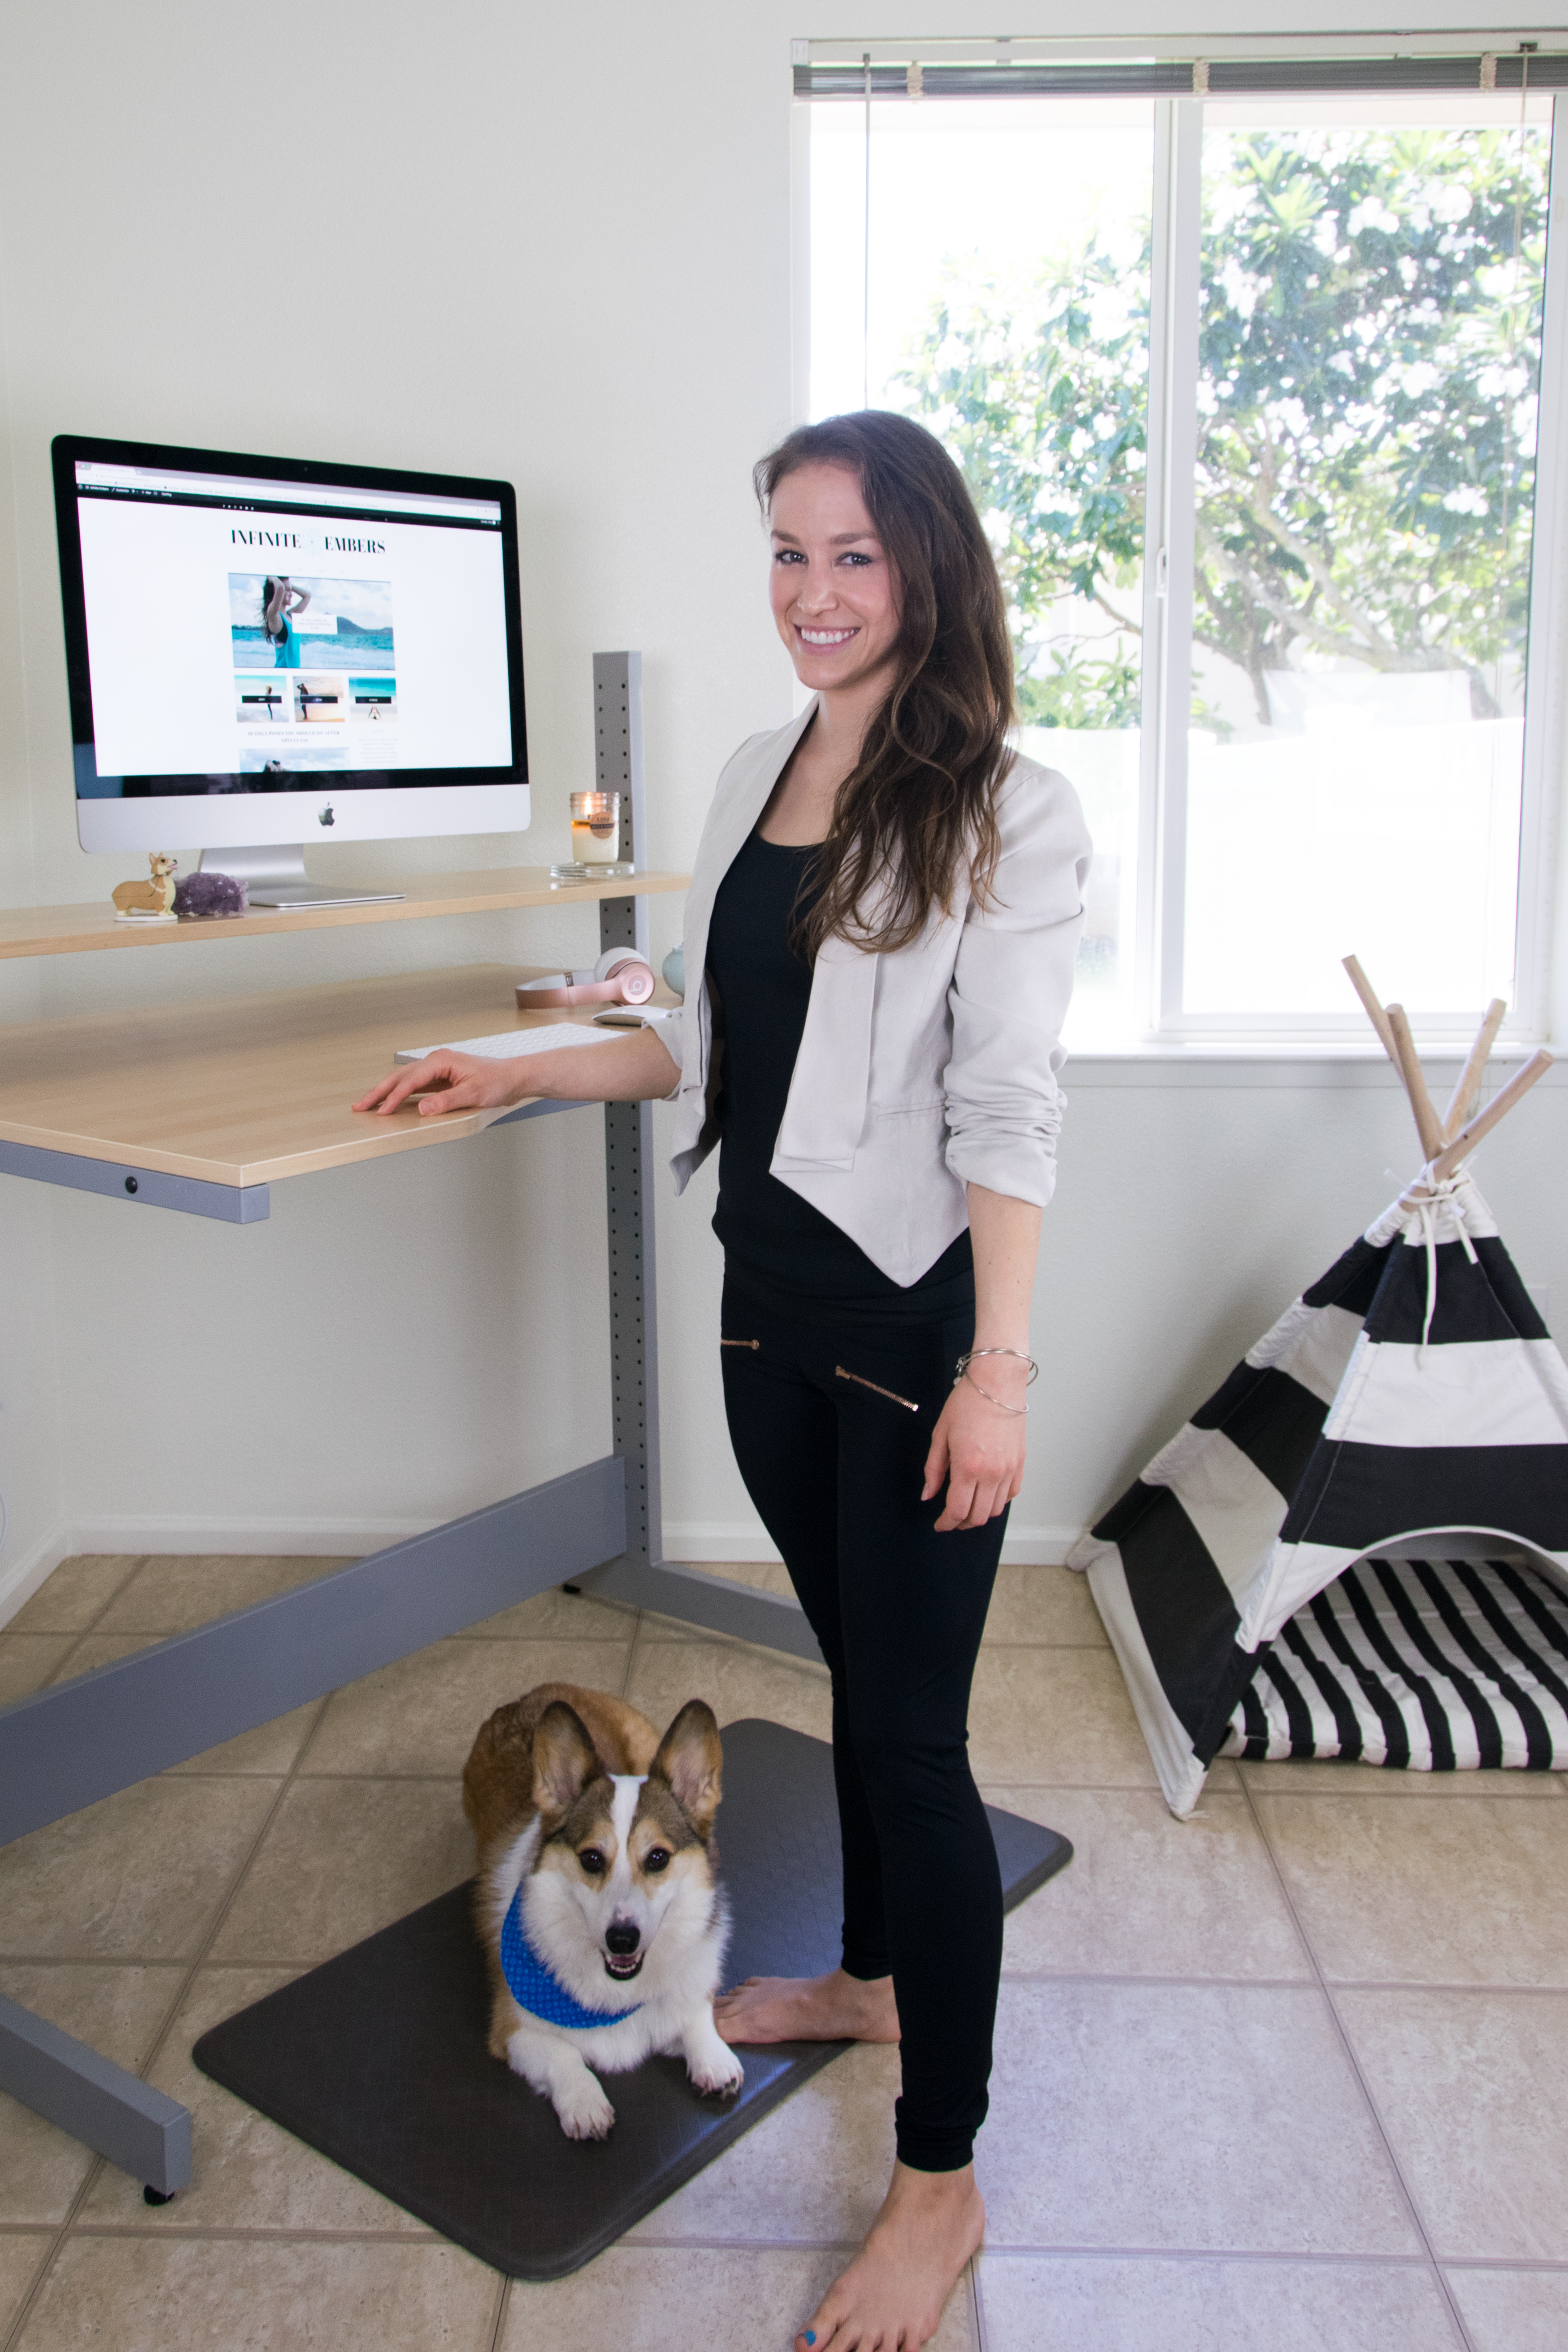
    » Corgi decided he had to be in the photo, too. (He loves the camera because he knows he can get treats for posing.) «

    My standing desk is one of my favorite things.

    I’m pretty much in love with it, to be honest. I’m at my standing desk the majority of the day, and right here, in this little corner of my living room, is where I make this blog happen. So that makes it extra special for me.

    Granted, I’m not exactly in love with the specific design of the desk I have – it’s definitely more utilitarian than chic. I got it brand-new off Craigslist back in 2014 for super cheap, but I’m thinking it’s due for a makeover. I want to paint it all black so it actually matches our home’s aesthetic (hint, hint, Matt – haha).

    But it’s hard to hate on my standing desk because it has helped me completely transform my posture, and, in turn, helped me recover from a horrible neck injury. So I really do love it.

    I have the worst posture when sitting.

    Picture me just curled over the keyboard of my desk, cranking my neck up, feet up on the chair seat, while I’m sliding down and twisting to the side and leaning to the left. This is definitely an obscure reference, but I used to sit like L from the Death Note graphic novels. Except worse? (Yes I’m a closet nerd.)

    But who actually sits in a chair at their desk with perfect posture? And even if you do…

    Sitting is really bad for your body’s health.

    Prolonged periods of inactivity (i.e. sitting for a long time without moving much) increases your risk of getting cancer, heart disease, and type 2 diabetes according to a study published by the Annals of Internal Medicine. It’s also “a risk factor for all-cause mortality,” according to a study from the Sydney School of Public Health, which means sitting just generally brings death closer to knocking on your door. And this is independent of any additional physical activity you might do the rest of your day. That means you can’t undo the harm by working out more later (but you should obviously still work out).

    All this information gained a lot of media attention around the same time I developed a chronic neck injury. Dr. James Levine, director of the Mayo Clinic-Arizona State University Obesity Solutions Initiative and inventor of the treadmill desk, even declared that “sitting is the new smoking.”

    Now, that’s maybe a bit extreme. It’s a powerful image – doesn’t that just terrify you? – but they’re not really the same thing. You should never smoke. Even one cigarette can do a lot of harm. But you’re not going to die because you have to take a super long flight or, you know, go to school or work. Sitting is an unavoidable part of our lives in many respects, and while it’s not great for you, it’s just about finding balance. The media loves to make stories extreme. So don’t freak out.

    In my opinion, the worst part about sitting is how horrible your posture becomes.

    If you can’t avoid sitting, at least make your mom happy and try to sit up straight. All of the rounding forward I did during my 10+ hour long days chained to a desk when I worked in TV destroyed neck. My muscles were completely seized up and I could barely turn my head.

    We’re all kind of set up for failure in the sitting department. We’re forced to sit through school, then at home for homework, then at desks for work. You can’t adjust most desks’ height, so they’re rarely at the correct angle for your arms. Plus, it takes a lot of core and back strength to sit up well, which can get exhausting.

    I tried getting a large exercise ball to use as a chair instead, and I found that it did force me to have better posture. But I didn’t feel super comfortable, and I was still sitting. As I became obsessed with trying to heal the unbearable pain and immobility in my neck, I made it my mission to live as healthfully as possible.

    So when I left the TV industry and moved to San Diego, I sold my desk from college and got this standing desk. And now I’ll never go back.

    Why You Should Use A Standing Desk » Infinite Embers blog

    I truly believe everyone should be using a standing desk. Why?

    The benefits to using a standing desk:

    • Improves posture
    • Strengthens supporting core muscles
    • Reduces risk of cancer
    • Reduces risk of obesity
    • Helps avoid shoulder and back pain
    • Helps blood sugar levels return to normal faster when standing after a meal

    » via Harvard Medical School «

    One thing to note: standing doesn’t necessarily burn significantly more calories than sitting. That should never be your reason to do anything, really, but just don’t expect your standing desk to be a weight-loss tool. I’ve got plenty of workouts for you if that’s what you’re looking for.

    I’ve been able to dramatically improve my posture by standing instead of sitting when I’m at my computer, which in turn has helped support my neck recovery. Plus I feel more energetic and more engaged as I work!

    How to transition to using a standing desk:

    1 » Buy a standing desk or convert your old one

    The easiest option is to just elevate your own desk by putting it on top of some stacks of old books, or maybe use these risers if you’d like it to look a bit nicer.

    Another awesome option is to get a desk converter for your computer to put on top of your desk. This gives you the option of sitting or standing.

    Your final option is obviously to buy a standing desk. This is the best affordable one I could find for you guys. If money isn’t as big of an issue and you’re looking for a sleeker option and a desk that adjusts from sitting to standing with just the press a button – then the Evodesk is what I’d buy. Or, do like I did and keep an eye on Craigslist and Facebook Marketplace for a deal!

    2 » Use an anti-fatigue mat

    Standing can be hard on your joints, so you want to give your feet some cushion when you’re at your desk. I love this anti-fatigue mat! Using a mat helps eliminate pressure that can lead to joint and muscle fatigue caused by standing for long periods of time. I actually prefer to double up and stand on two mats for even more cushion.

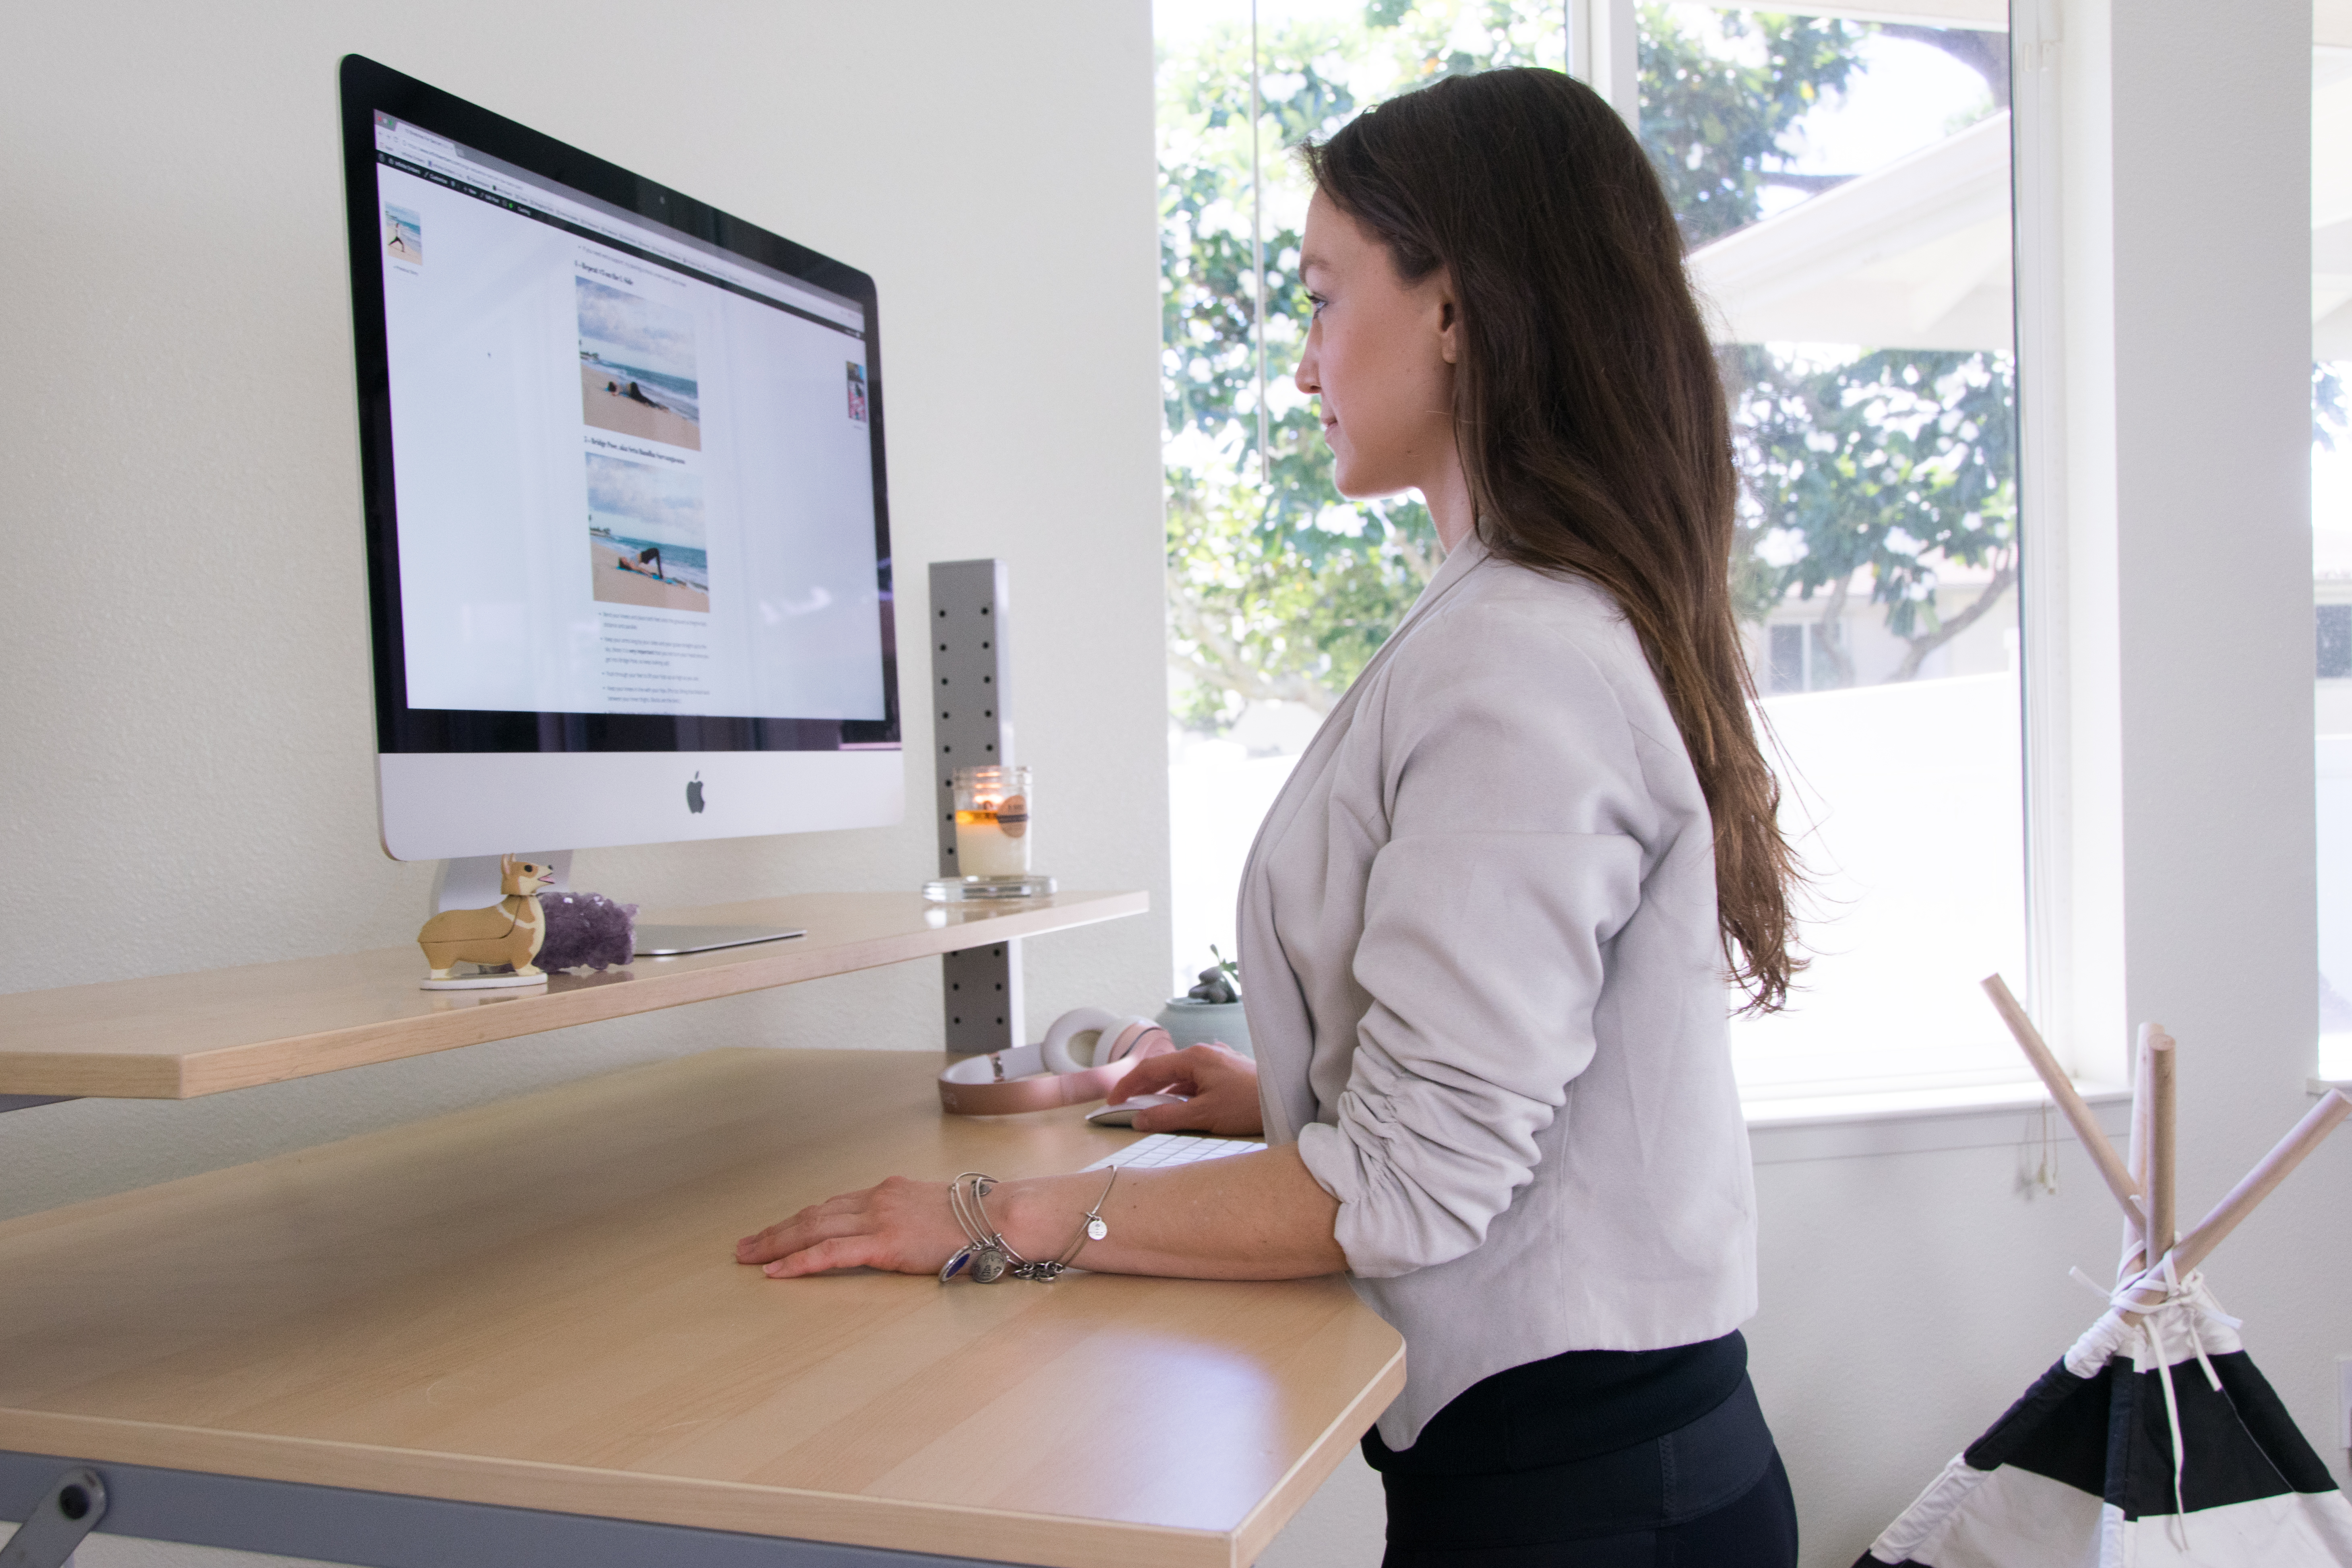
    3 » Adjust the height correctly for your keyboard and mouse

    This is key. Positioning the height of the desk so your keyboard and mouse are correct will help prevent you from rounding forward in the shoulders and upper back. When you rest your hands on your keyboard, your elbows should be bent to just slightly more than 90 degrees. This does make it difficult to share a desk, however, so you get to set it up as a special space just for you.

    Why You Should Use A Standing Desk » Infinite Embers blog

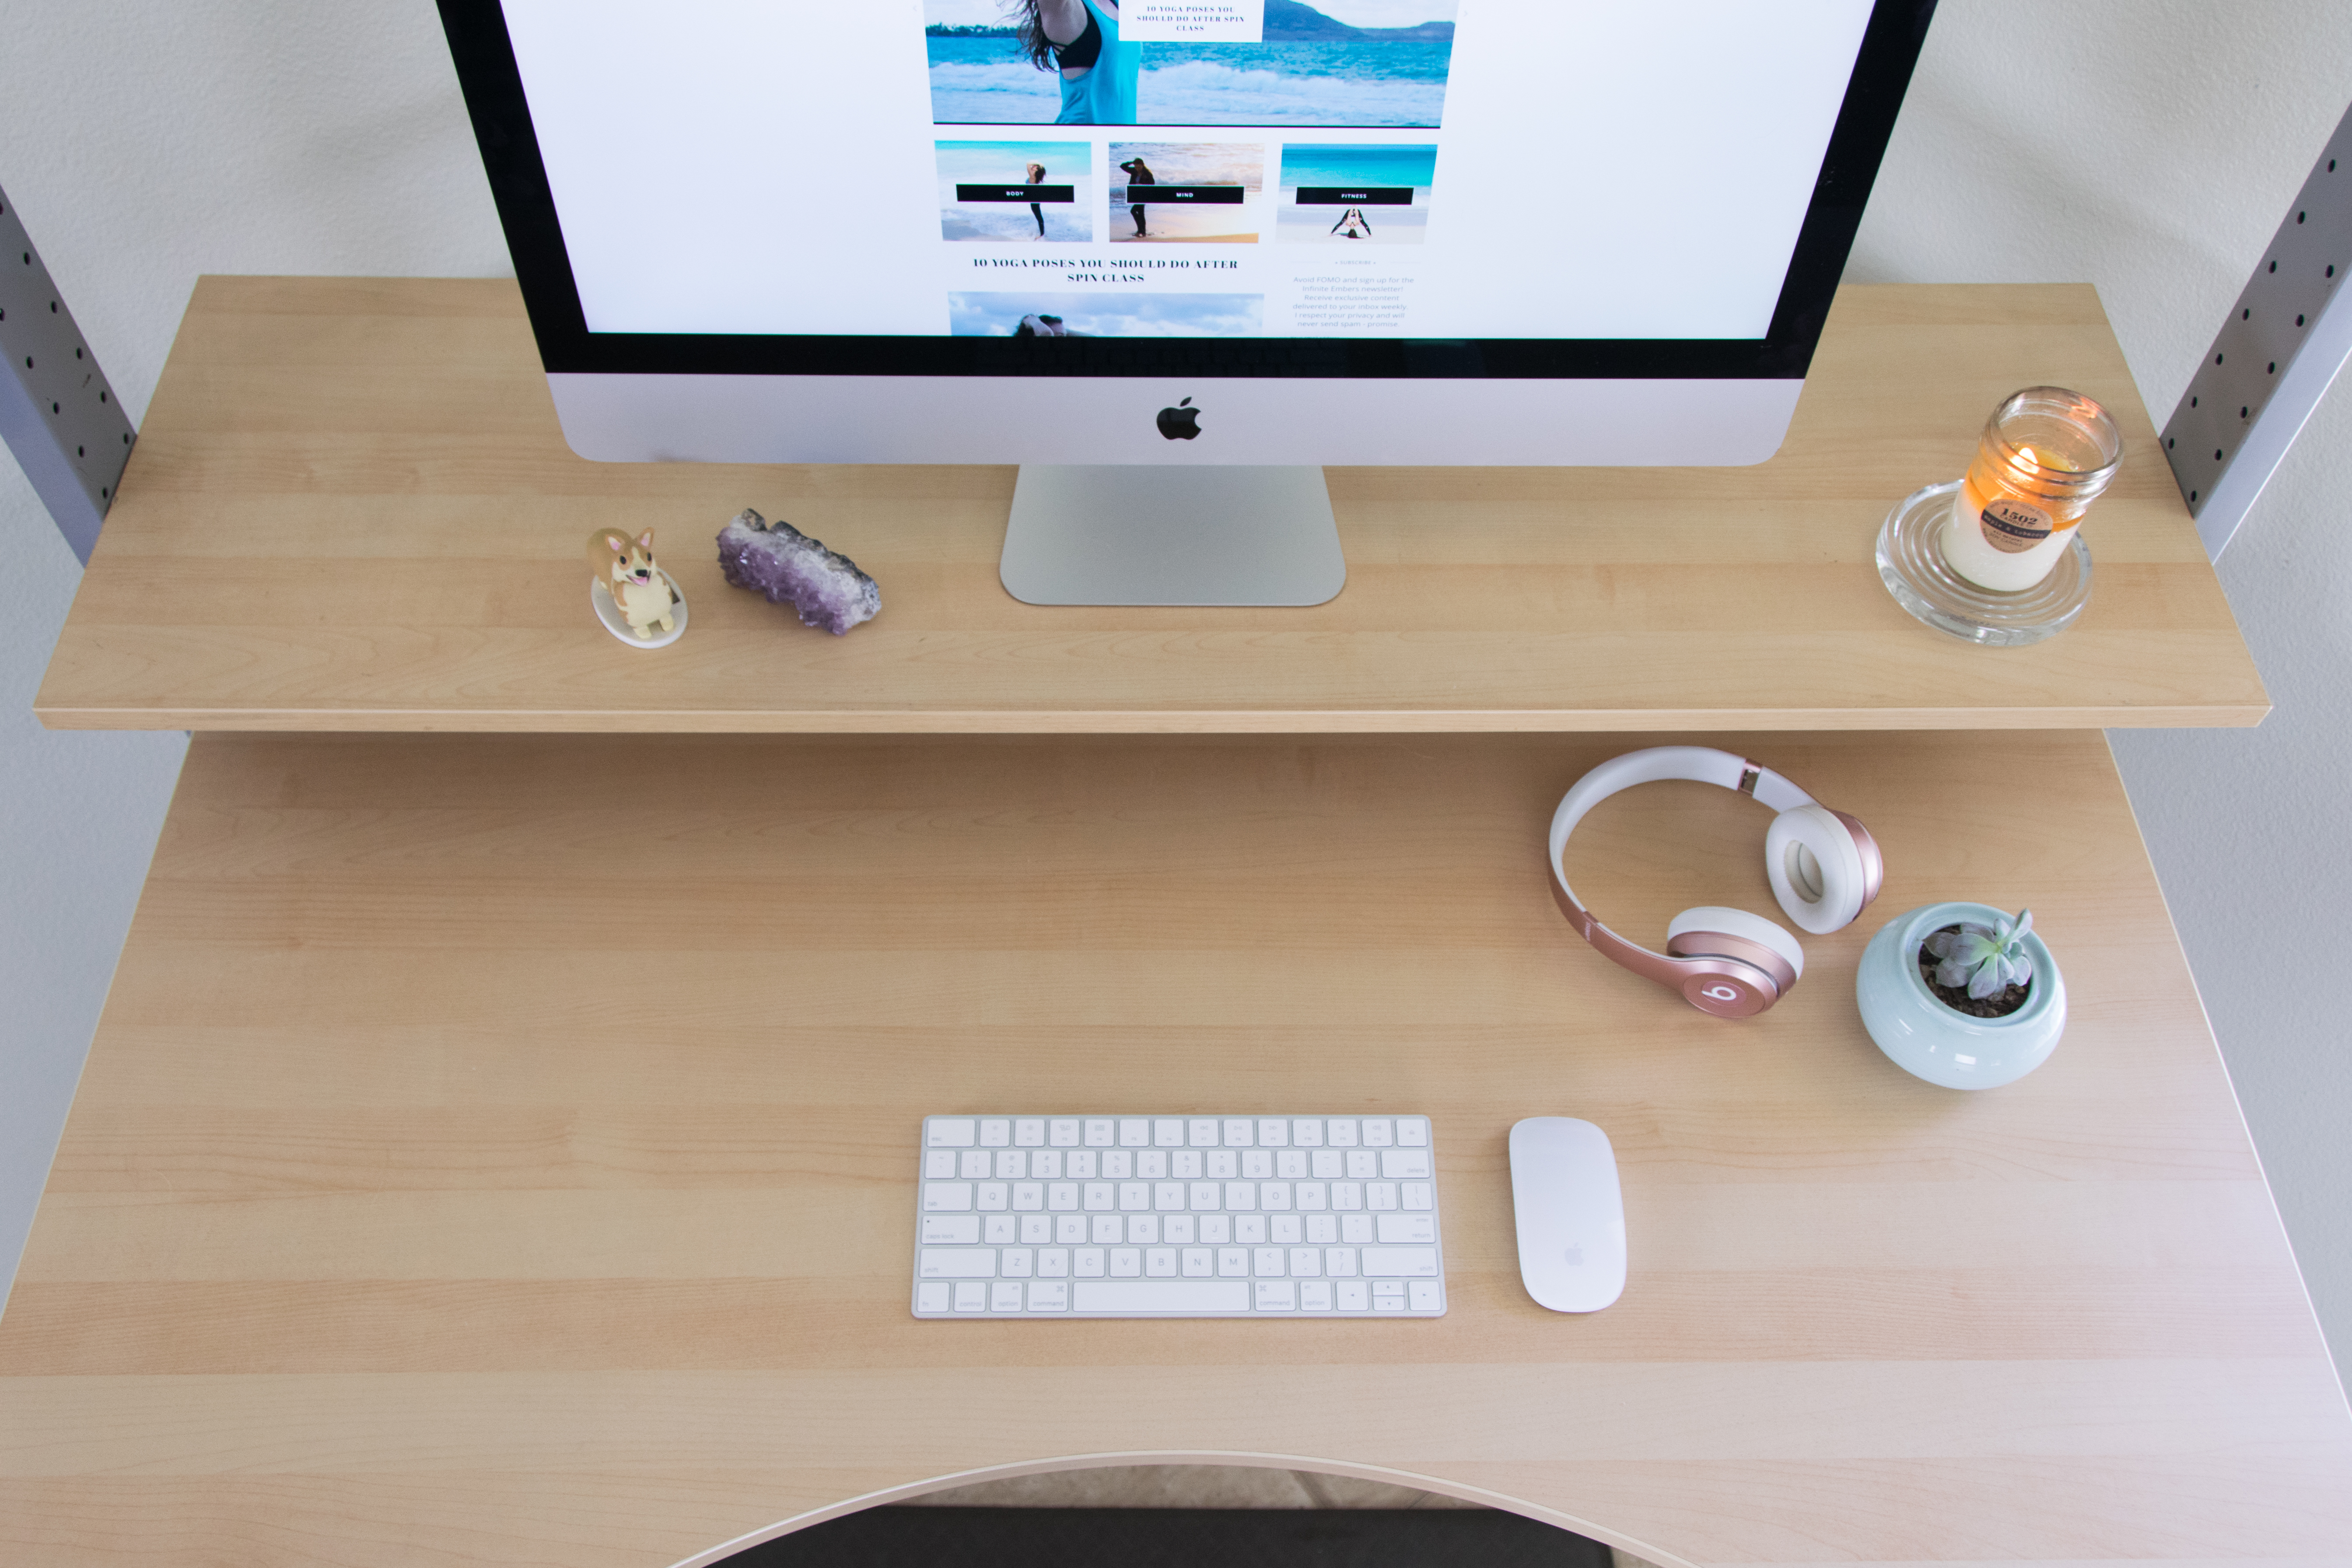
    » I love the handmade soy wax candles from 1502 Candle Co, a small business in San Diego – the maple + tabacco scent is my go-to! «

    4 » Make sure your computer is at eye level

    I prefer desks that have an additional level for your computer for this reason. Your computer should be elevated and not resting on the same level as your keyboard and mouse. If your desk doesn’t come with a shelf, I recommend getting a monitor stand. You want your eyes to be level with the top 1/3 of the screen when your head is in neutral alignment. The screen should also be 18-24″ away from your eyes. This will help you keep good posture and not jut your head forward, and will prevent you from straining your neck and eyes.

    Also! If you have a laptop, please buy yourself a separate keyboard, either wireless or not, so that you can elevate your laptop to the right height while keeping your arms in the correct position to type.

    5 » Maintain good posture

    This makes all the difference and will ensure you actually reap the benefits of your newfound standing ways. Stand with your absolute best posture, like you would in Tadasana if you practice yoga. Separate your feet so they’re hips’ distance and parallel. Your ears should be directly in line with your shoulders, shoulders in line with your hips, hips in line with your knees, knees in line with your ankles. Keep a soft bend in your knees and press through all four corners of your feet. Stand so that your spine is straight and in neutral, core slightly engaged. Arms are relaxed at your sides. Keep your gaze straight ahead so your head and neck are in neutral, shoulders relaxed. Breathe deeply and try not to lean your weight to one side.

    6 » Start slowly

    Begin by standing at your desk for only 20 min a day, then gradually increase the amount of time. Only stand for as long as feels comfortable. Your body will need time to adjust to working and holding itself differently from sitting to standing, so be patient. Eventually you’ll likely be able to stand and work at your desk for as long as you want without feeling fatigued!

    7 » Take frequent breaks

    Try to move around at least once every 30 minutes. I use this time cube to remind me when I need to take a break. I usually go refill my water or snuggle my corgi, because he’s almost always by my side. Just move around a little or sit down for a while if you need to rest.

    8 » Take care of your feet

    It’s obviously challenging on your body to be standing for long stretches of time, and your feet absorb most of the pressure. So give them some rehab when you’re done for your day. I also recommend elevating them above your heart if possible to help reduce any swelling or tension they might feel. Legs Up The Wall pose from yoga is an awesome way to unwind.

    How much do you sit in a day? Have you ever tried a standing desk? Share your thoughts with me in the Comments below!

    xo,

    Amy

    There are affiliate links in this post, all for stuff I genuinely love and recommend!

  • How to Become Confident

    How To Become Confident » Infinite Embers blog

    You are naturally confident.

    “What? No I’m not,” you might be thinking. I know, I get it – I used to think I was not naturally confident, either. I was horribly insecure and self-critical and just generally like a freaking nervous wreck when it came to interacting with other people.

    But here’s the thing: 

    Your natural state is one of confidence. All the insecurities that hold you back are actually just limiting thought patterns you developed somewhere along the road of your life.

    They’re not really part of you. And they’re total bullshit.

    I became less confident as I grew up and it stuck with me. But I started out confident, just like every other child – lack of confidence is something you learn, not something you are.

    Now, sure, some of us aren’t exactly set up for success, genetics-wise; certain personalities are more susceptible to the negative thought patterns that dim our confidence way down. Depression, anxiety, and insecurity are in a squad and love to tarnish your self-image. The way you were raised and the experiences you have also affect your confidence.

    But I have good news for ya:

    It’s super easy to get your confidence back.

    I’m not going to lie to you, though. It takes work. It takes dedication. And it takes time. But it’s totally something you’re capable of handling, so don’t sweat it (see Step 1).

    How To Become Confident » Infinite Embers blog

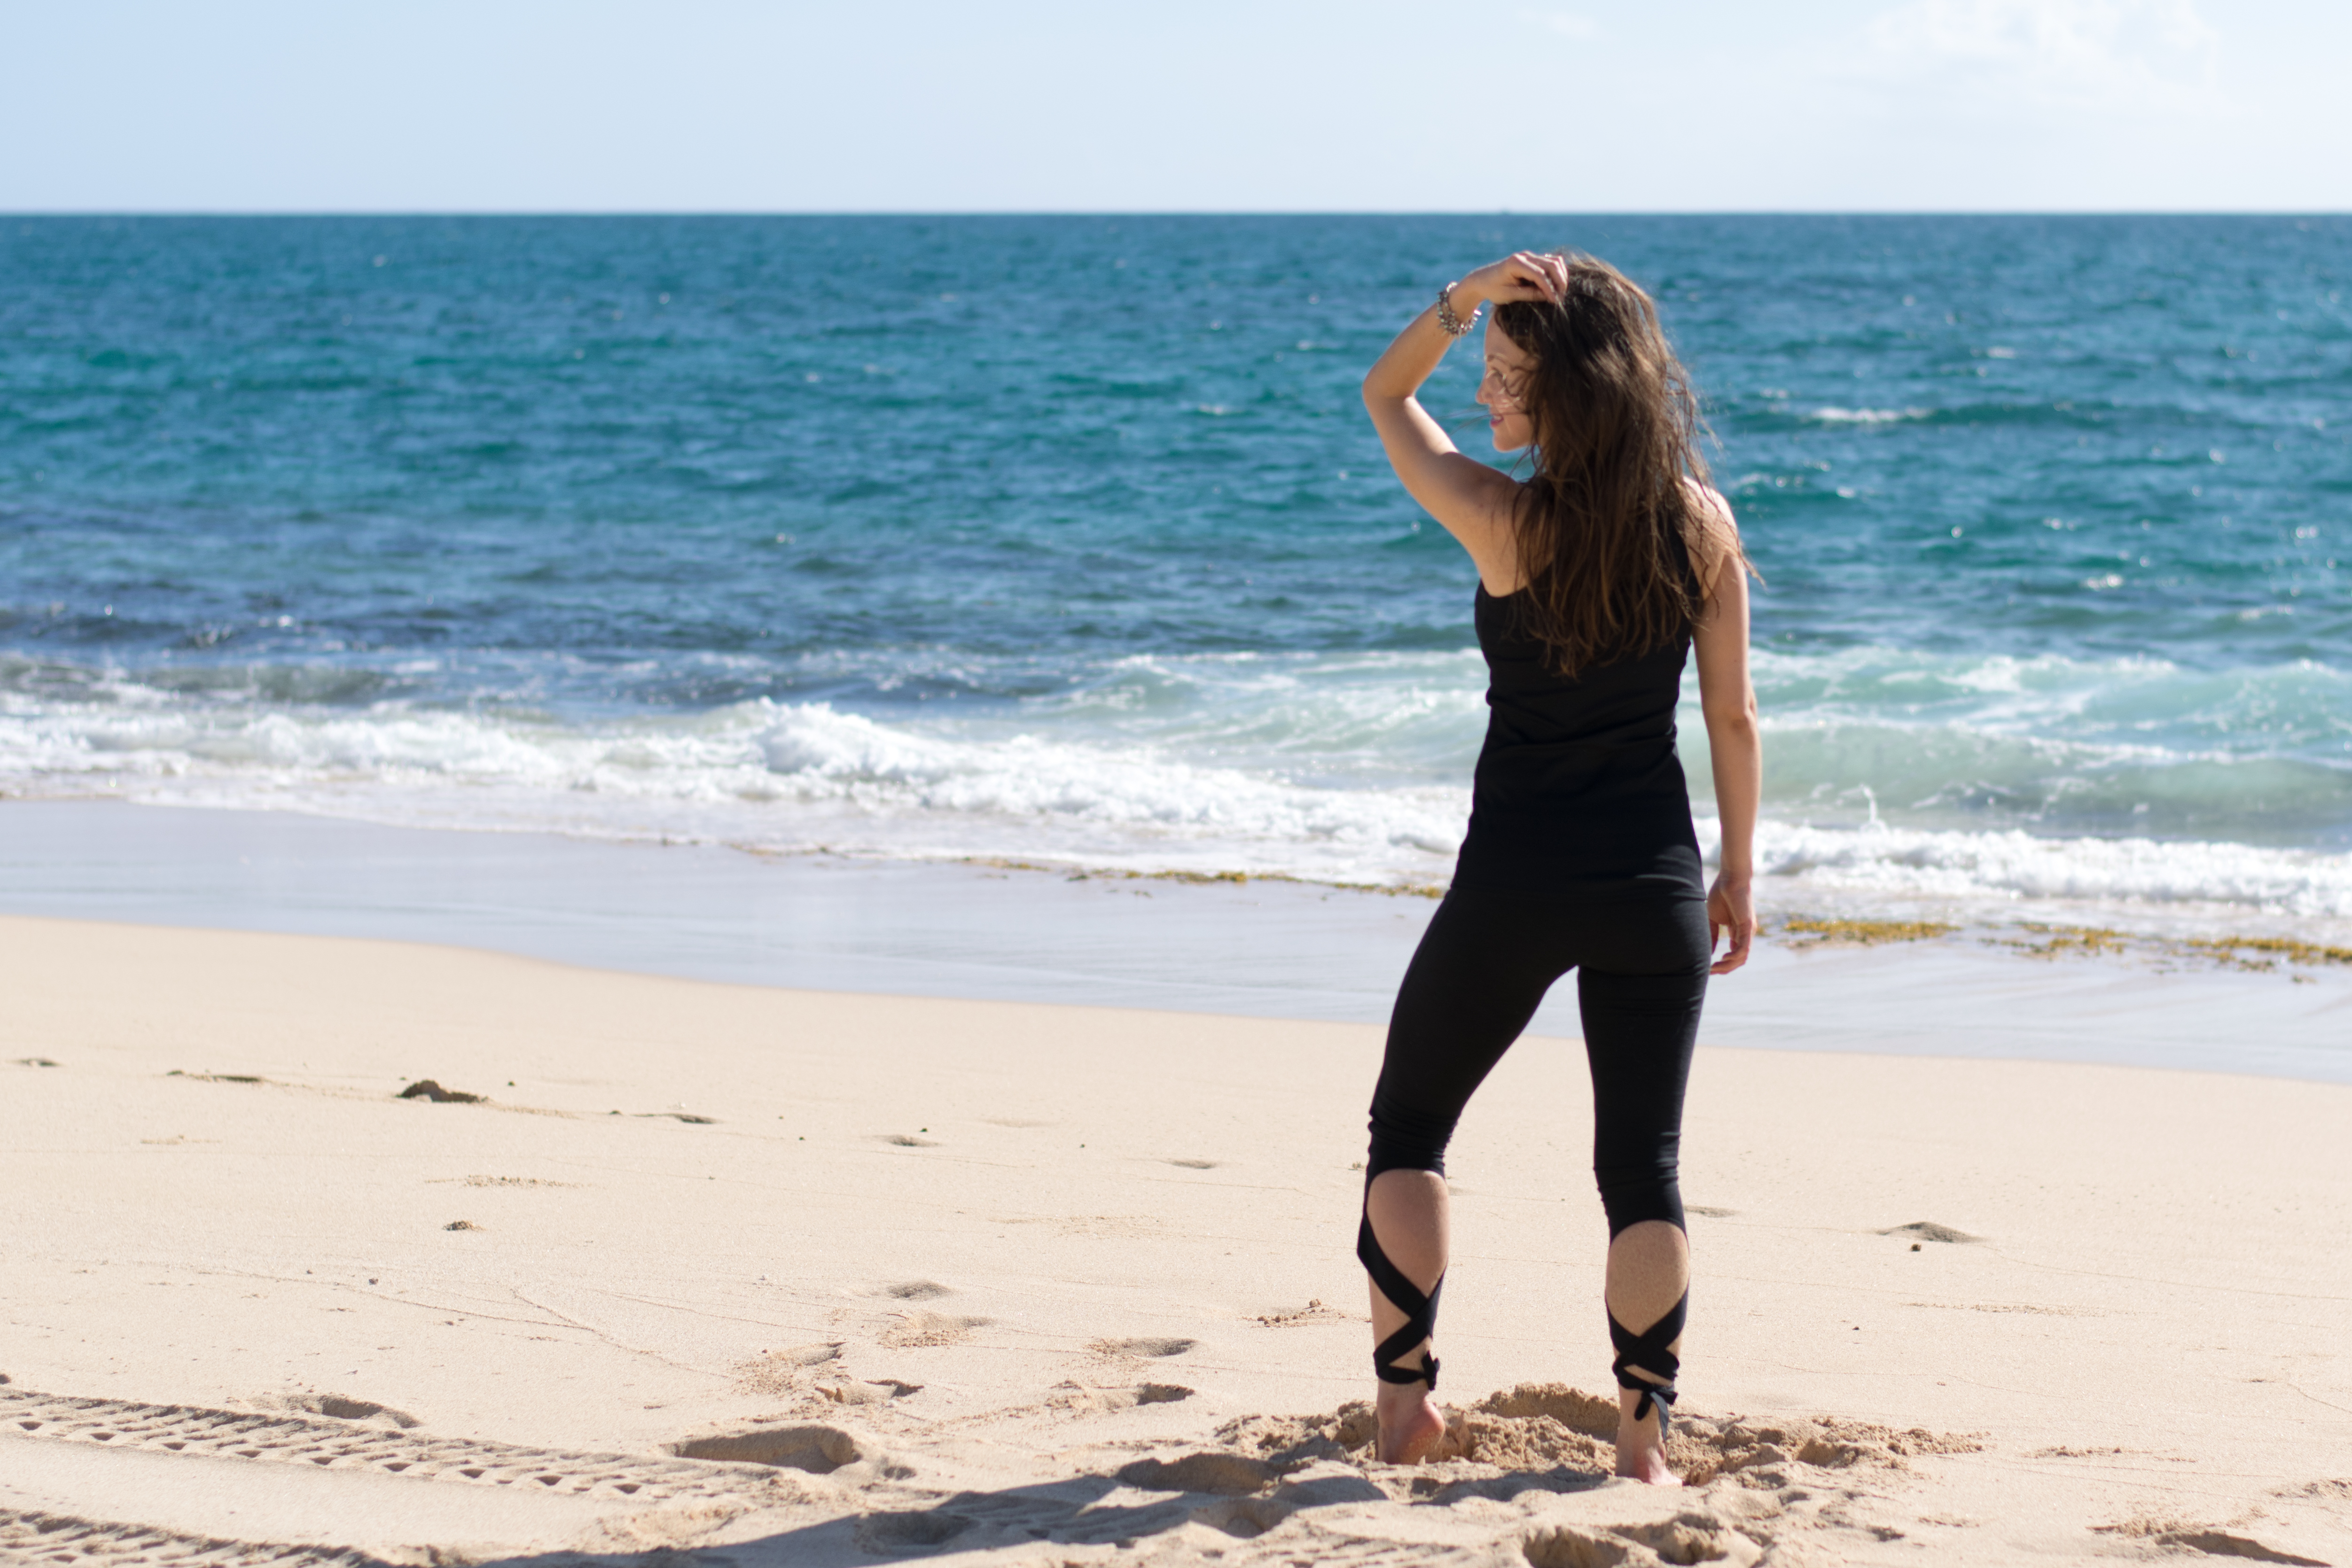
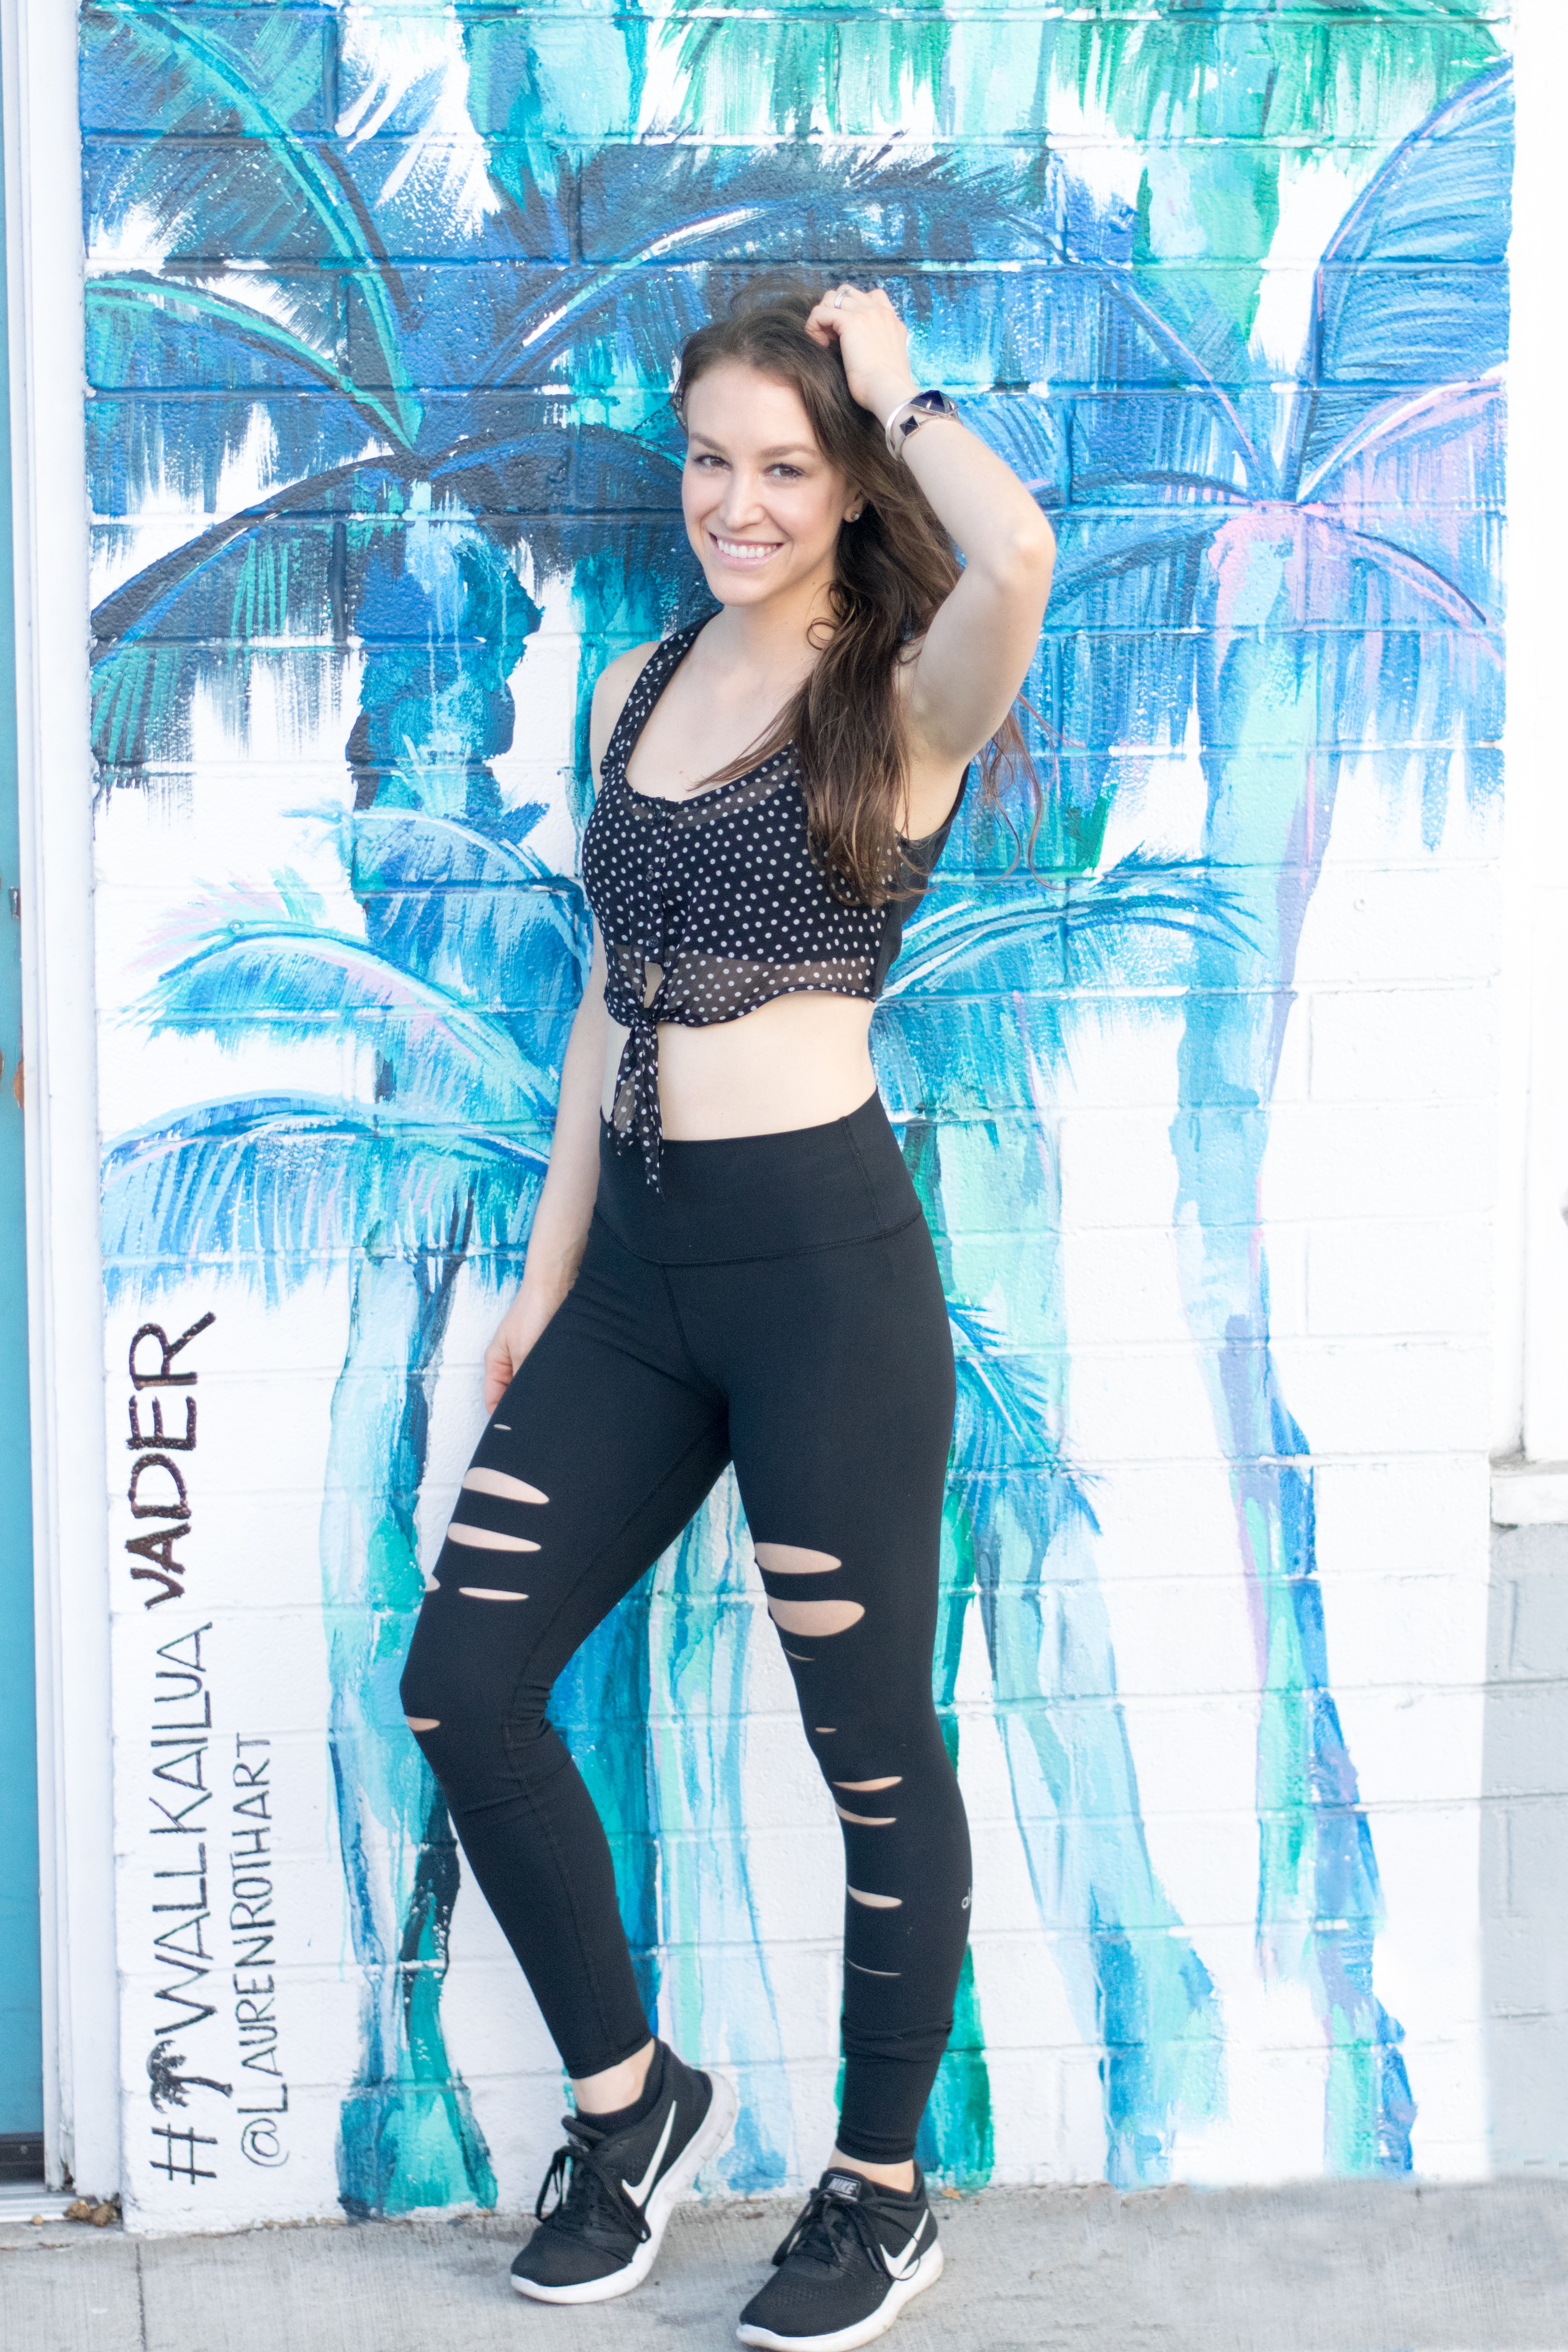
    » Leggings: Alo Yoga (an affiliate link) «

    I was actually pretty confident through most of my childhood. I was wildly energetic, opinionated, and self-assured.

    But right around 3rd grade my confidence foundation began to shift. I got my first set of braces and a bright pink pair of coke bottle glasses, and I began to notice that I didn’t wear “cool” clothes. I felt like a total loser.

    As I got older, my confidence slipped further and further away from me. There were certain moments where I could feel it again – when I was in my element, like when I was writing, or when I’d nail a workout. But I kept falling back into that “I suck” mindset.

    My lack of confidence was really holding me back.

    Teaching fitness is actually what helped me find my confidence the most. To this day I still don’t know what possessed me to audition to teach barre back in the fall of 2012. I still don’t know why I was picked to train to teach. I still don’t know how I got over my fears of being judged and criticized. But I wanted to teach so badly that I just did it.

    During the first official class I ever taught, I was so nervous I stumbled and fell flat on my ass on the floor.

    Guys. I fucking fell.

    In front of all my clients.

    During my first class.

    Truthfully, it was perfect – it was exactly what I needed to get over myself. I was beyond mortified but I had to keep teaching. I’m crazy dedicated to my work. And it was my job to work those clients out, whether they just saw me humiliate myself or not. So I just kept the class going. I brushed it off and immediately continued, shaking slightly but still in charge.

    And I saw that it wasn’t the end of the world. Like, no one pointed and laughed or told me I was stupid when I fell. Honestly, it was in LA, so they probably didn’t even really notice because they were too focused on looking good in the mirror.

    Teaching others ended up teaching me.

    I know it’s corny, but it’s true. It’s how I finally became confident.

    Over the course of teaching for over 5 years and counting, I’ve had endless experiences like that that have forced me way outside of my comfort zone. I’d say that about a year ago was when it all really clicked for me. Everything I’d learned settled into clarity and I realized something:

    We can LEARN how to be confident.

    It just takes a little practice to develop a new habit, and confidence is a habit of the mind. Having confidence means your mind defaults to knowing your inherent worthiness. You don’t need to be validated by anyone or anything.

    How To Become Confident » Infinite Embers blog

    These are the practices that helped me find my own confidence.

    I promise life’s a lot better when you’re on your own side. Get ready to make life way more fun.

    Step 1 » Don’t be so dramatic about it.

    First of all, the more you obsess about your (lack of) confidence, the less confident you feel. The thing about confidence is that it’s relaxed. Cool. Chill. Easy breezy.

    You can’t be simultaneously anxious and confident. In fact, anxiety can be triggered by or linked to a lack of confidence. So before you can be confident you must first get to a more Zen state and RELAX. Be the opposite of anxious.

    How? Breathe deeply. Close your eyes. Take a quiet moment by yourself in the bathroom. Smell lavender essential oils. Pour yourself a bath. Do whatever you need to feel calm.

    Step 2 » Develop a “fuck it” mantra.

    My personal lack of confidence stemmed from worrying about what others thought of me. I have some deep-seated trust issues, so I convinced myself regularly that everyone hated me.

    When I first started teaching, I’d obsesses afterwards over how I thought I did, worrying over every tiny mistake I may have made and whether or not the clients would write a bad review about me. It made me sick I was so stressed out.

    I finally just got tired of caring so much. Like, exhausted in my bones.

    It really doesn’t matter what other people think. So what if they don’t like me? If I’m having fun and being myself, it doesn’t affect me!

    I want you to practice adopting this same attitude. No matter what happens, you can brush it off. Other people rarely care as much as you think, because they’re too busy being concerned about their own lives, or they’re miserable and projecting their own shit onto everyone else. It just doesn’t make sense to let outside opinions (or the voice in your own head) affect you. I mean, there are people out there who don’t like Oprah. You definitely can’t live to make other people happy.

    All you can do is aim to be YOU, 100%, and don’t compare yourself to anyone.

    Before every one of my classes now, I tell myself “Fuck it.” Like it’s a mantra. Like it’s everything. Because my only concern is loving and living my life. And that means choosing to feel good about myself. So choose to know you’re the shit.

    Step 3 » Fake it till you make it.

    The trick I learned to getting over my fear of having everyone’s eyes on me while I taught was to create a kind of character for myself. I would essentially act my way through class. I was playing the role of Cool Confident Instructor, and it was way easier to be her than me. Because she was just like me, except she could stand tall and speak authoritatively and do hair flips on a spin bike.

    This is where the practice part of building up your confidence really comes in. It will feel really forced at first, but smile and look others in the eyes and keep reminding yourself that you’re confident, and you eventually will be.

    I want to clarify that you’re not supposed to be fake or act like someone other than who you really are. Rather, I want you to act MORE like you really are and be confident about it, especially when it comes to things you’re insecure about. Be more authentically you, and be unafraid about it.

    Step 4 » Bring out the thought police.

    You’re going to fall back to your old thought patterns. Confidence likely won’t come easy at first, but it does come if you’re patient. Faking it till you make it will be uncomfortable, which will give your brain plenty of fuel to repeat its old negative habit of bringing you down.

    Don’t let it.

    You’re now in charge of monitoring your own mind. So set up some thought police stations in your head and get ready to work. Any time you feel insecure, imagine a little siren going off and all the police have to come out to block the thought from continuing down its path. When you catch the perp, remind your brain to continue on acting confident. Order restored, at last.

    Meditation is the best tool to learn to become more mindful of your thoughts and how you can change them!

    Step 5 » Check your posture.

    I’ll take any opportunity I can to talk about how your mind and body are linked. Sooooo…

    What’s your body doing right now?

    There is a very specific body language associated with confidence and another entirely different one associated with insecurity. A confident person stands tall and proud. An insecure person slouches and curls into themselves and tries to make himself smaller.

    Think Mufasa and Scar. Yes, from The Lion King. I’m serious! Mufasa is drawn to hold his head up and stand broadly. Scar is drawn with his head hanging low, and he kind of slinks along as he walks because he’s a weak-ass motherfucker who kills his brother. I don’t know why I chose lions to illustrate how humans stand but I know you know what I’m talking about.

    Sit straight. Stand tall. Look up.

    Again, this won’t feel super effortless at first, but practice often enough and it will become your new way of holding yourself. Your body doesn’t know that you’re “faking”, and will start to produce chemicals in your brain that help reinforce your strong posture. It’s like the ultimate bio hack! You can also make yourself happier just by smiling. Your brain thinks it missed a memo and rushes to adjust your brain chemistry to match.

    Plus with great posture you’ll have a healthier and stronger body, which helps you feel even more confident, so it’s really a win-win!

    Step 6 » Live your awesome life.

    It’s way easier to be confident when you’re happy. So do what fills you with joy. Make friends with people who support and adore you. Take pride in the work you do and the ways you contribute and help others. Be kind to others. Spread love and positivity.

    Do what you’re good at, and repeat often, so you can continually see what a Badass you actually are. Praise yourself for even your smallest accomplishments and truly celebrate your wins!

    And if you’re still stuck feeling unconfident, my final piece of advice is to get out of your own mind. Switch your focus from inward to something outside of yourself. Help someone in need. Take a walk and admire nature’s beauty. Watch a movie that makes you laugh.

    Basically, fill your life with endless reasons to be confident because you acknowledge your blessings. Having an attitude of gratitude (and keeping a gratitude journal) about all the good things in your life also helps you become more secure in what really matters. Taking the focus off yourself will help you relax, making the whole confidence thing way easier.

    Step 7 » Lather, Rinse, Repeat.

    Your mind is just like any other muscle that can be trained, but it requires commitment and patience. So don’t give up. Stay confident that you’ll become confident!

    Trust me, you have every reason to be confident. You just have to slowly turn down the noise in your head that tries to say otherwise.

    » Song Vibes «

    Want even more help? I made this playlist to boost your confidence—guaranteed to pump you up about your awesome self!

    What helps you feel more confident? Share in the Comments below!

    xo,

    Amy

  • 10 Stretches For Sacrum / Low Back Pain (Restorative Yoga Sequence)

    Yoga Stretches for Sacrum + Low Back » from Infinite Embers blog

    » Leggings: Manduka «

    You guys – you know how I wrote about how addicted we all are to our cell phones earlier this week?

    Well, I have an overuse injury at the moment. In my right thumb. From using my phone too much. It’s been aching all week.

    HOW IRONIC.

    But really – it hurts to text. So bye bye phone. Thankfully my husband and I were hosting one of his childhood friends here on Oahu for all of the long Labor Day weekend up until Thursday so I was significantly preoccupied enough to give my phone a break.

    Anyway, speaking of my husband… He has way more to complain about in terms of injury than I do.

    He was in a bad car accident about a month ago.

    It was one of those moments that just sucks. We were at a hard point in our lives and this was just one more thing.

    I kind of like to imagine that there are these dark forces of energy that whip through the atmosphere around us humans until they attach to someone. The energy infects the poor victim, causing some form of destruction and pain in their life, and the person has two choices: they can choose to keep the dark energy with them, cultivating resentment and anger because of the pain they’ve experienced; or they can choose to let that shit go, and be thankful for the chance to move forward. (Don’t you just know when that dark energy has targeted you? That little feeling of unease before something bad happens…)

    In order to release the pain, you first have to feel it, and that period of time is the worst. There’s no way around it. And then you have to remind yourself that you’re going to be okay, that you will move past this. But man, it can be really hard to accept being the unlucky one.

    The bright side was of course that my husband’s accident wasn’t worse. But he did badly injure his back, especially around his sacrum. I realized that while we were powerless to change what had happened, we are still in control of what happens next.

    So we’ve become focused on healing his back.

    Back injuries are complex. Your entire spine works as a whole unit, so a problem in your neck usually affects your low back, and vice versa. In my husband’s case, his sacrum absorbed most of the shock and was the point of most of his pain.

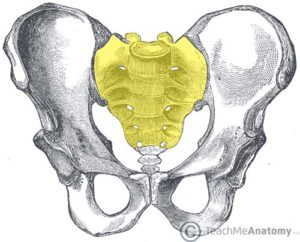
    Hold up – WTF is a Sacrum?

    If I had to venture a guess, I would say 80% of the American population has no clue what a sacrum is. (I’m literally just making that number up, but in my mind it’s accurate, so let’s go with it.) Like really; we’re clueless. So if you don’t know what it is, don’t worry. Here’s the low-down:


    sacrum

    » image via «

    • The sacrum is a triangular-shaped bone at the base of your spine that consists of five vertebra (S1-S5) that are fused together. The sacrum is the back center part of the pelvic/hip bowl.
    • You can reach back and feel your sacrum – it’s right above your tailbone and is flat. Think of it as a little plate of armor. When you sit in a C-shaped position, like in many abdominal exercises, you probably naturally rest on your sacrum because it’s thick and can more comfortably take the pressure of your body’s weight.
    • Ideally, your sacrum shouldn’t move too much. It’s meant to stabilize your spine because it’s the bridge between your upper and lower body. So, this is why while intentional stretching of the spine is fine, it’s not exactly good for you to twerk in the club or do exaggerated tucks in barre class. I’ll write more about this in the future but your sacrum should ideally be in its neutral resting position as often as possible unless you’re specifically stretching it forward or back.
    • The sacrum is the home of the 2nd Chakra, the Sacral Chakra. It relates to our ability to feel creative and sexual, and to accept change. Funny how important that whole “accepting change” thing is, isn’t it?

    Yoga Stretches for Sacrum + Low Back » from Infinite Embers blog

    I developed this sequence of yoga poses to help relax and relieve pain in the sacrum and low back.

    In all likelihood, if you have any kind of chronic back or neck pain, you will benefit from releasing the muscles around your sacrum. My husband has found it really helpful, so I hope you do, too!

    Hold each of these poses for about 1 minute (longer if desired or shorter if needed). Remember, go slow. Listen to your body. Breathe deeply and try to soften into each asana (“pose”). The goal, as always with yoga, is to move mindfully so you can feel better.

    Grab a mat (not necessary if you don’t have one, but this one from Manduka is my favorite) and let’s get started!

    10 Minute Restorative Yoga Sequence To Heal Sacrum / Low Back Pain

    » Helpful Props: a block and a strap (I use these blocks and this strap)

    1 » Corpse Pose, aka Savasana

    Yoga Asana (Pose) » Savasana / Corpse Pose » Stretches for Sacrum + Low Back » from Infinite Embers blog

    • Lie down, arms and legs extended. Try to straighten out your body as much as you can.
    • Close your eyes, and begin to focus in on your breath – try to make each inhale and exhale equal length. Breathe slowly and deeply.
    • Scan your body in your mind’s eye and try to relax any points you feel tension.
    • Pay attention to your back and ensure your spine and pelvis are in their neutral position – you should have a slight curve in your low back, there might be some space between it and the floor.

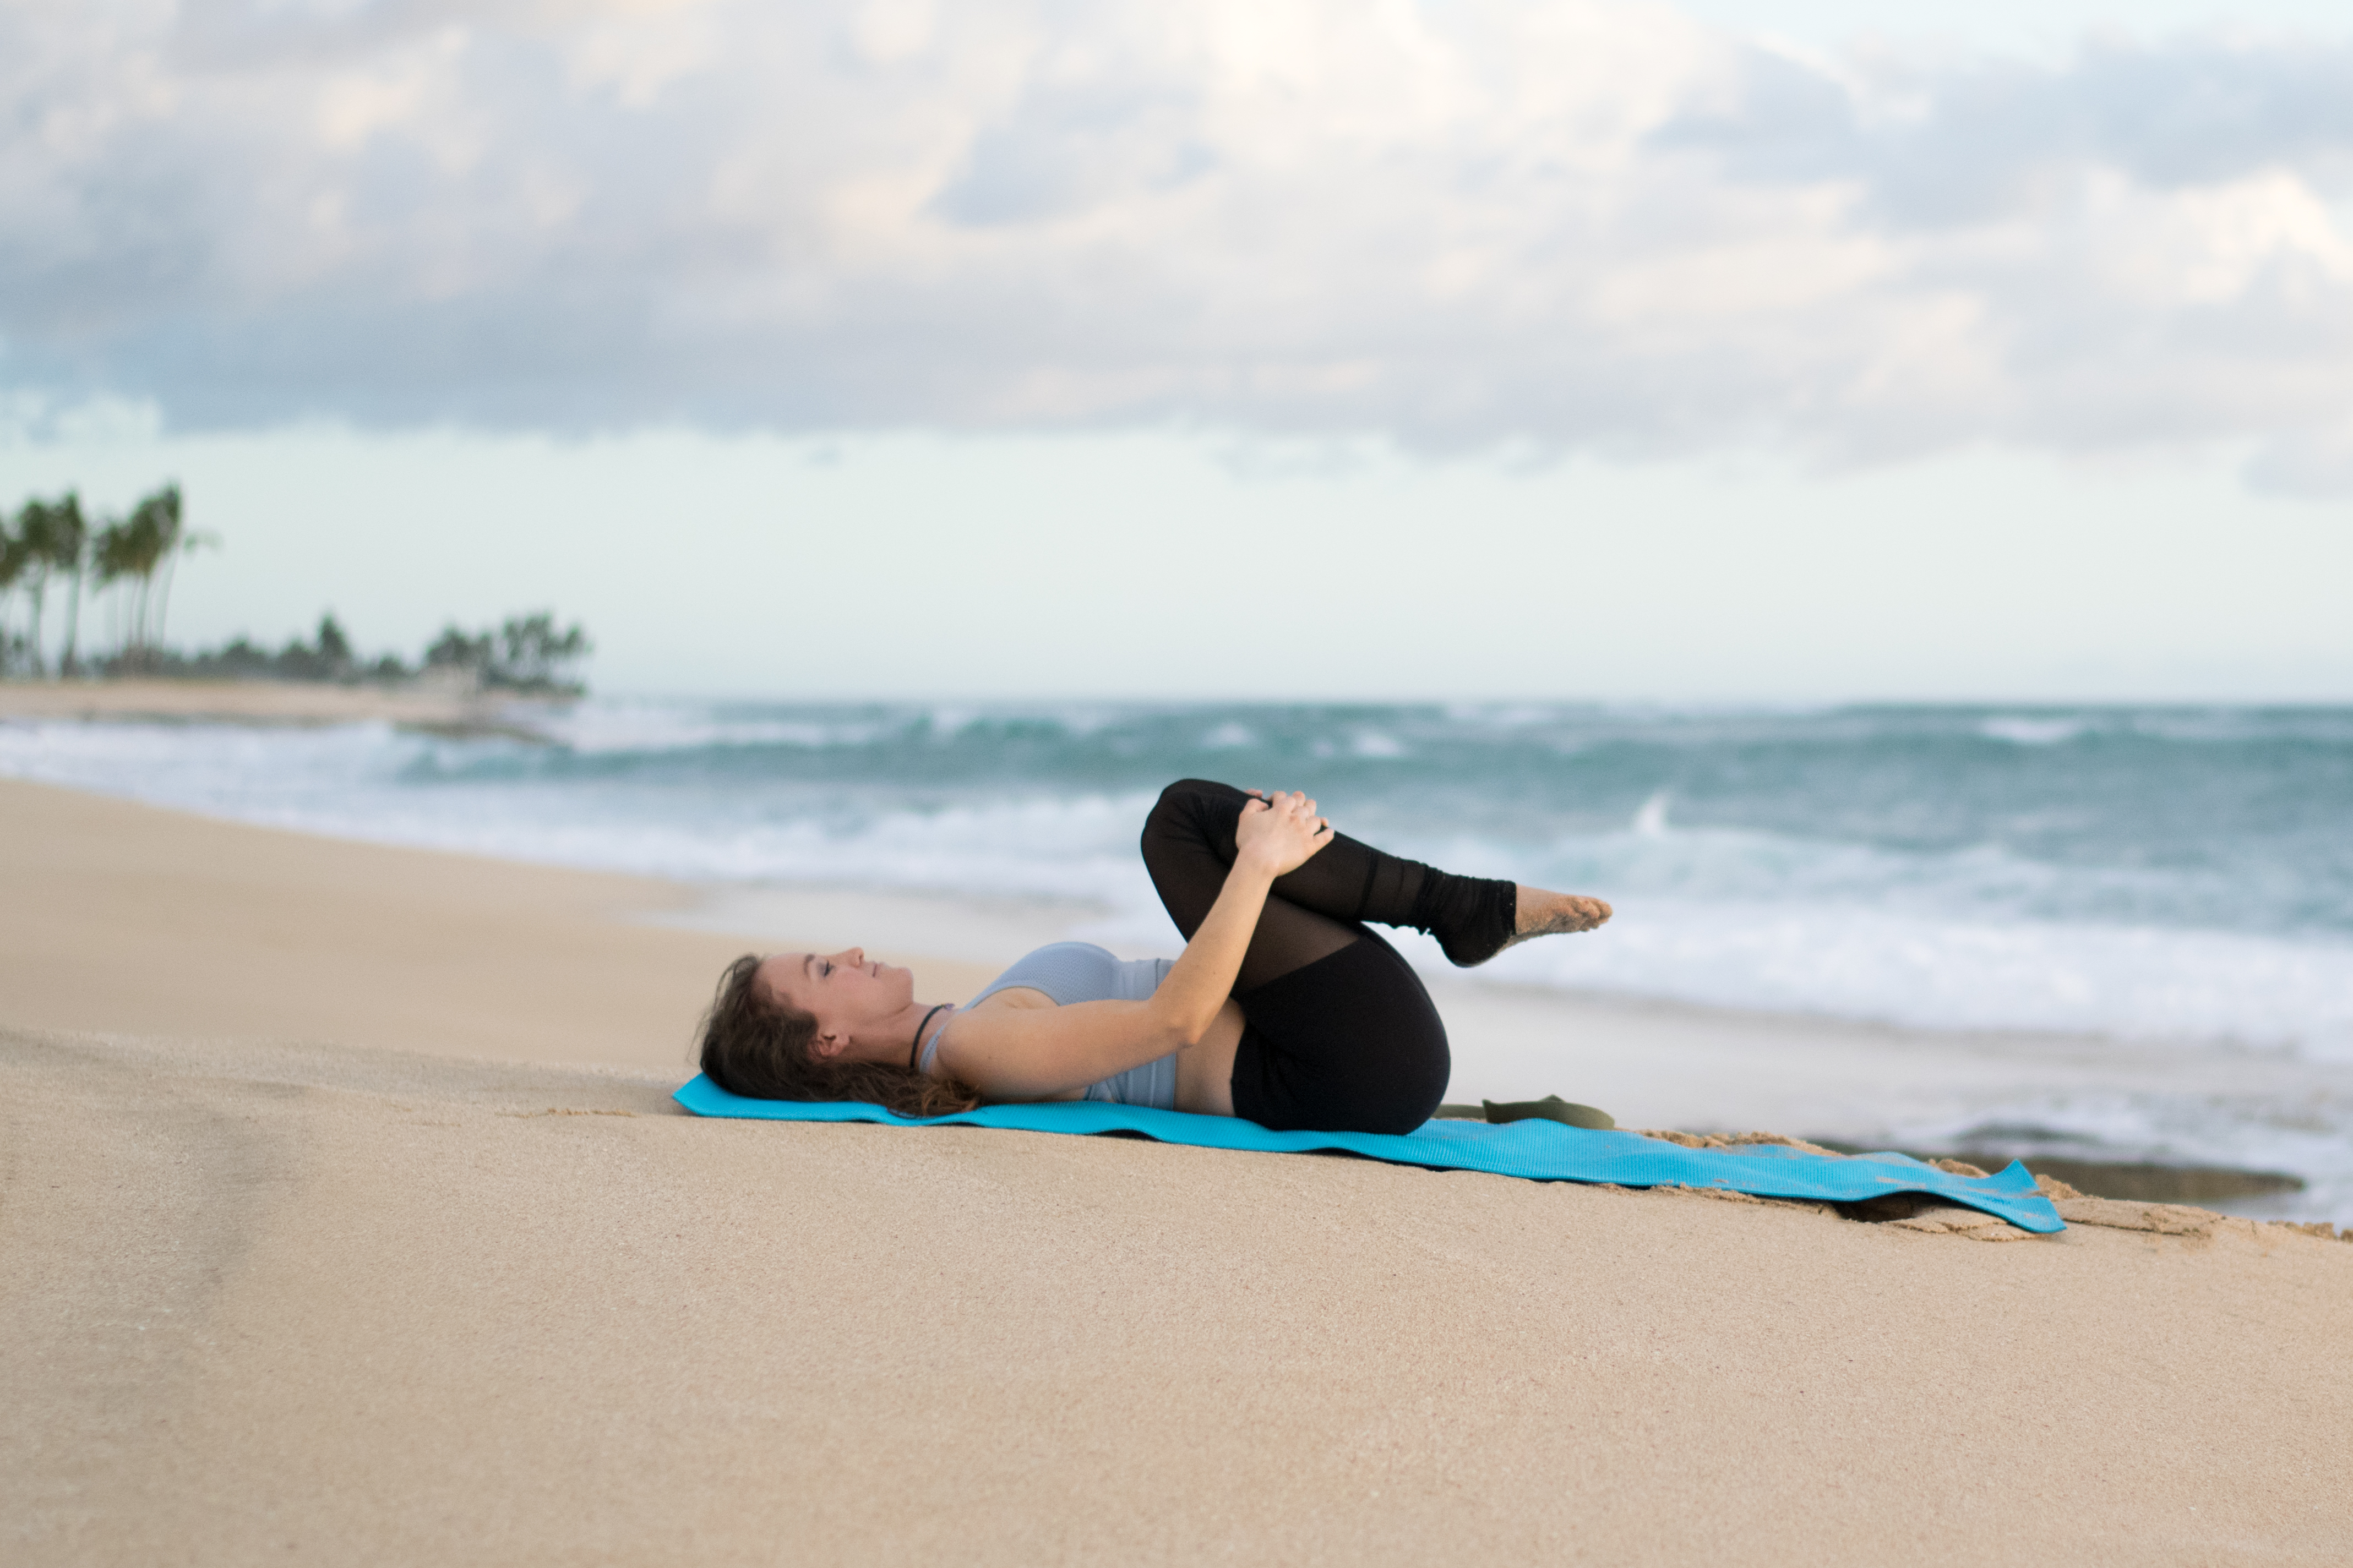
    2 » Knees-To-Chest Pose, aka Apanasana (with Circles)

    Yoga Asana (Pose) » Apanasana (Knees to Chest) » Stretches for Sacrum + Low Back » from Infinite Embers blog

    • Moving slowly, hug your knees into your chest.
    • Keep your spine long, your shoulders down, and your muscles relaxed.
    • Trace small circles in one direction, trying to massage a circle around your sacrum.
    • Go the other direction.

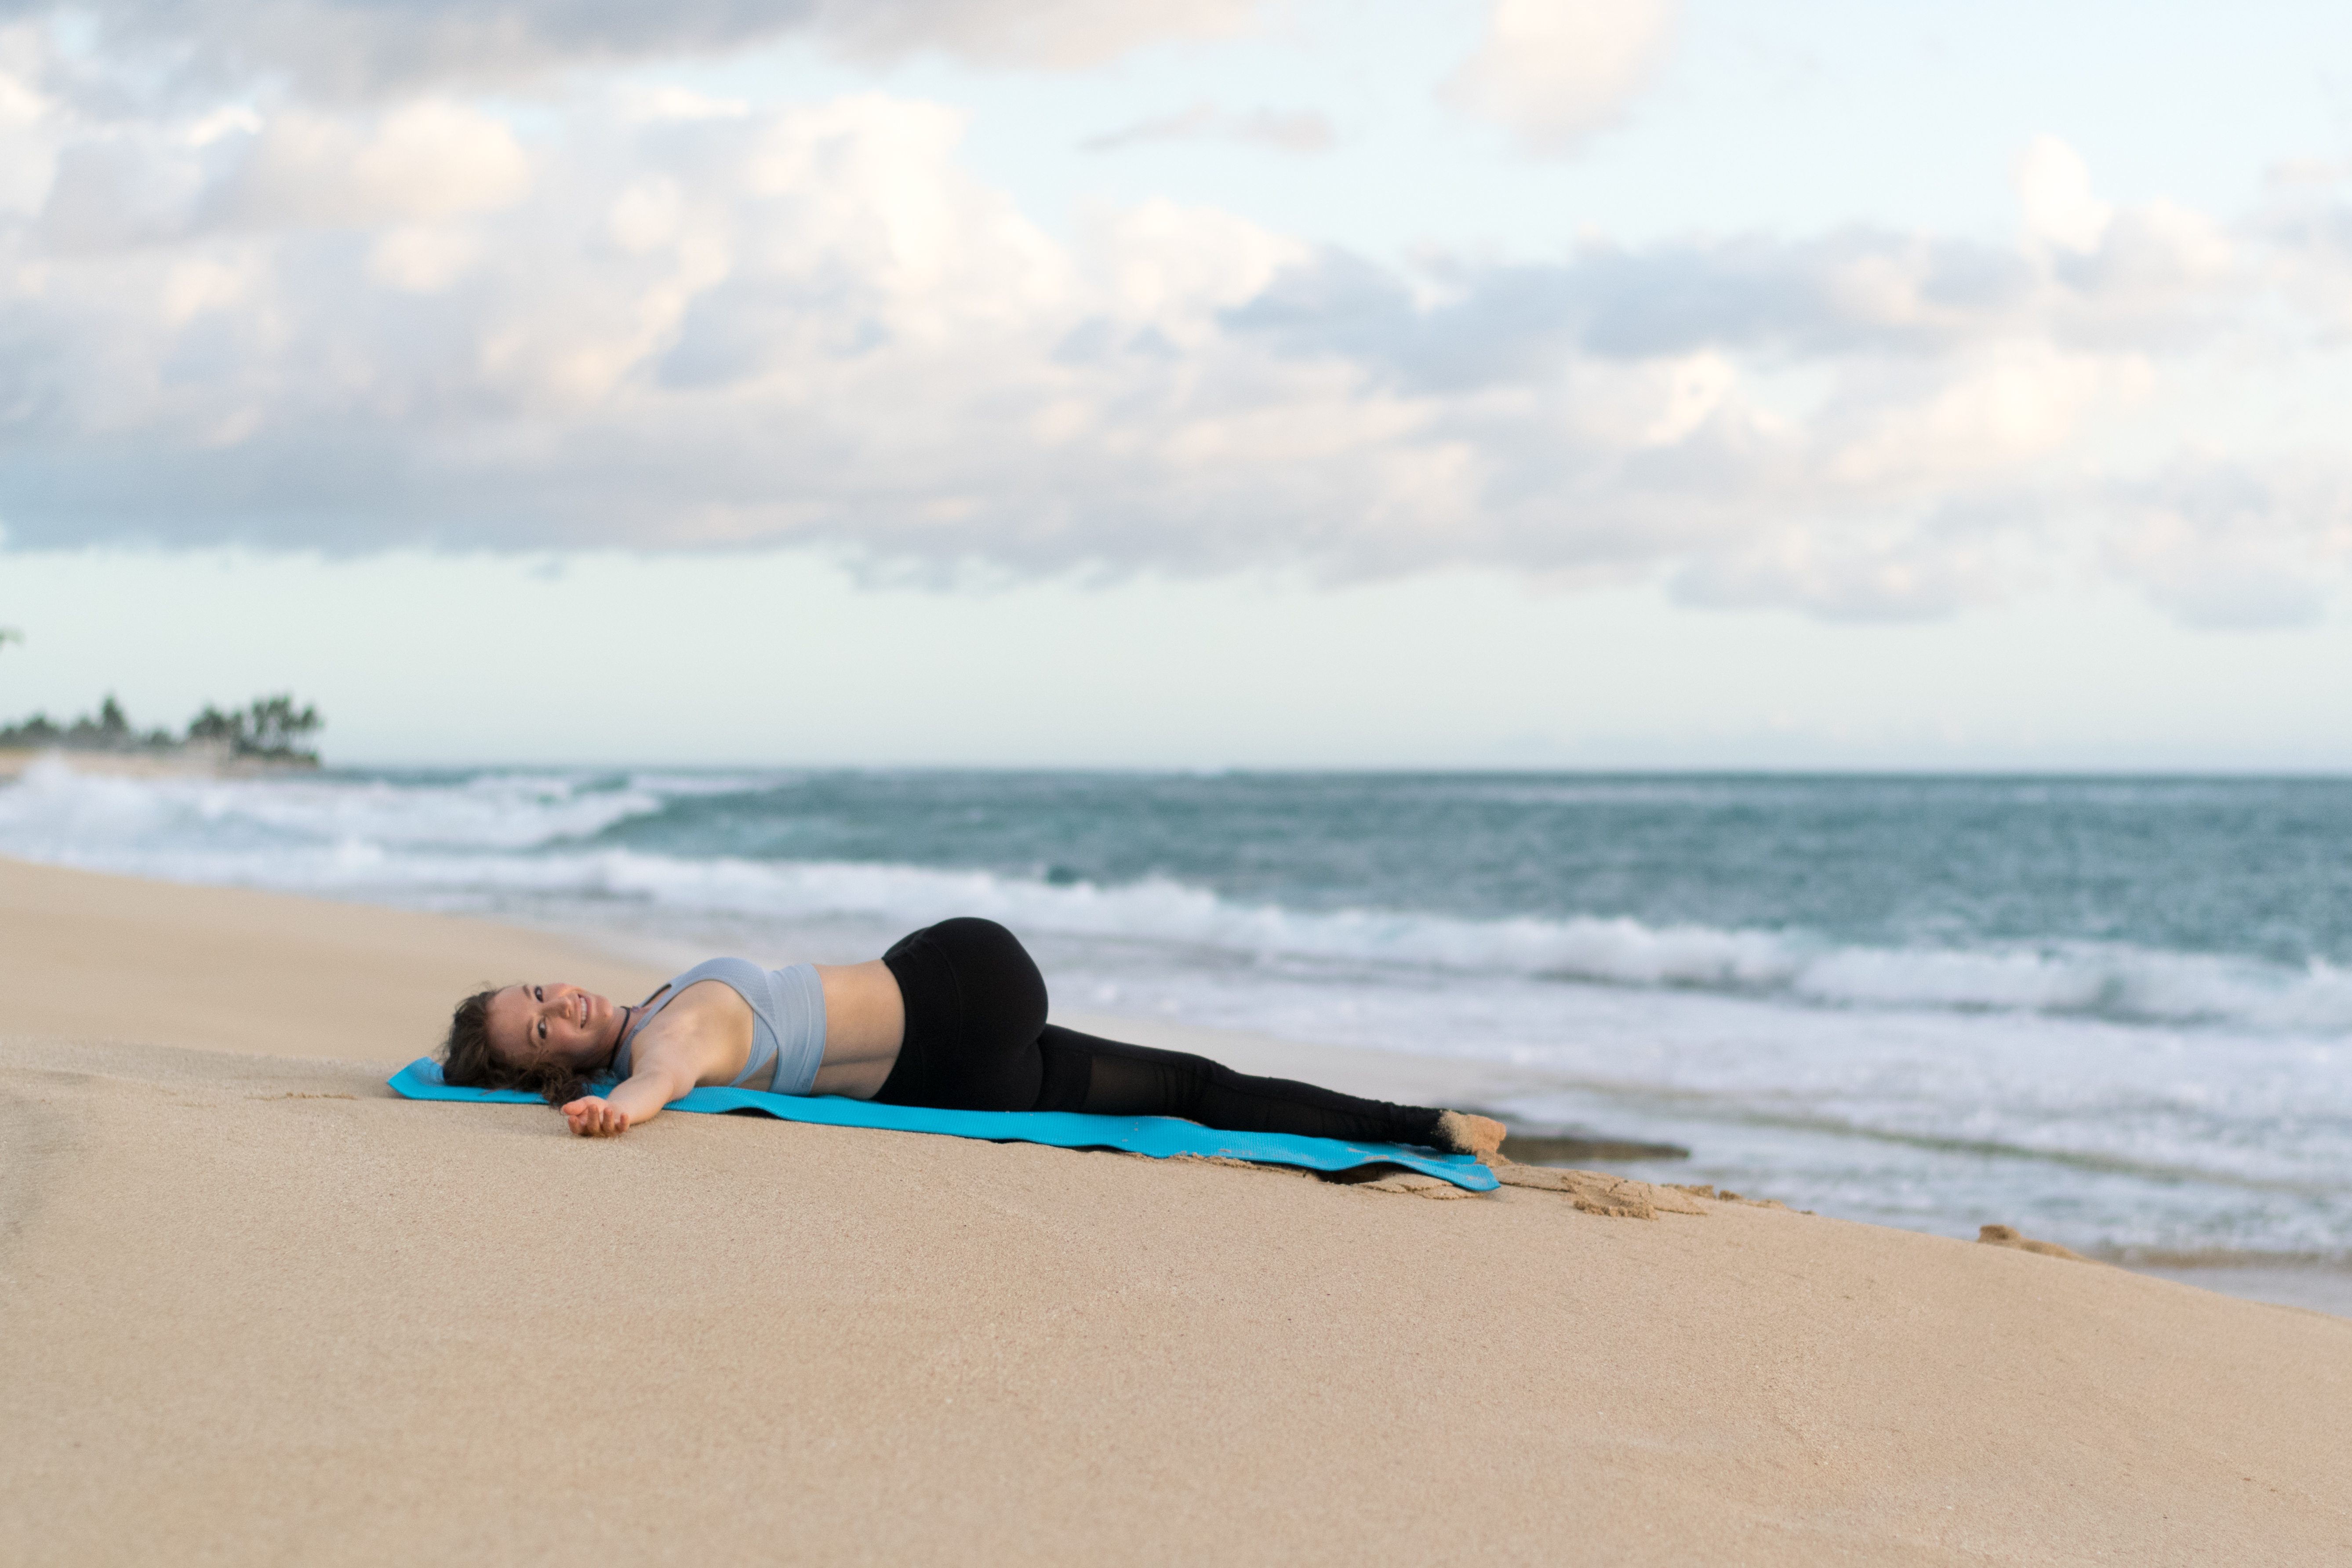
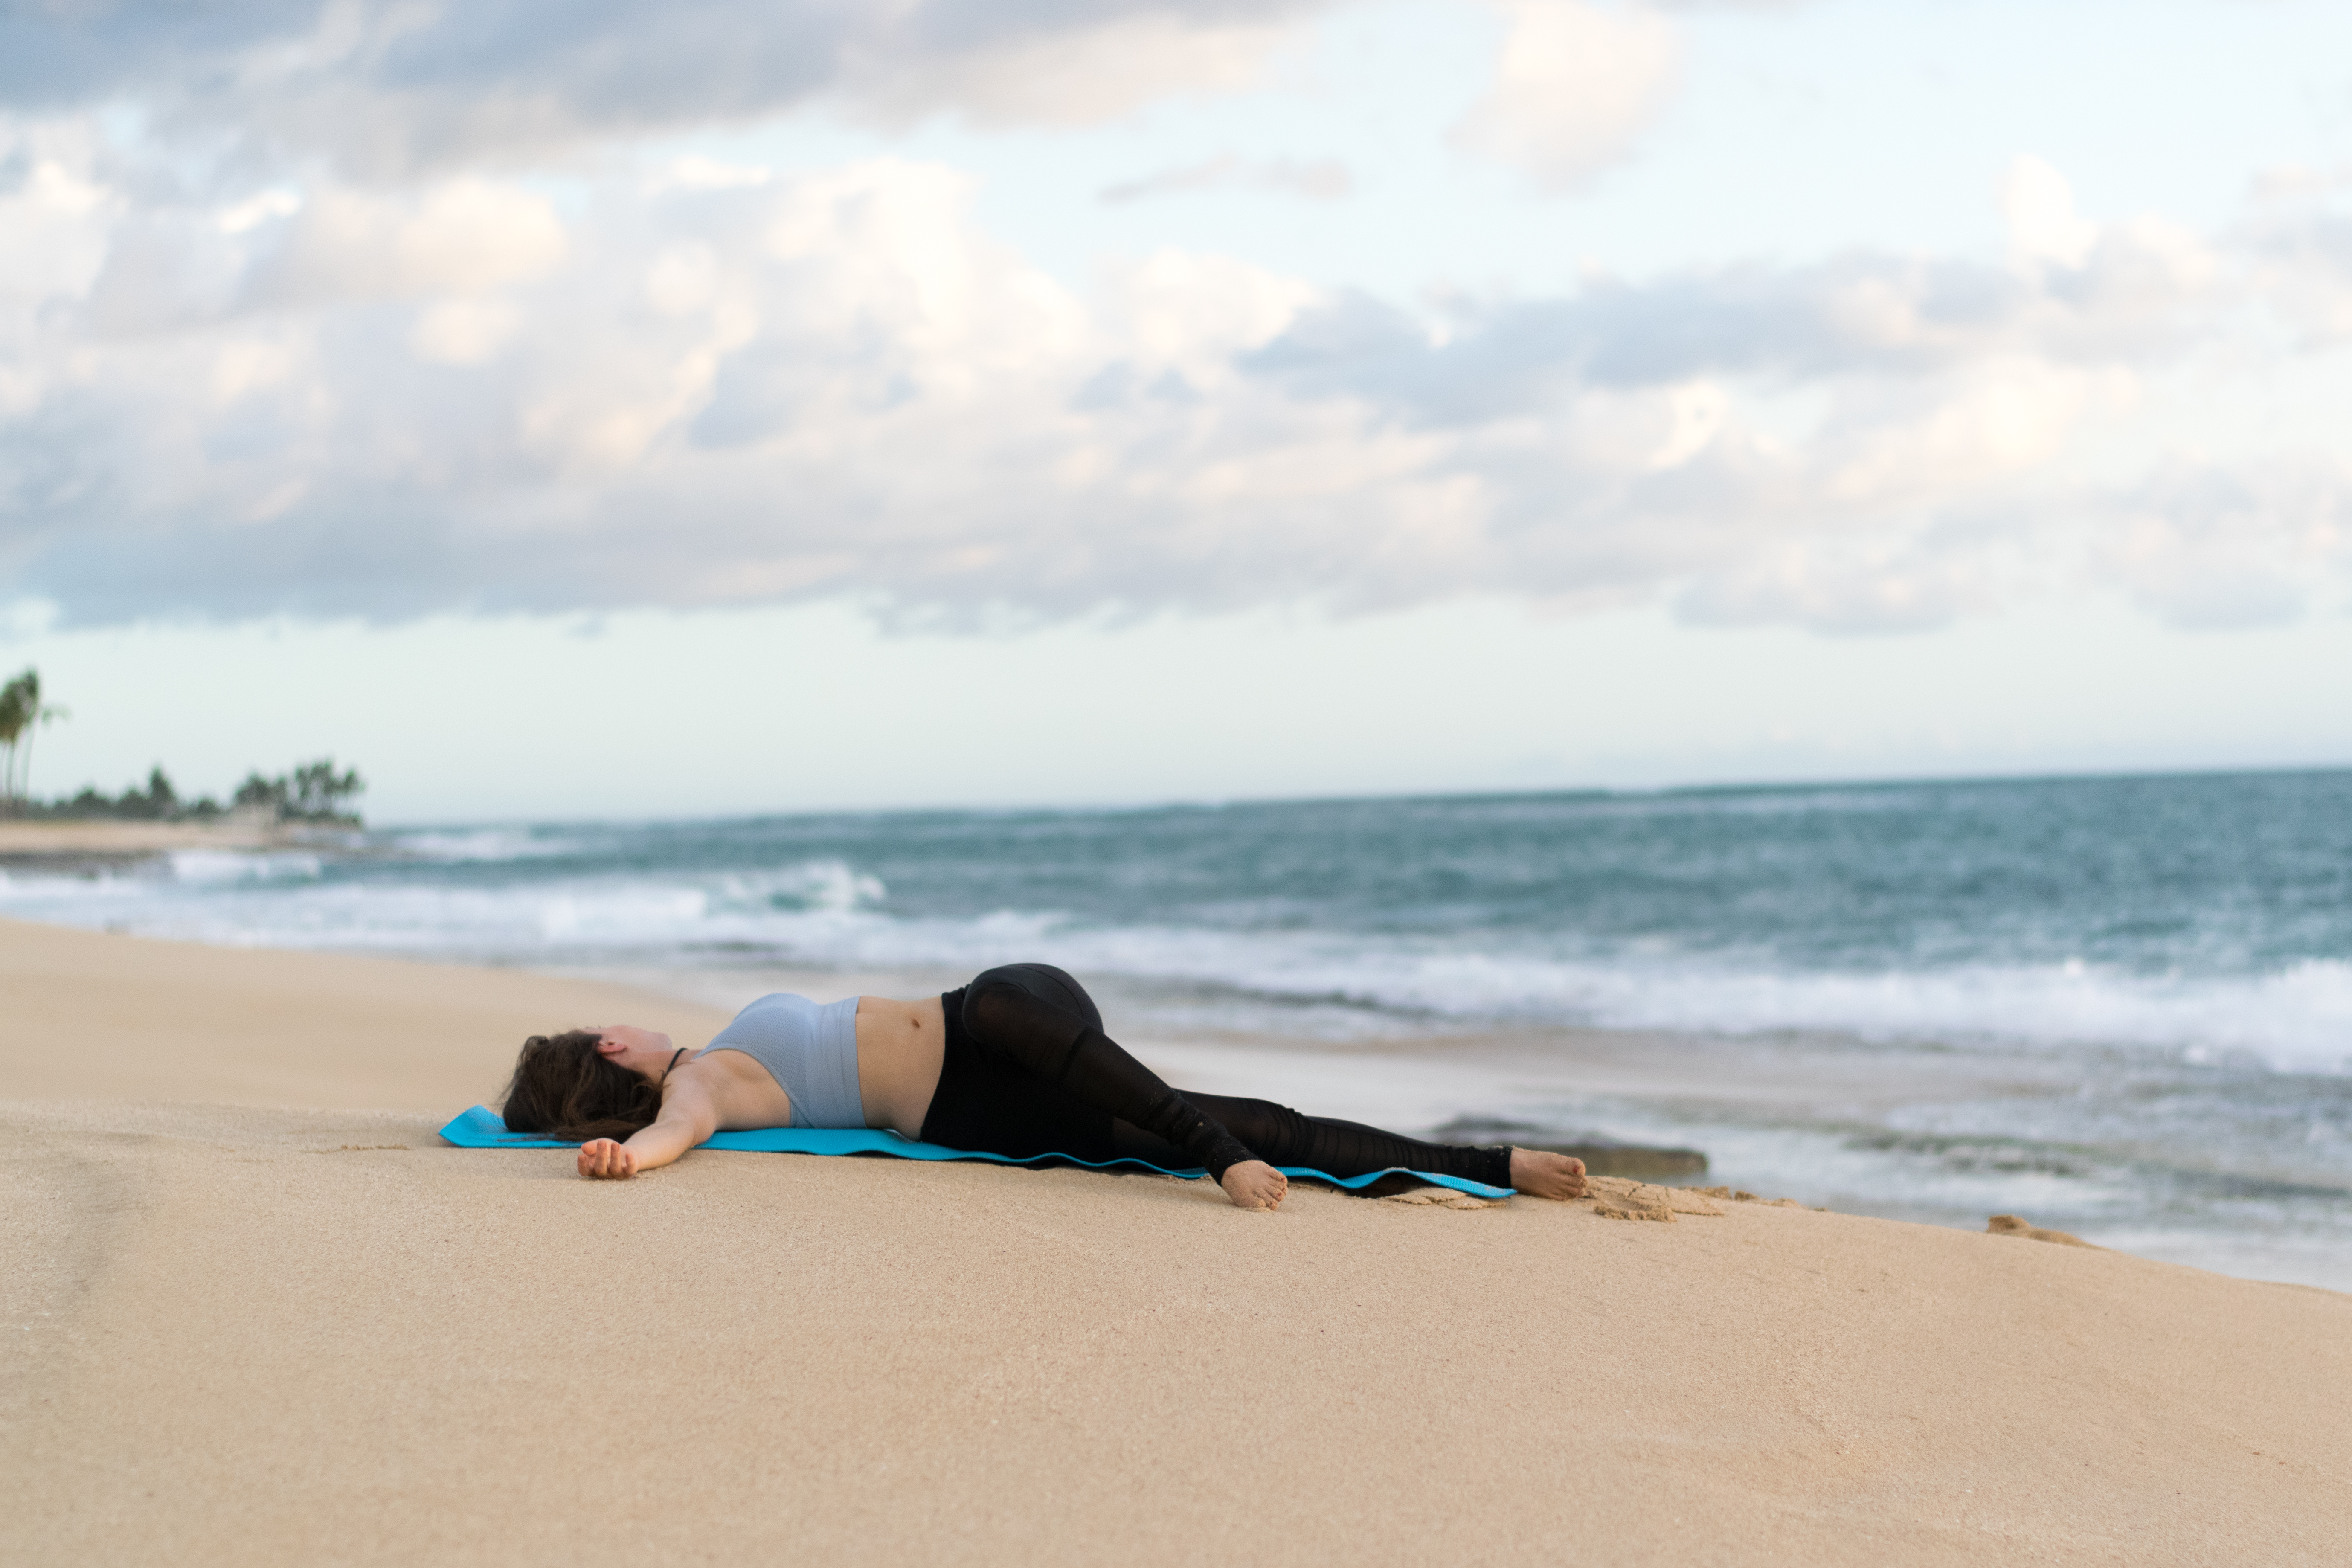
    3 » Supine Spinal Twist, aka Supta Matsyendrasana

    Yoga Asana (Pose) » Supine Twist » Stretches for Sacrum + Low Back » from Infinite Embers blog

    • Stay holding your R knee into your chest and extend your L leg so it’s straight and heavy on the ground.
    • Check that your spine is in a neutral position, with that slight curve in your low back. You may need to not draw your R knee in so close.
    • Reach your R arm out to the side like a T and use your L hand to guide your R knee up and over towards the L.
    • Stop as soon as you feel your R shoulder try to lift up. Keep both shoulders down on the ground. If you’re lifting up, you’ve gone too far.
    • You can keep your L hand on your knee or stretch it out to straighten that arm, as well.
    • If it feels okay on your neck, turn your head to look to the R.
    • If you need extra support, try placing a block underneath your knee.

    4 » Repeat #3 on the L Side

    Yoga Asana (Pose) » Supine Twist » Stretches for Sacrum + Low Back » from Infinite Embers blog

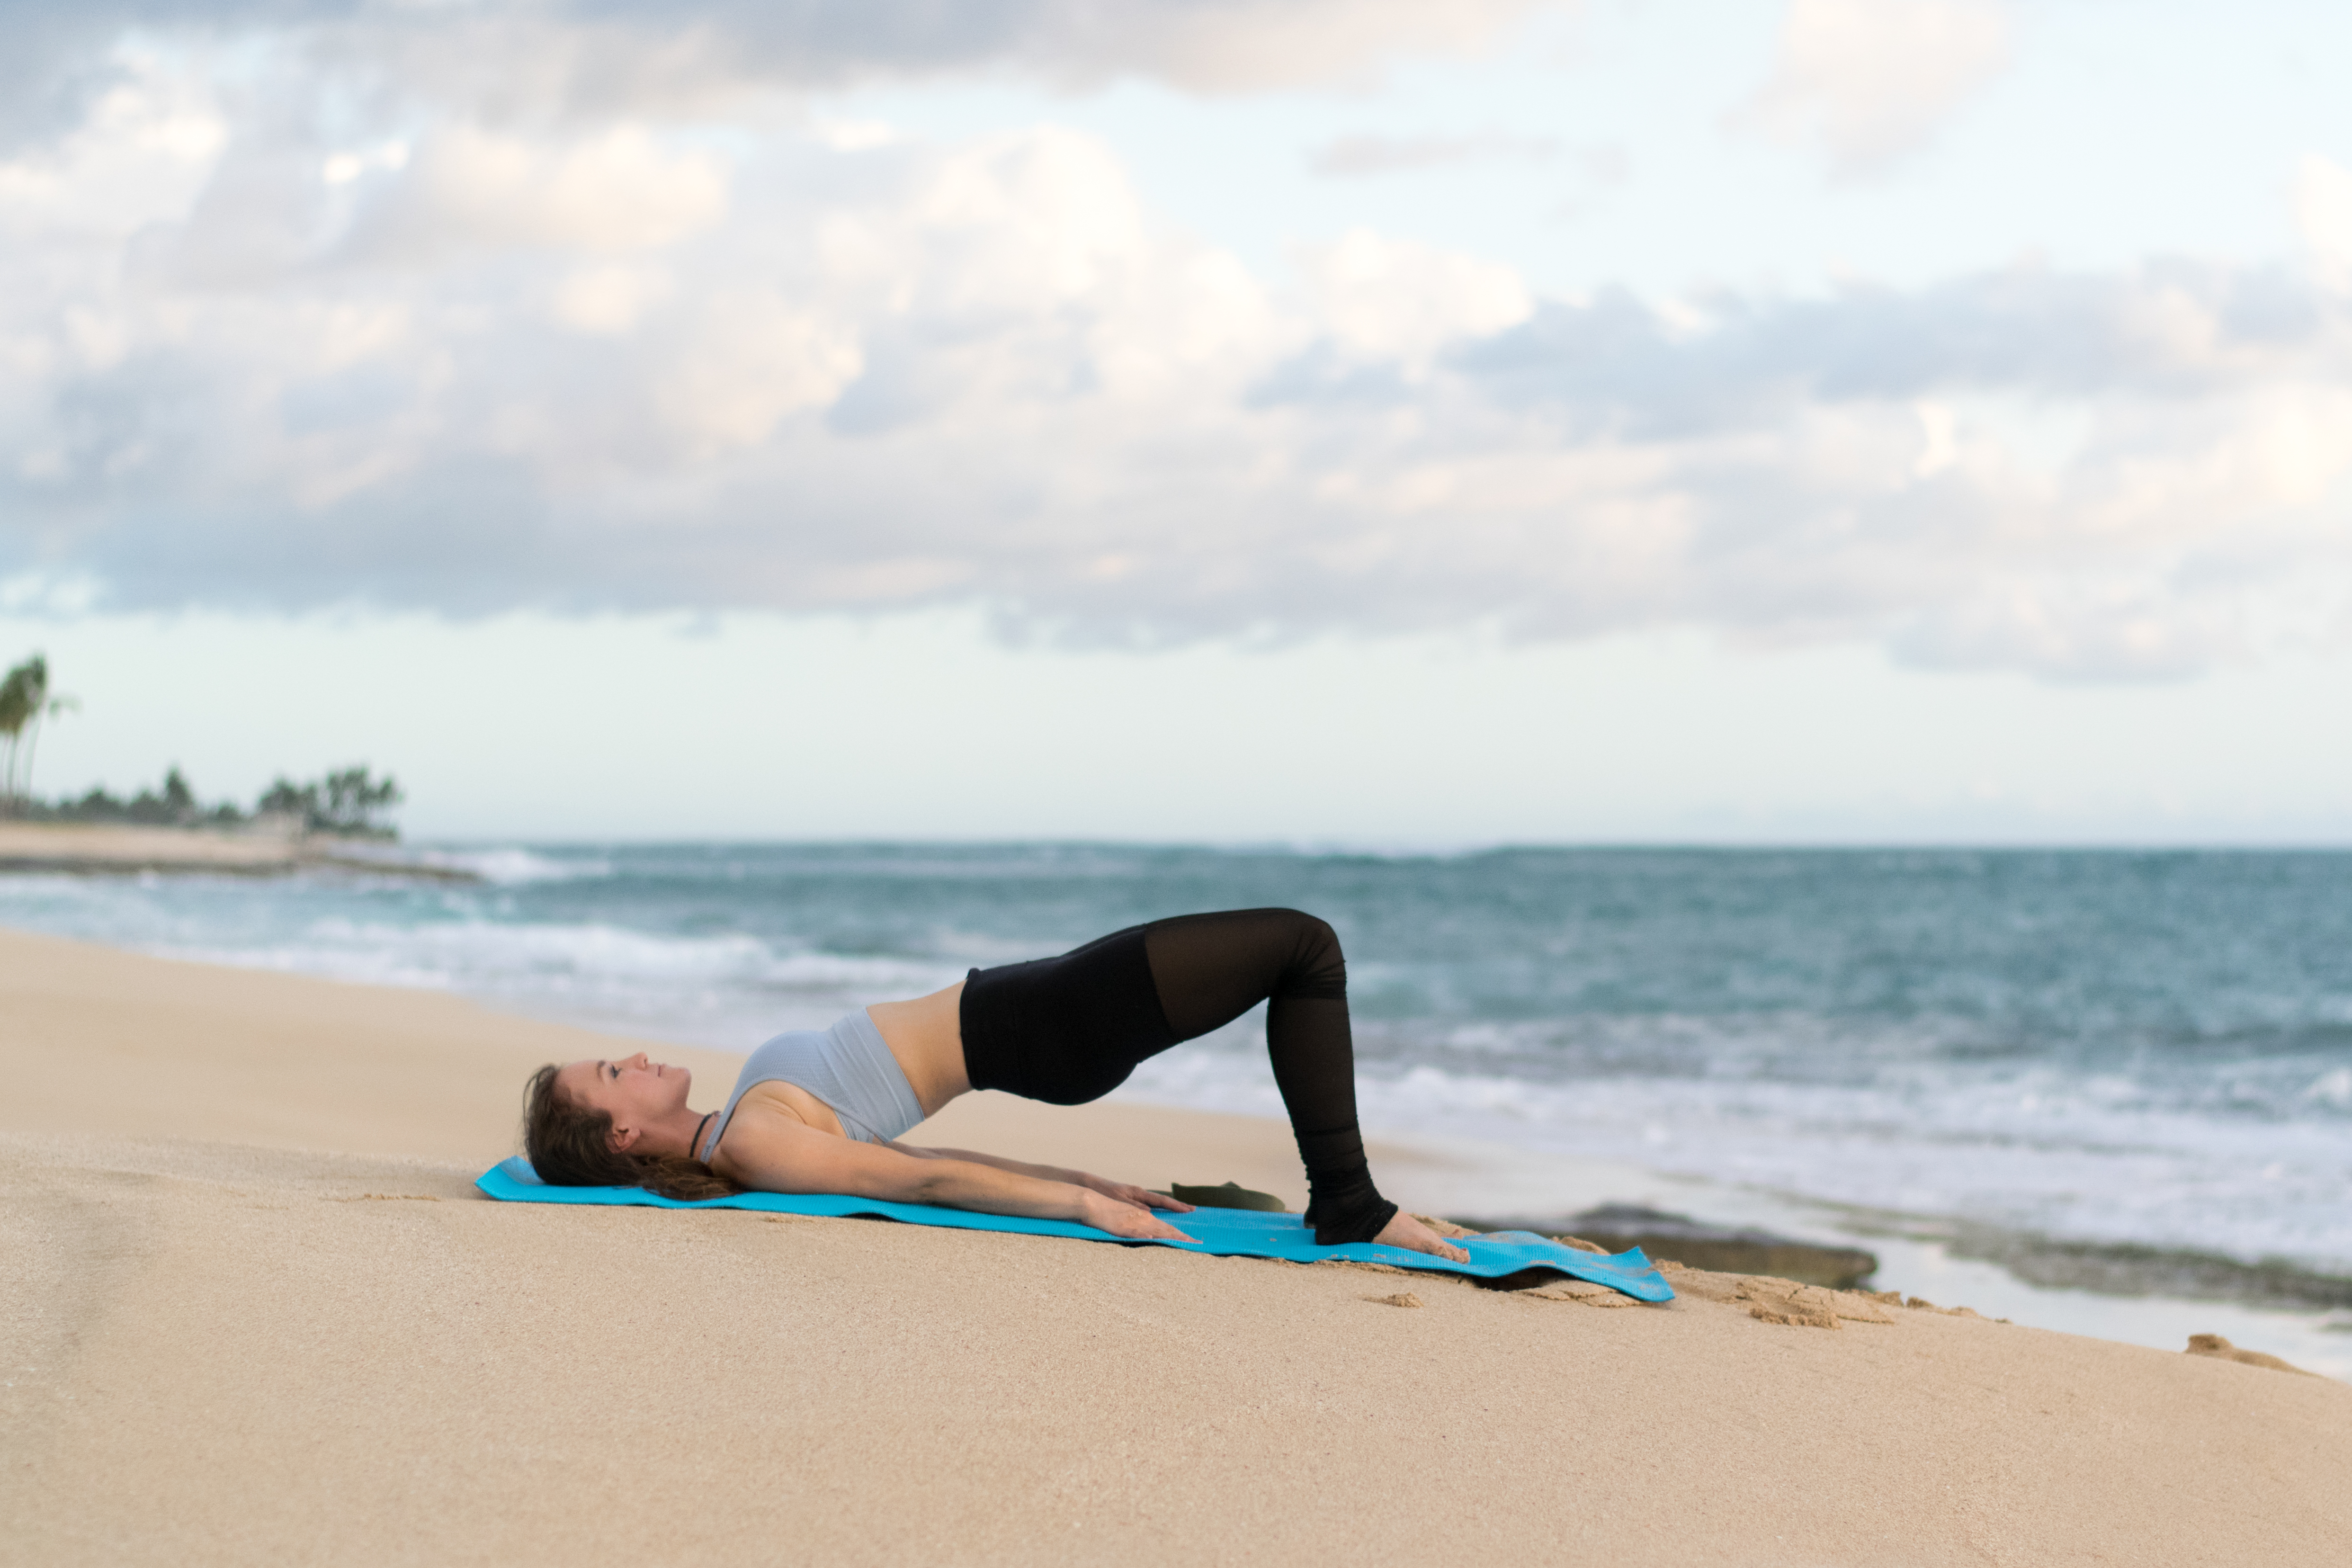
    5 » Bridge Pose, aka Setu Bandha Sarvangasana

    Yoga Asana » Bridge Pose » Stretches for Sacrum + Low Back » from Infinite Embers blog

    • Bend your knees and place both feet onto the ground so they’re hip’s distance and parallel.
    • Keep your arms long by your sides and your graze straight up to the sky. (Note: it is very important that you not turn your head once you get into Bridge Pose, so keep looking up!)
    • Push through your feet to lift your hips up as high as you can.
    • Keep your knees in line with your hips. (Pro tip: Bring that block back between your inner thighs. Blocks are the best.)
    • Relax your glutes and back while puffing your chest up to the sky.
    • Without actually moving your heels, try to pull them towards your head. Hello, hamstrings!
    • If you’d like more, shimmy your shoulder blades underneath you and clasp your hands, interlacing your fingers.
    • For a more restorative option, place a block under your sacrum to rest in Supported Bridge.

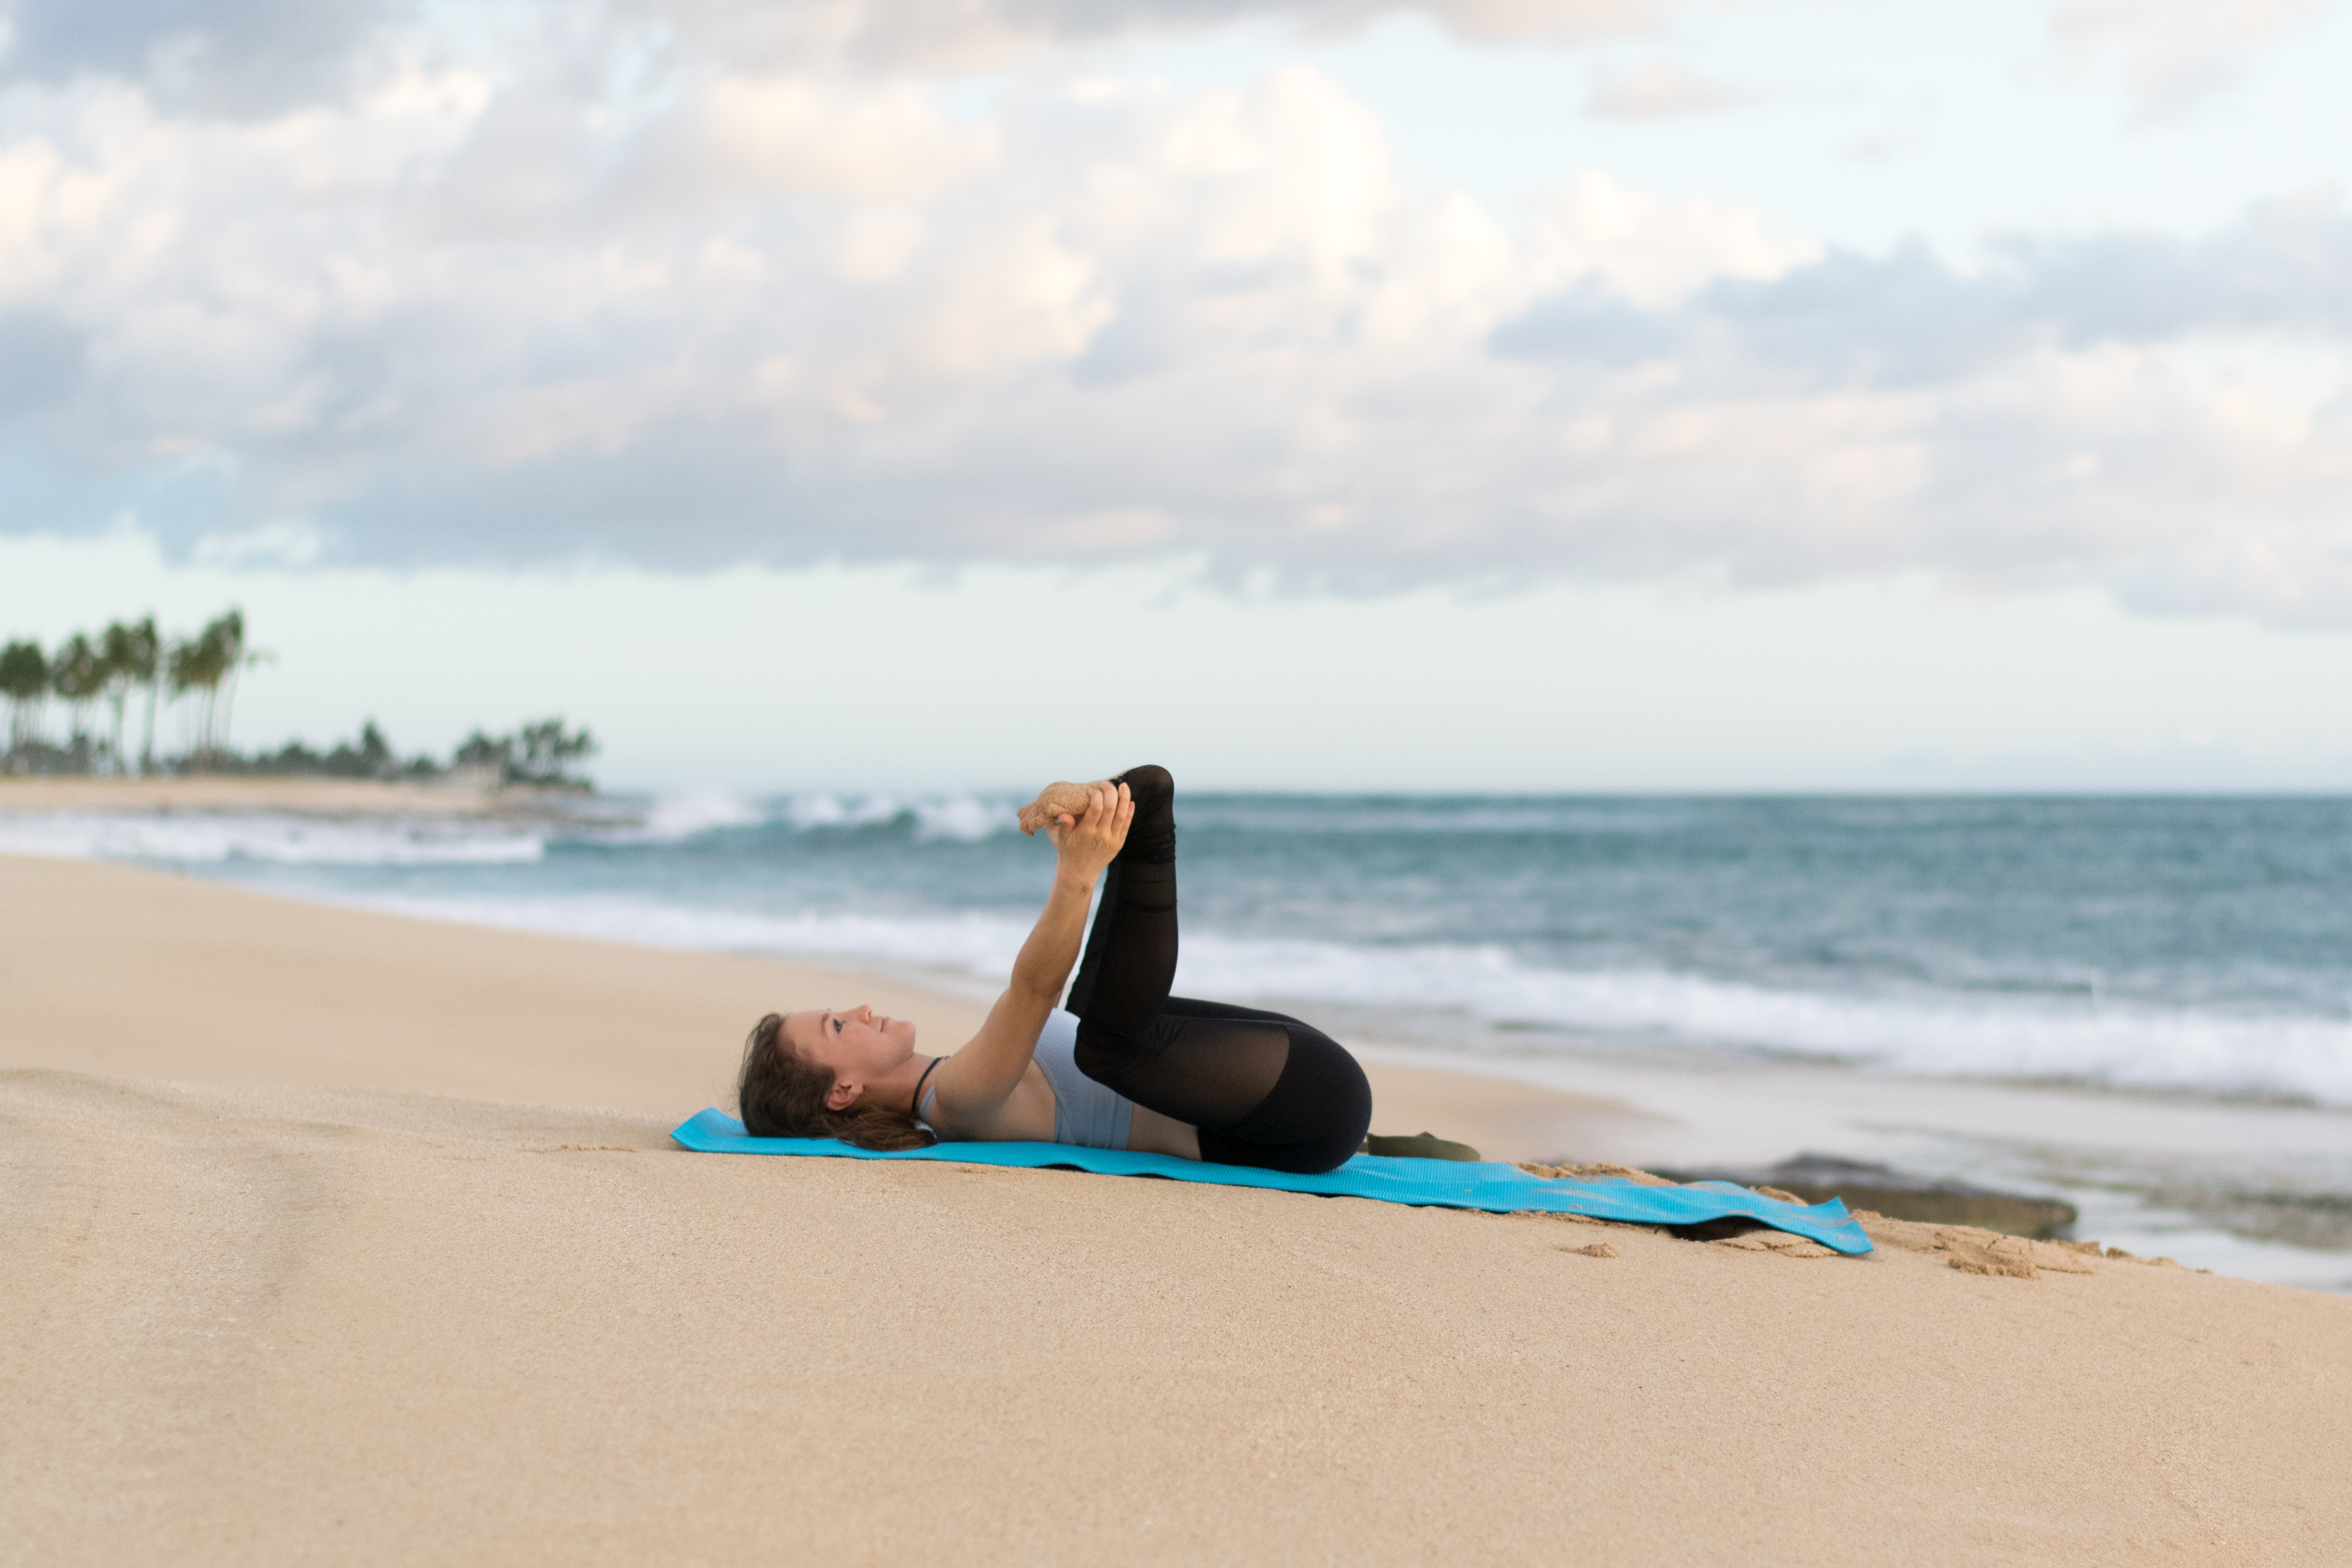
    6 » Happy Baby Pose, aka Ananda Balasana

    Yoga Asana » Happy Baby Pose » Stretches for Sacrum + Low Back » from Infinite Embers blog

    • Keeping your spine in a neutral position, slowly draw your knees back into your chest.
    • Grab on behind your thighs. Slowly begin to lift your feet up towards the sky to make your legs look like two 90 degree angles.
    • Pull your knees slightly outwards and towards your shoulders.
    • If you can keep your back neutral, grab hold of the outside of your feet.
    • If it feels good you can rock slowly side to side and try to straighten your legs out to the side one at a time.

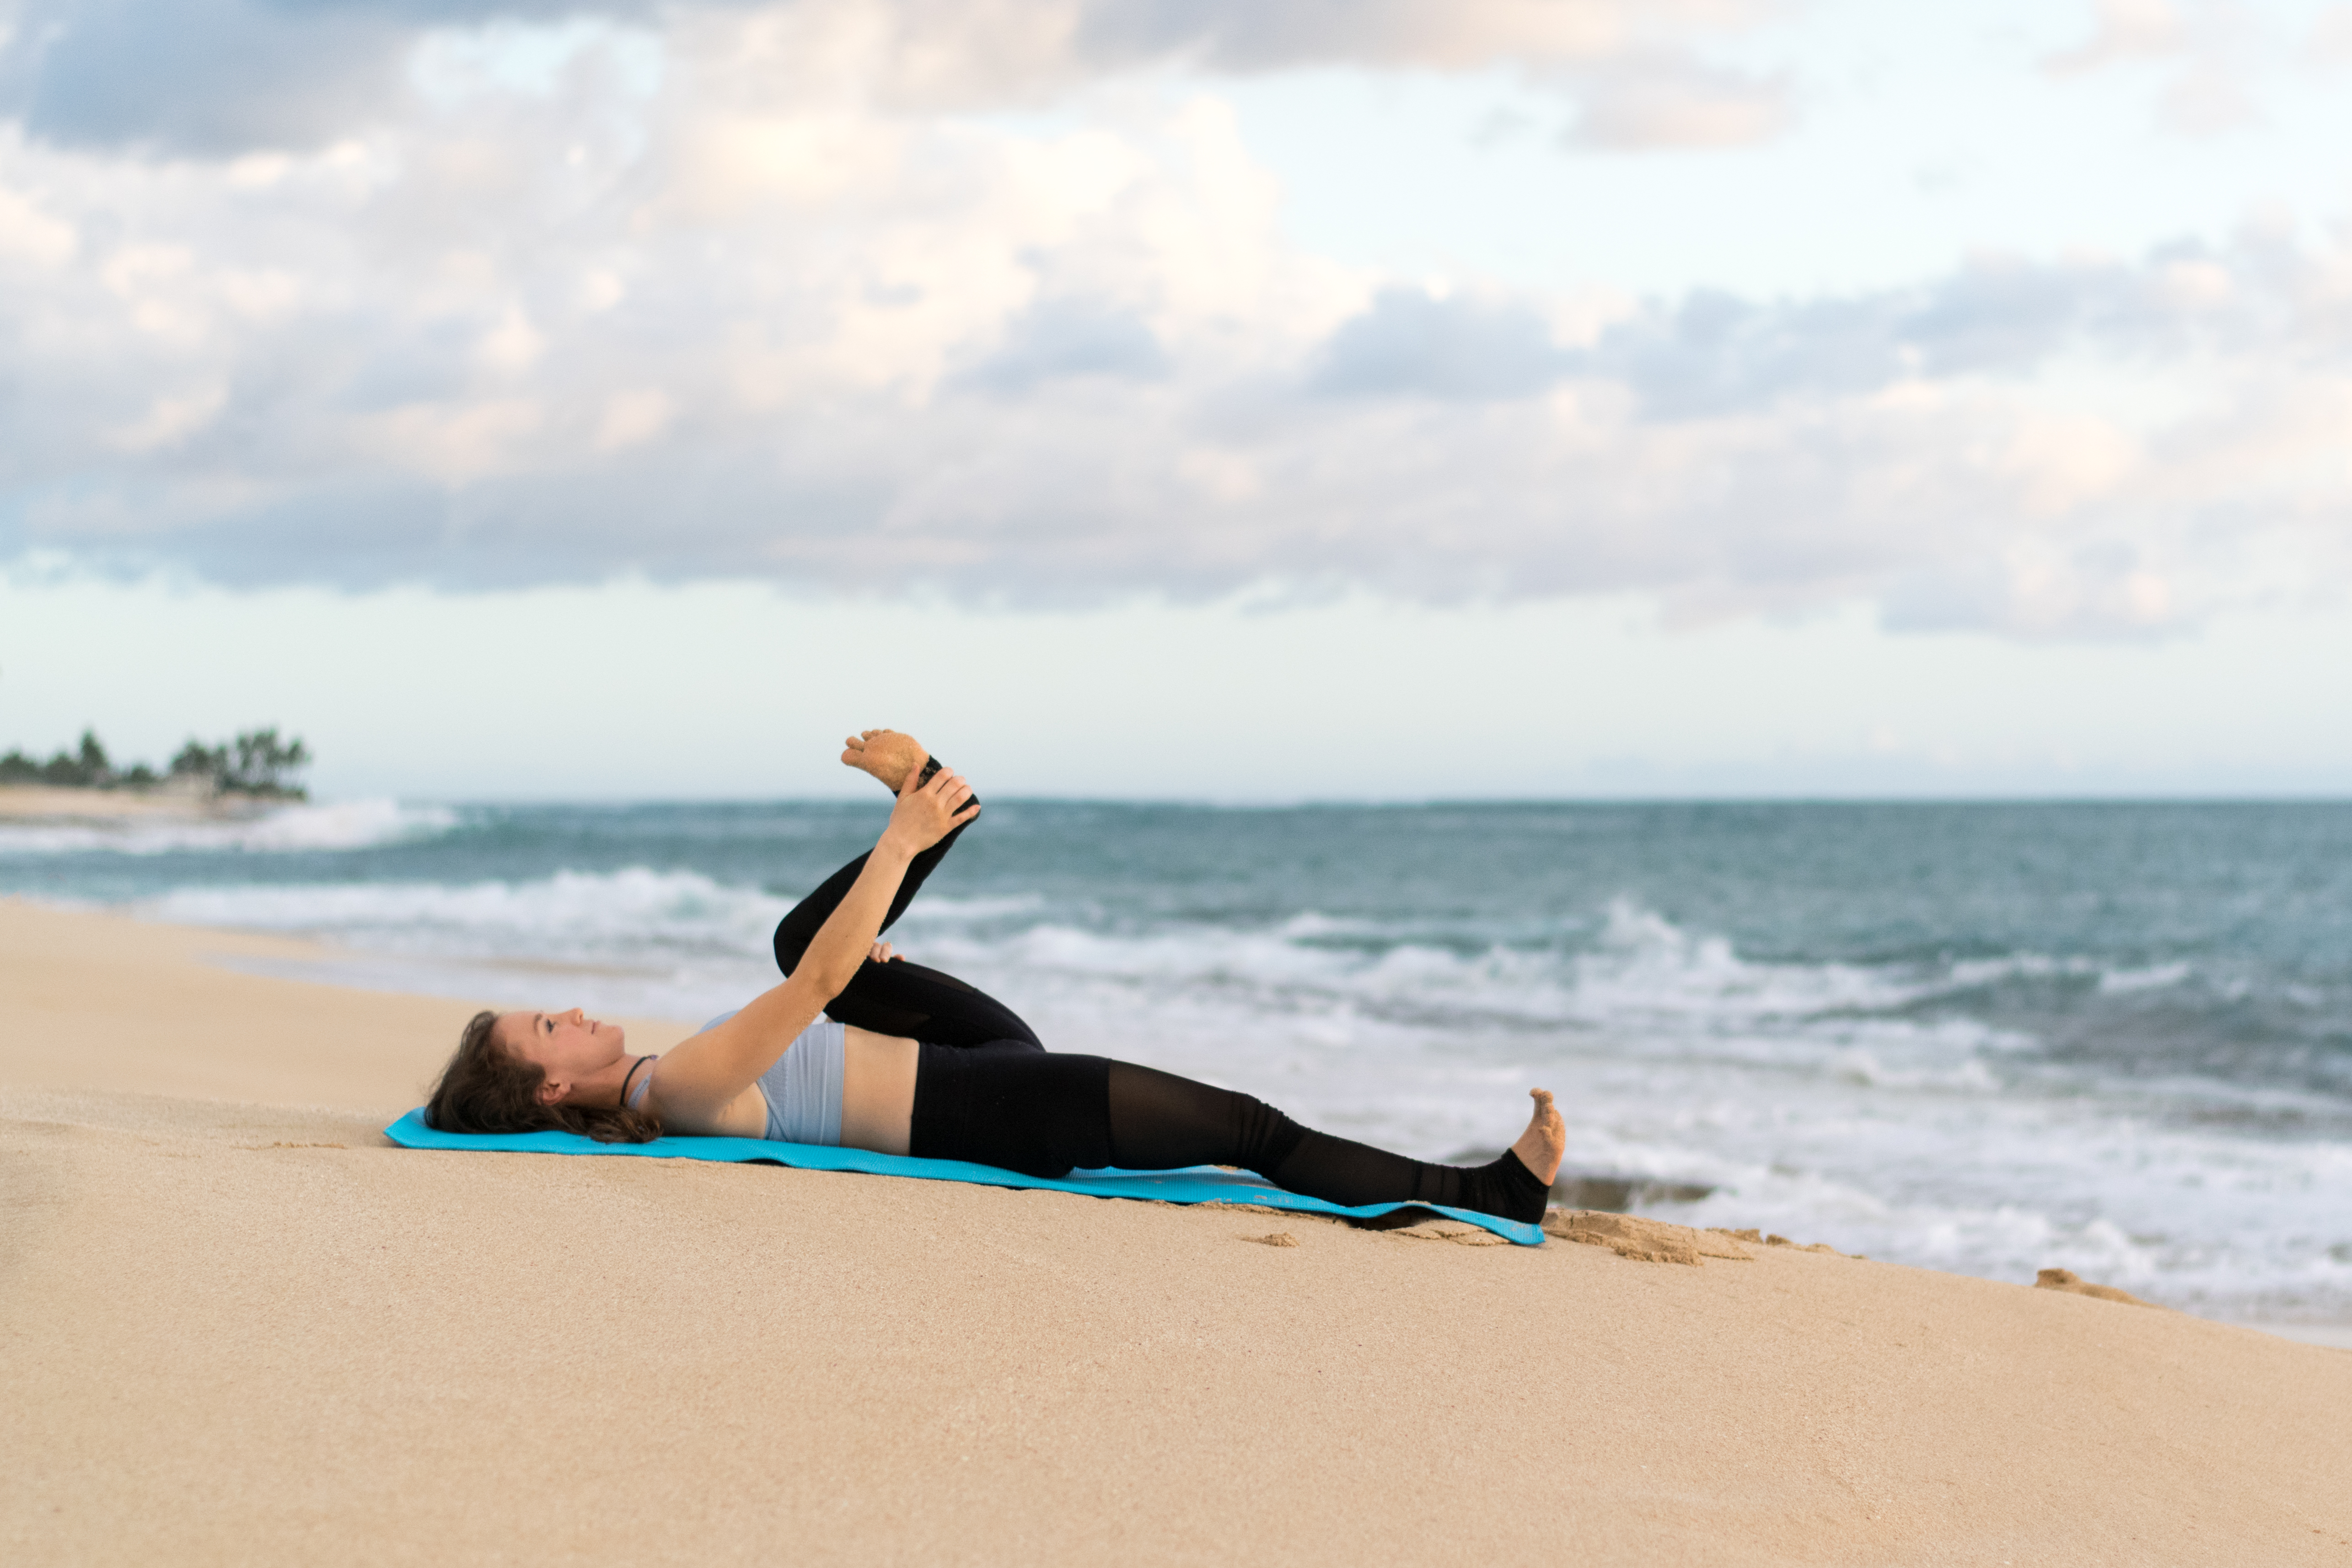
    7 » Supine Pigeon, aka Supta Kapotasana (Variation)

    Yoga Asana (Pose) » Supine Pigeon » Stretches for Sacrum + Low Back » from Infinite Embers blog

    • Pull your R knee into your chest. Put your L leg bent with your foot flat on the floor, as it was in Bridge Pose.
    • Hold onto the back of your R thigh.
    • Flex your R foot and lift it up away from your R thigh as much as you can, aiming to bring your leg into a 90 degree angle.
    • Rotate from your hip to try to bring your R foot towards your L shoulder. Keep your leg in that same 90 degree position with your foot flexed – don’t twist your knee. If it’s easily within reach, grab onto your R ankle with your R hand (keep the L hand on the thigh) to help guide your leg.
    • Now pull your R knee slightly across your body towards your L shoulder. You should feel a stretch in your R outer hip.
    • Keep your shoulders down and relaxed on the ground and maintain the natural curve of your low back – no rounding!
    • If you want more, try to straighten your L leg out onto the ground. Keep that foot flexed as well and point your toes and knee up to the sky.

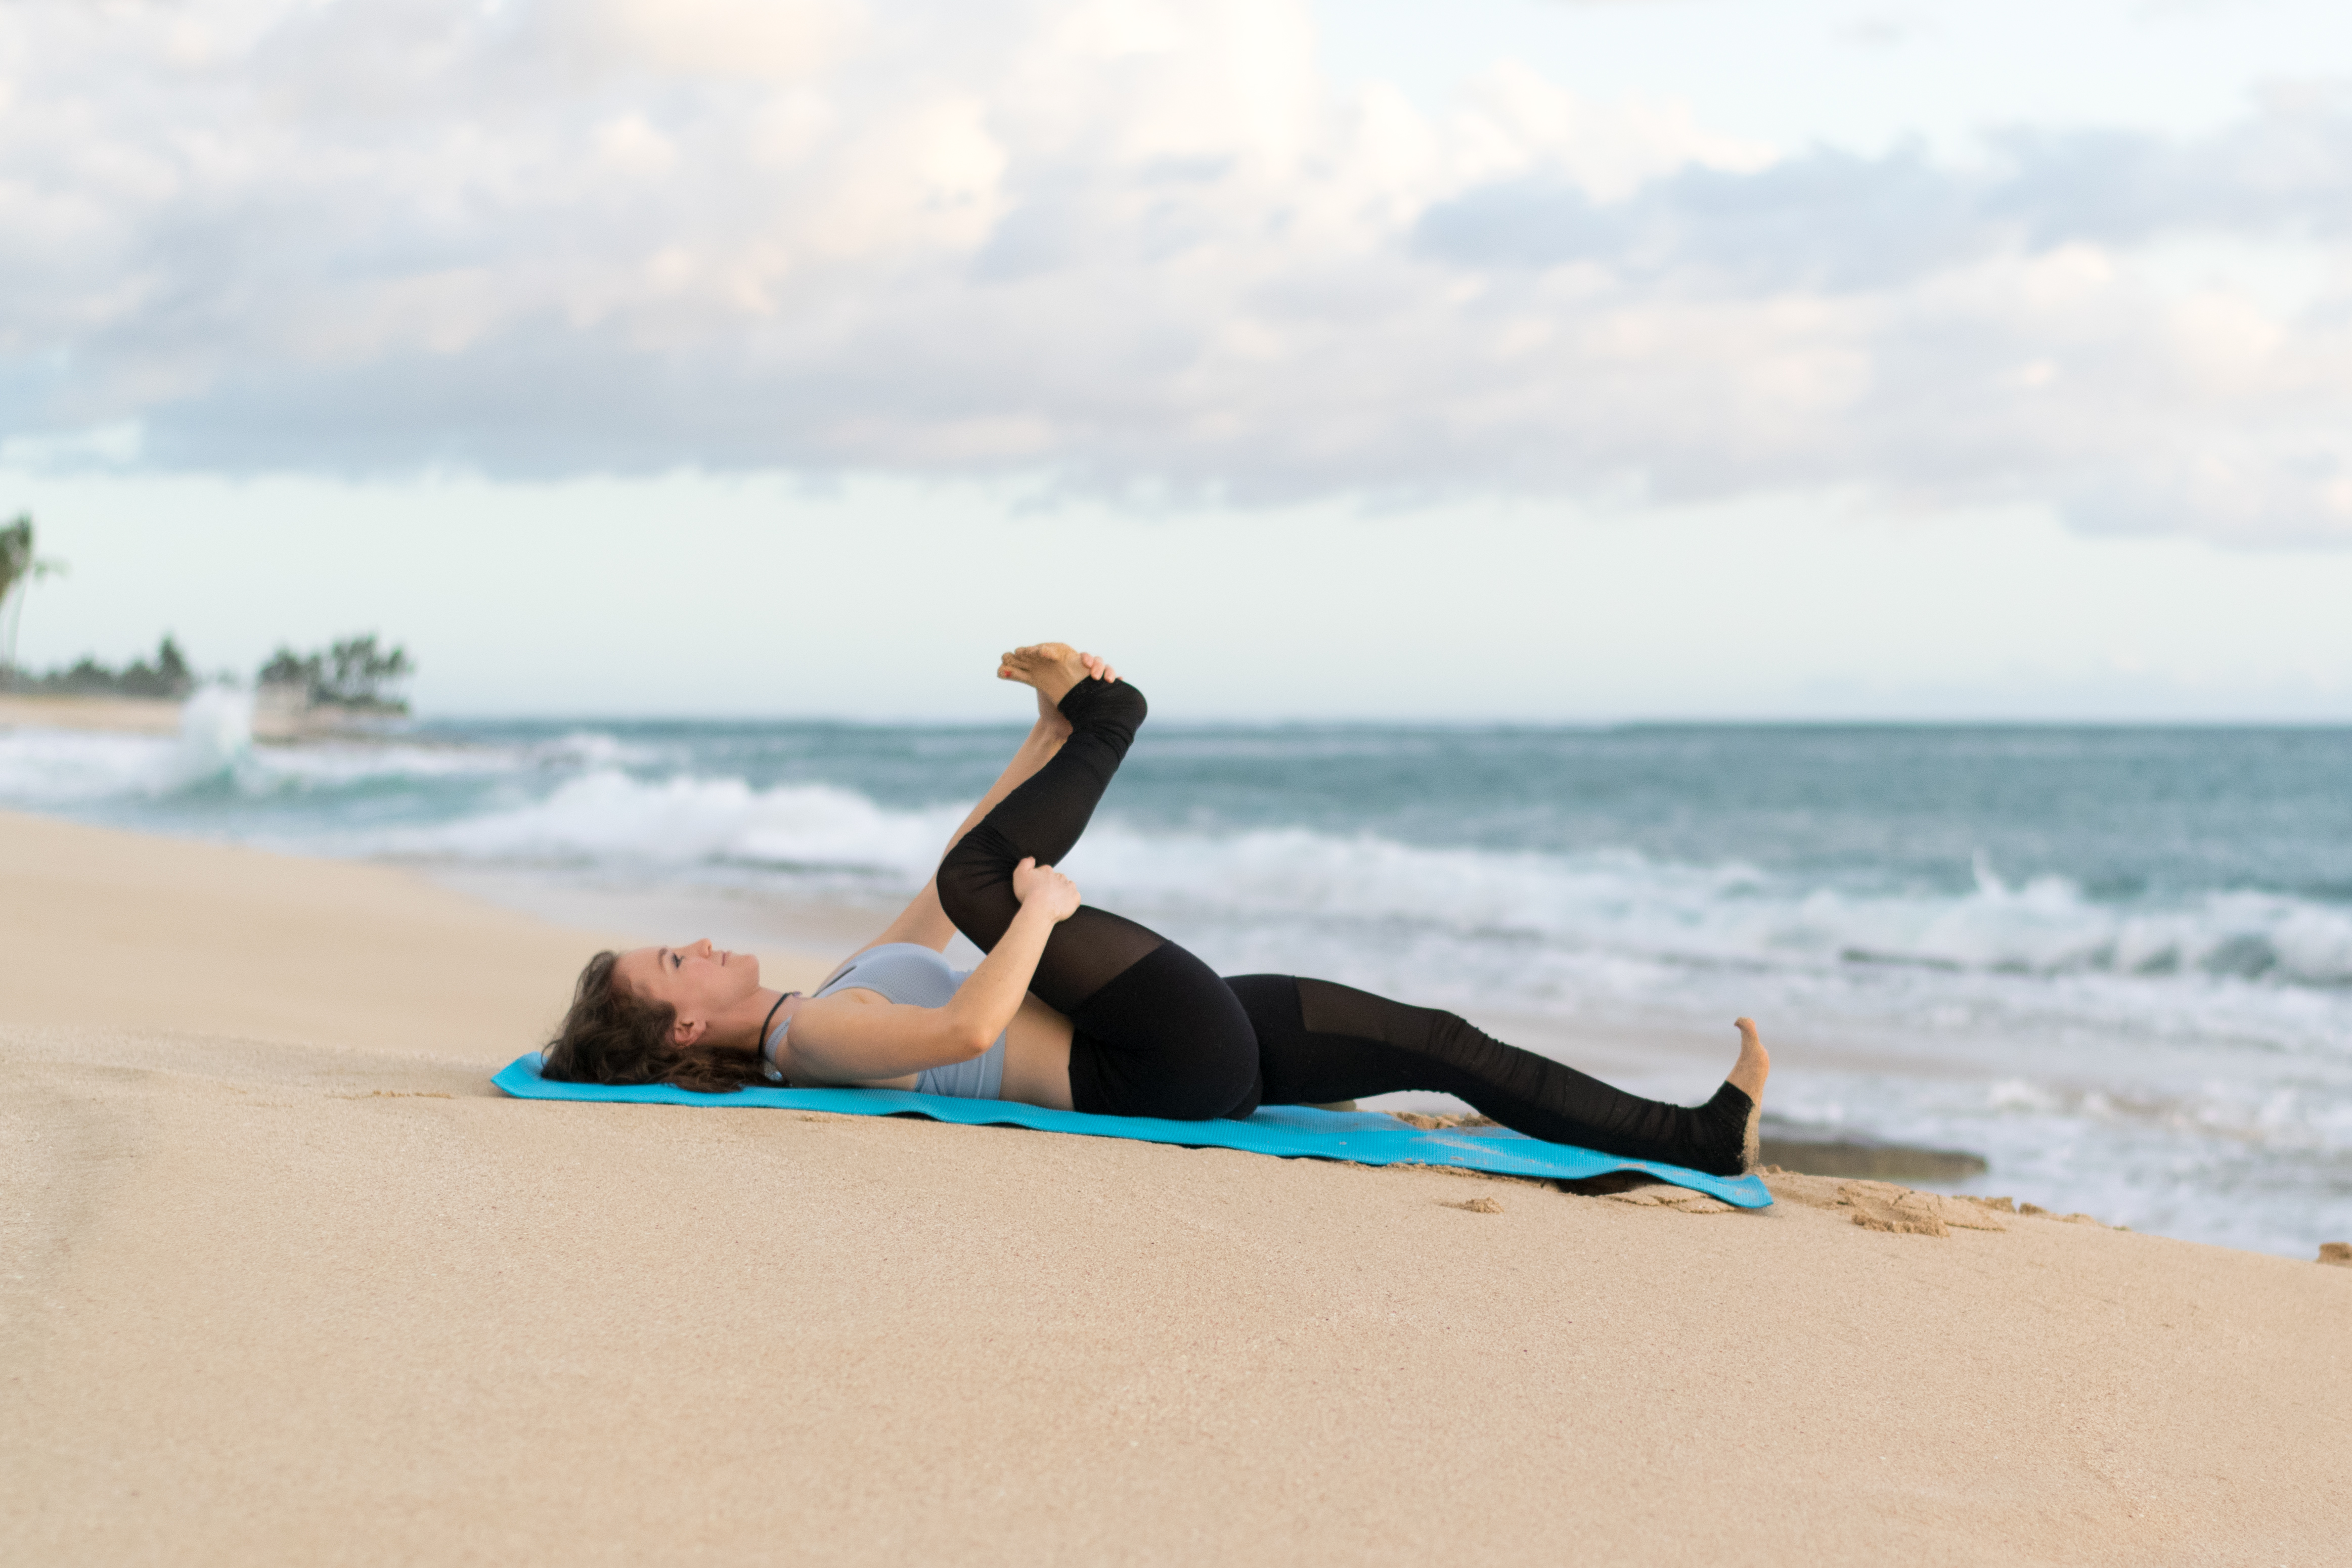
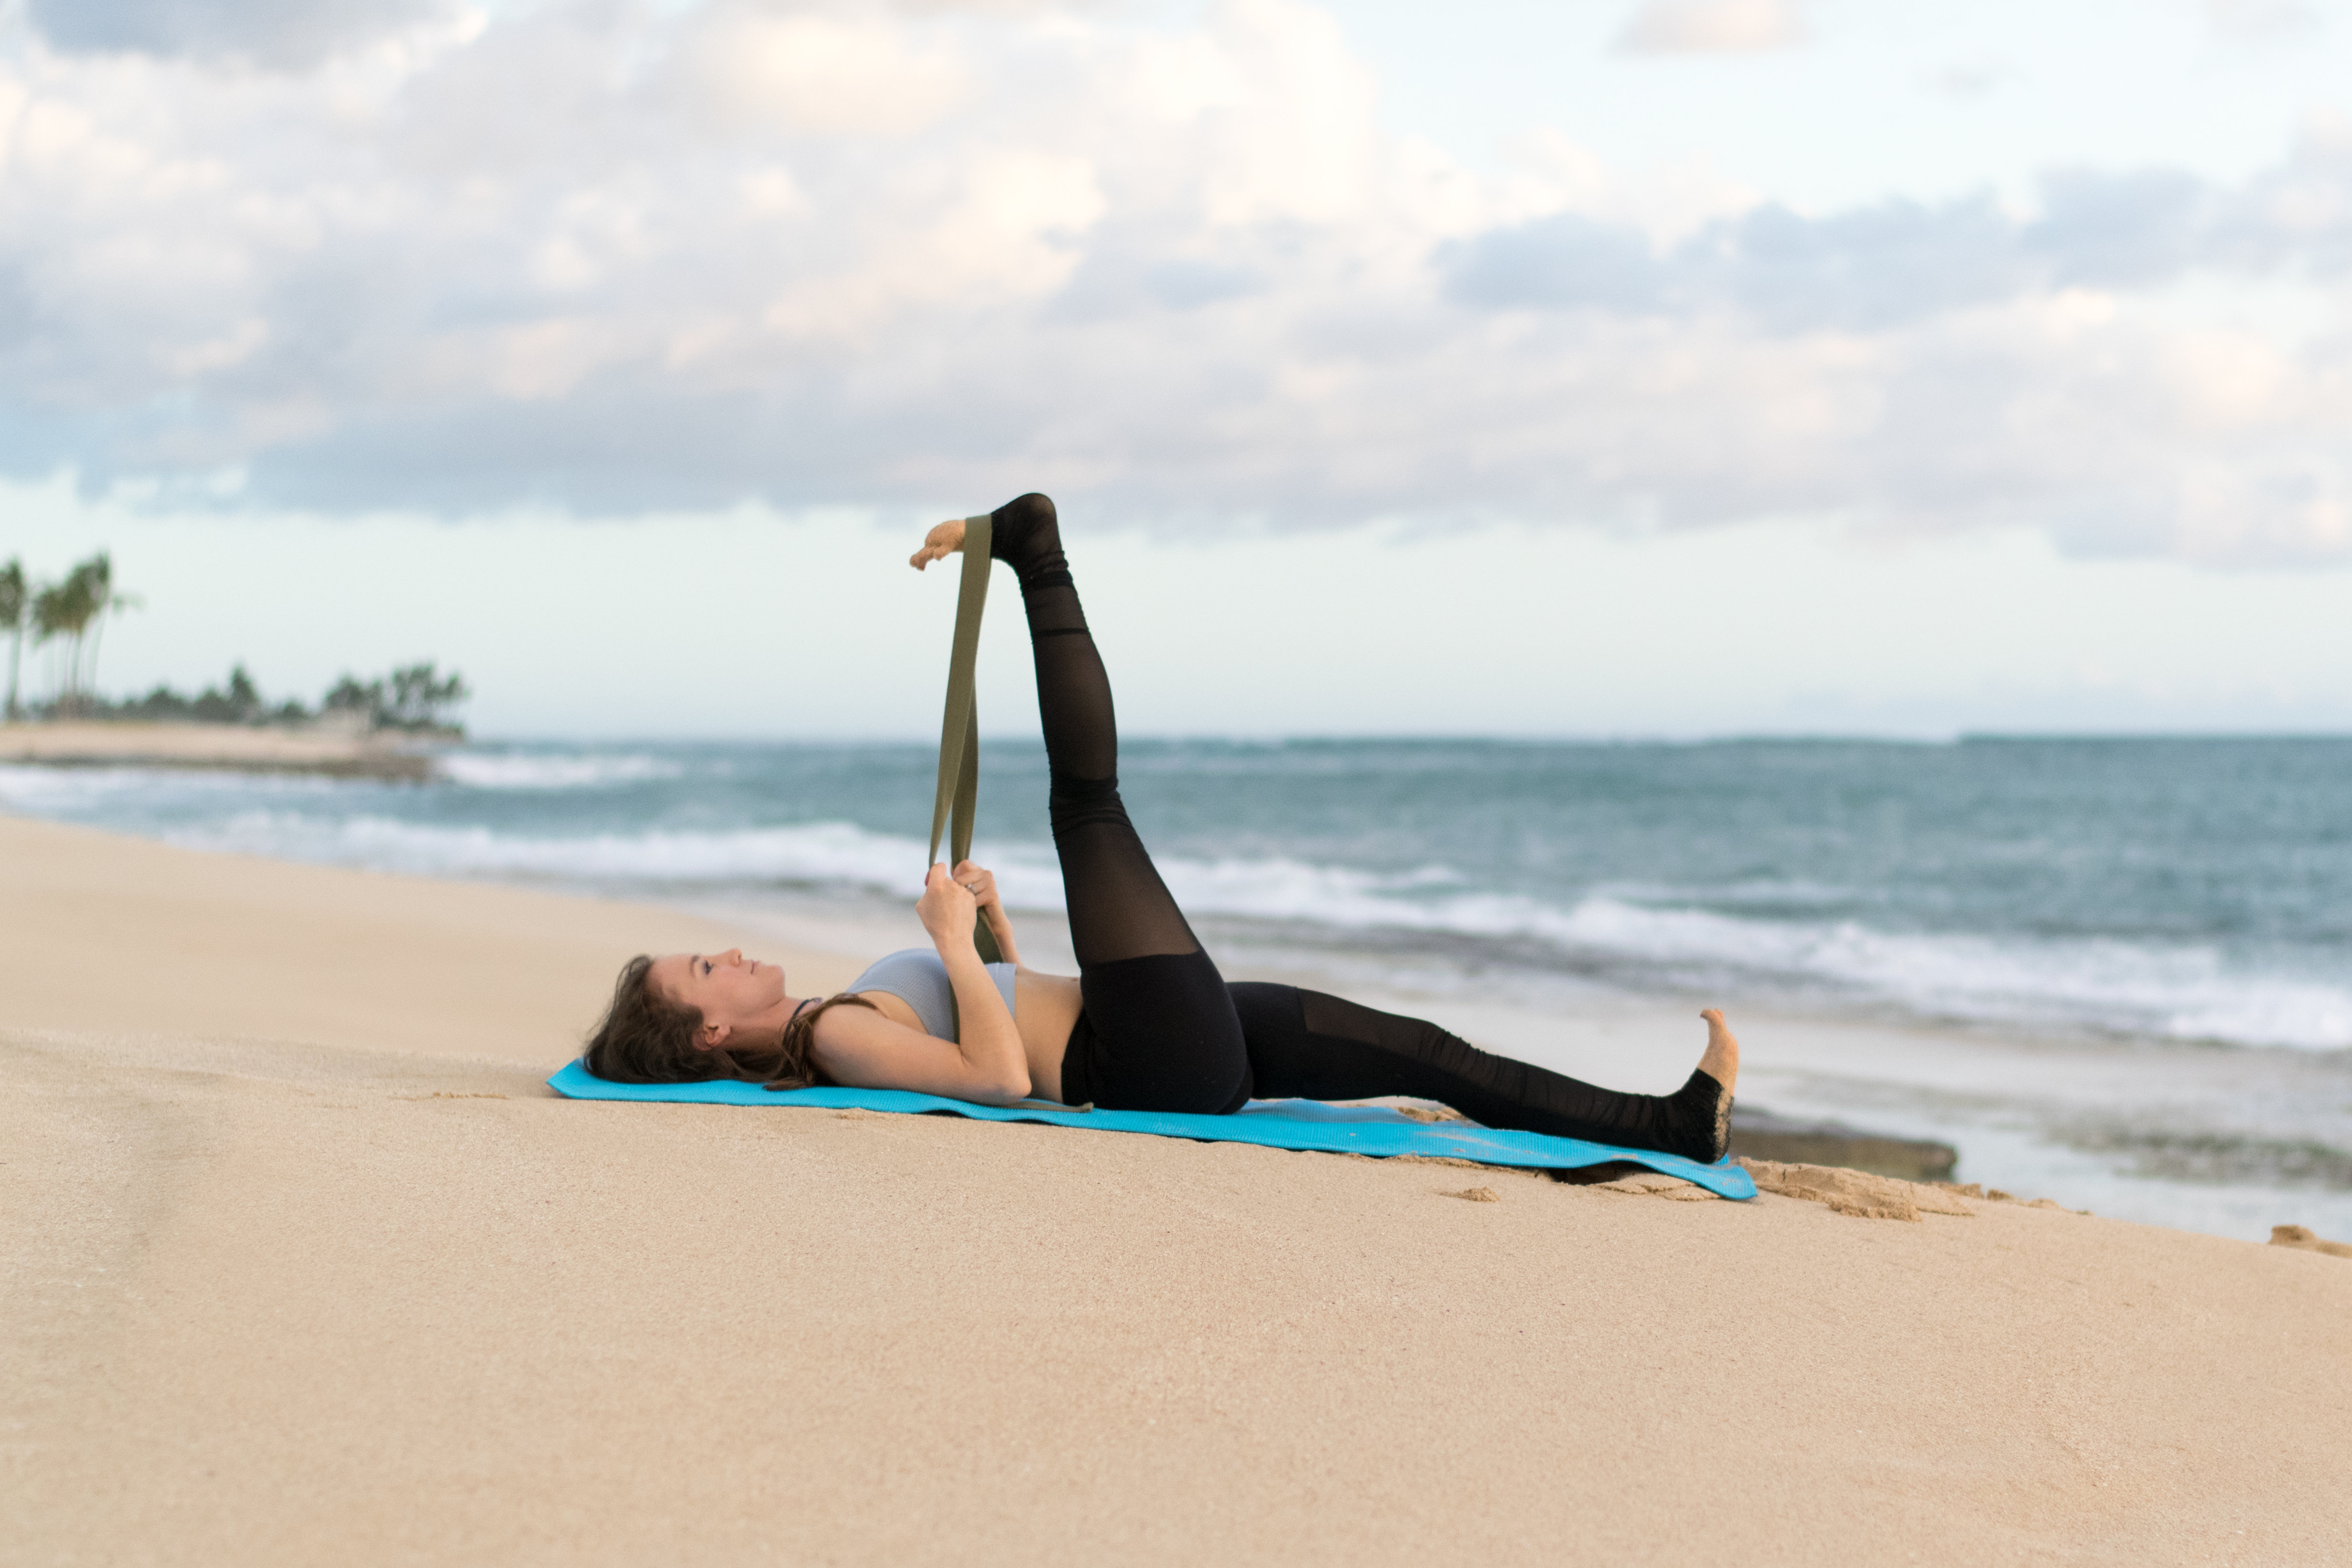
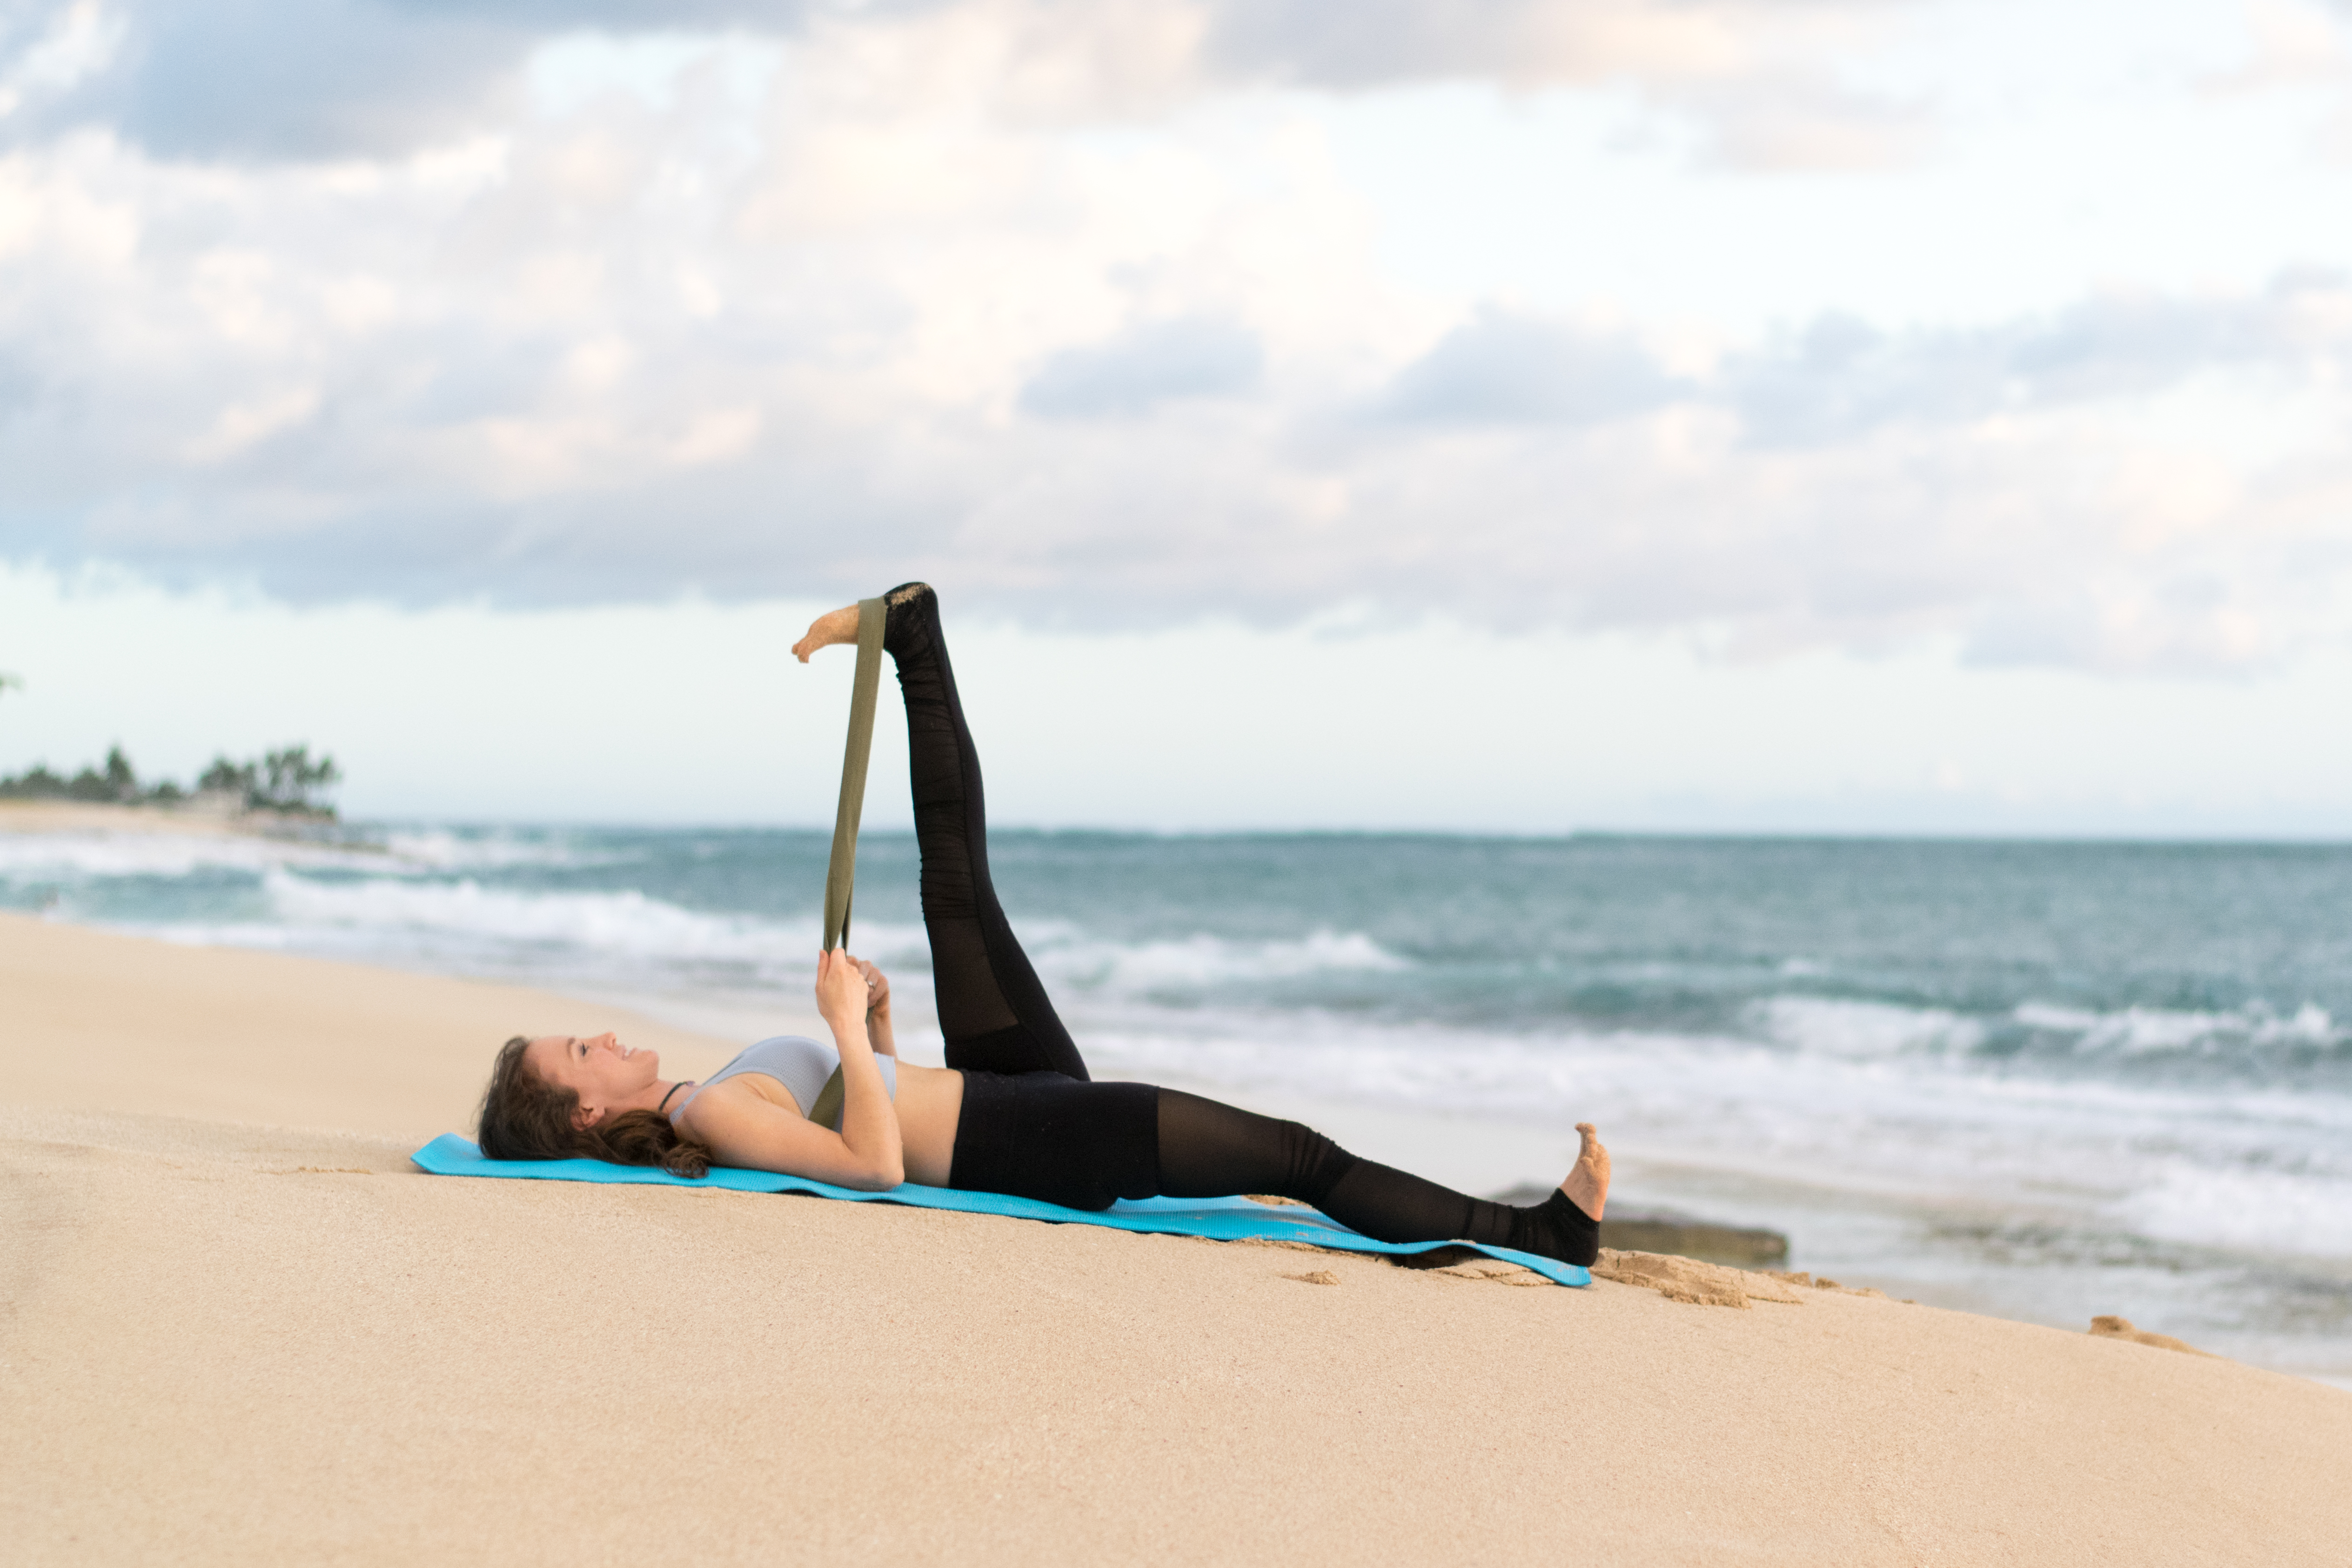
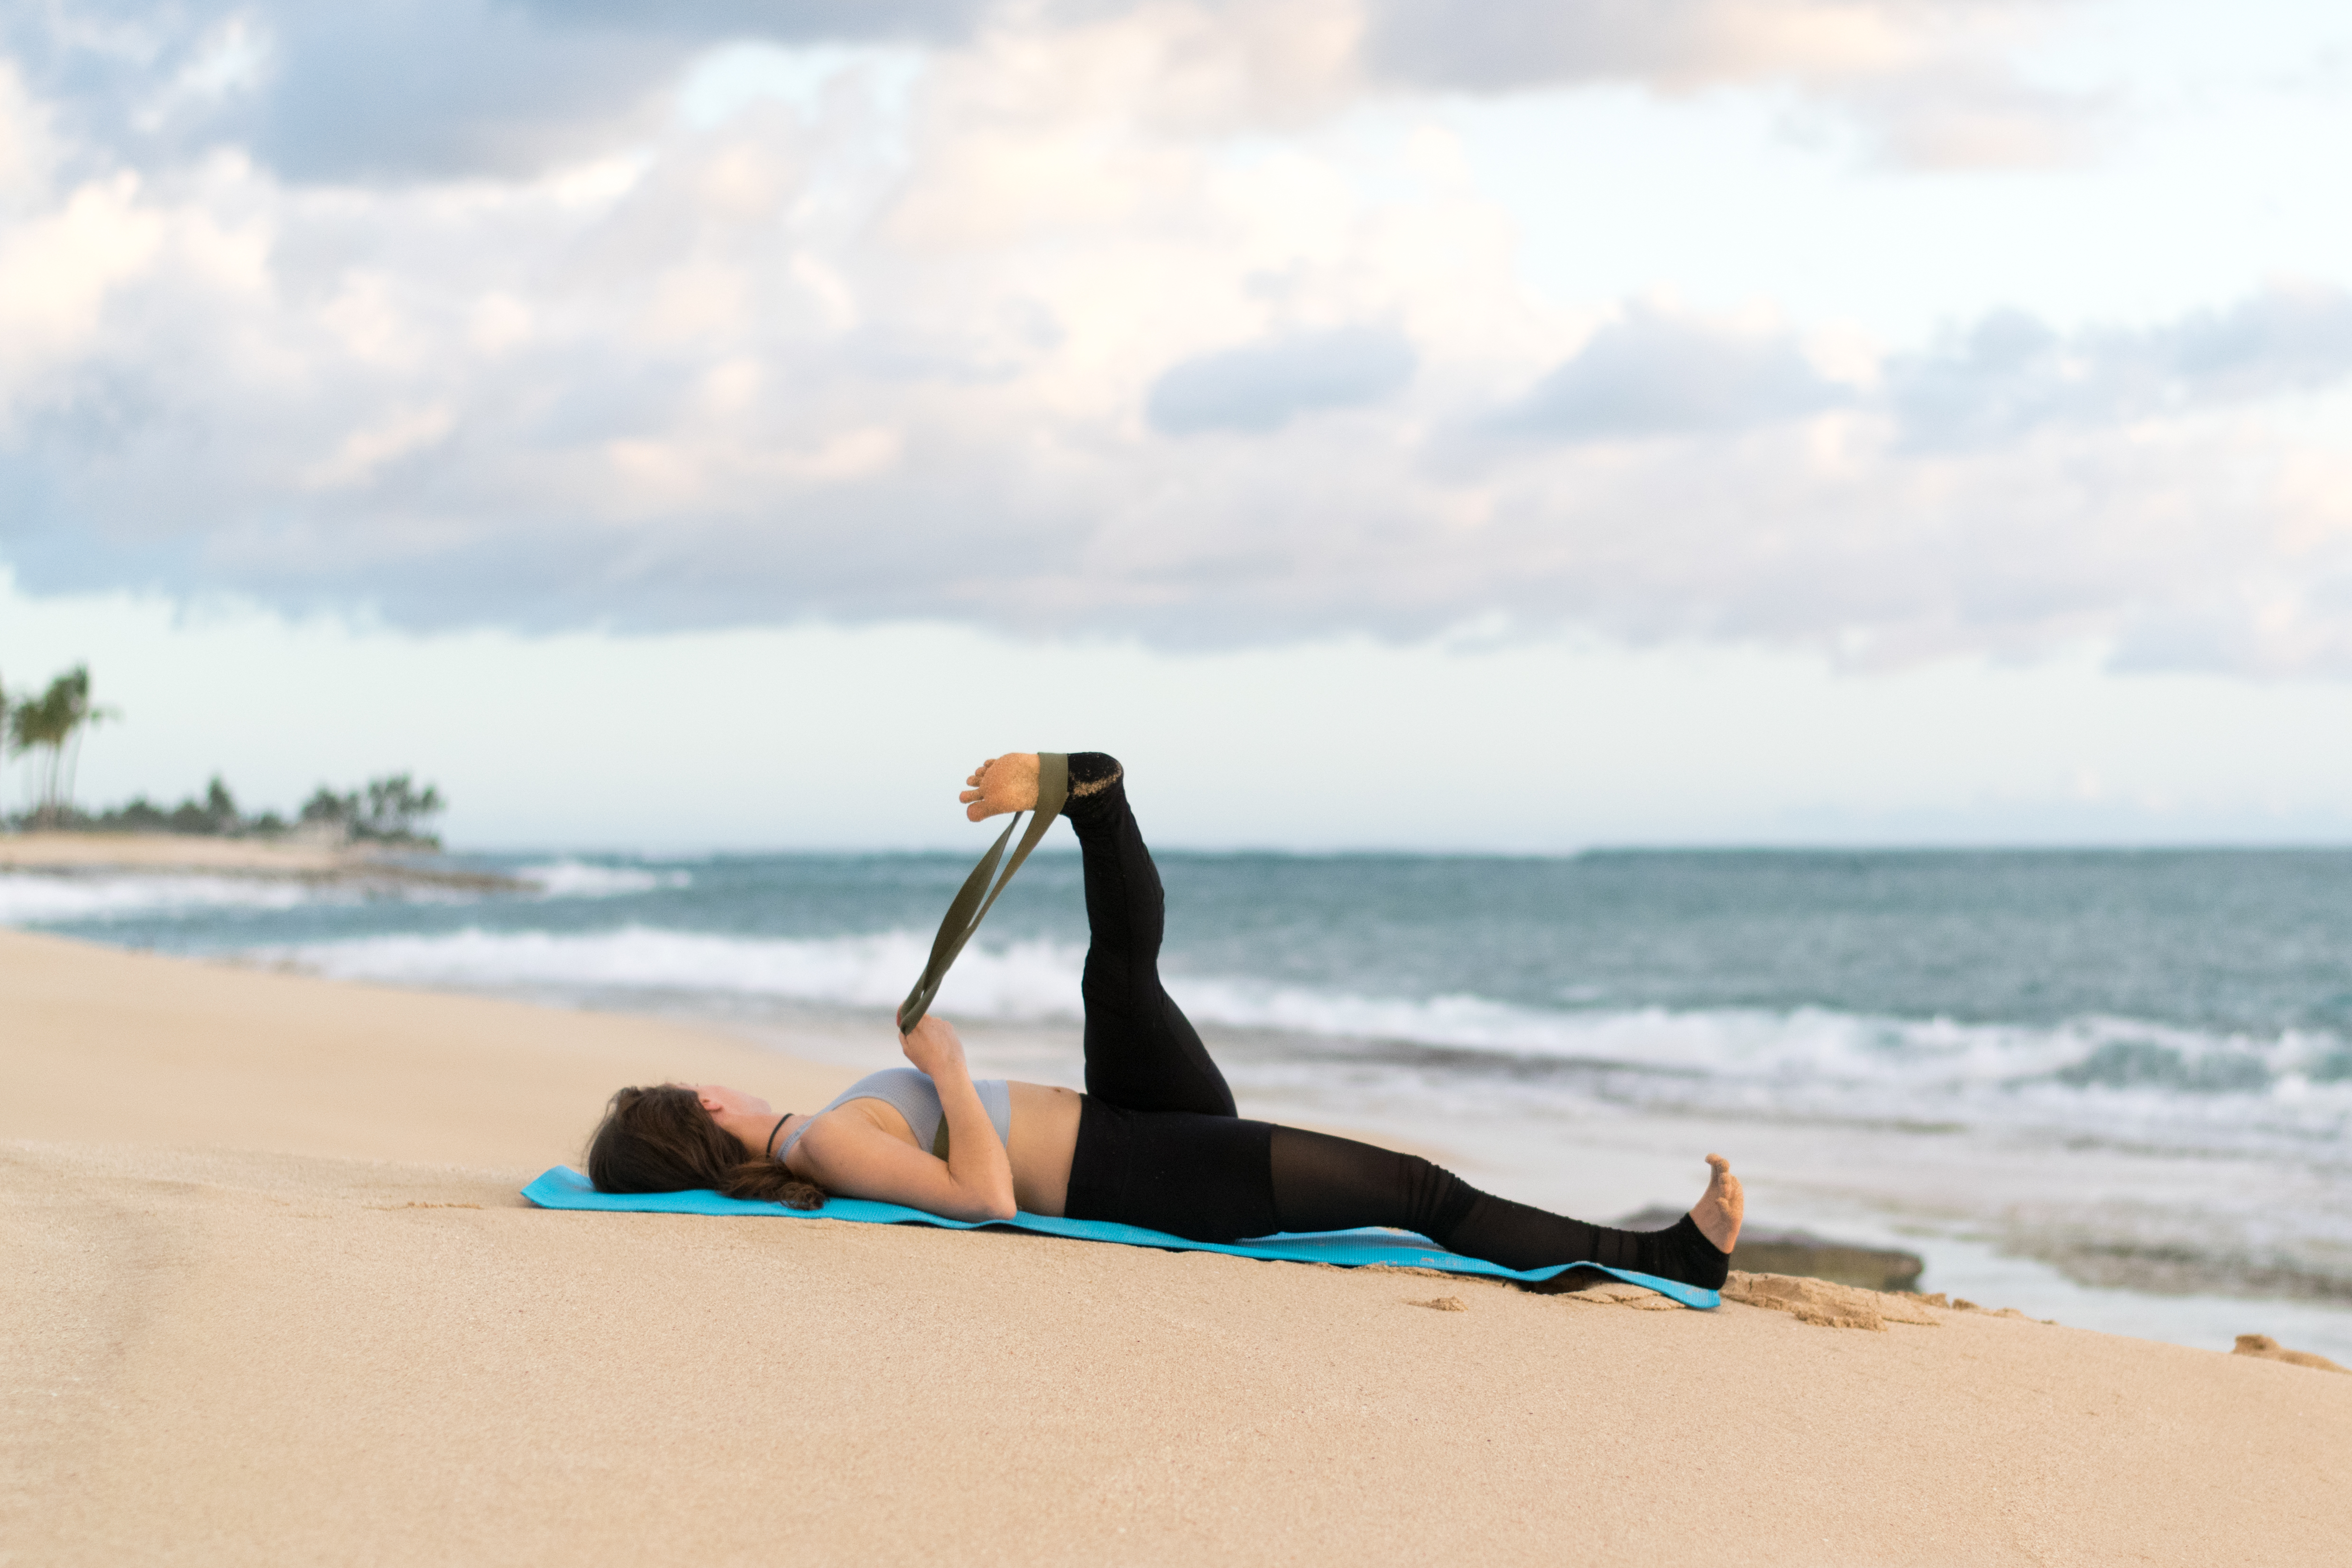
    8 » Reclining Hand-To-Big-Toe Pose, aka Supta Padangusthasana

    Yoga Asana (Pose) » Reclining Hand to Big Toe » Stretch for Sacrum + Low Back » from Infinite Embers blog

    • If you have a strap or towel or belt or literally anything that is long, that will be helpful here.
    • From Pigeon, hug R knee back into your chest. Start with your L foot flat on the floor with your knee bent.
    • Place your strap across the ball of your foot and slowly begin to straighten your R leg, aiming your foot directly above your R hip as you extend towards the sky. Keep your R foot flexed. (If you have nothing to lasso your foot with, hold onto the outside edge of your foot, but watch that your R shoulder doesn’t come up off the ground)
    • Think of pushing your leg down so it’s rooted into your hip socket while your foot reaches upwards – it’s like you’re trying to grow your leg longer from both ends.
    • Keep your shoulders down and your spine (you guessed it) neutral.
    • If you want more, try to straighten your L leg out onto the ground. Keep that foot flexed as well and point your toes and knee up to the sky.

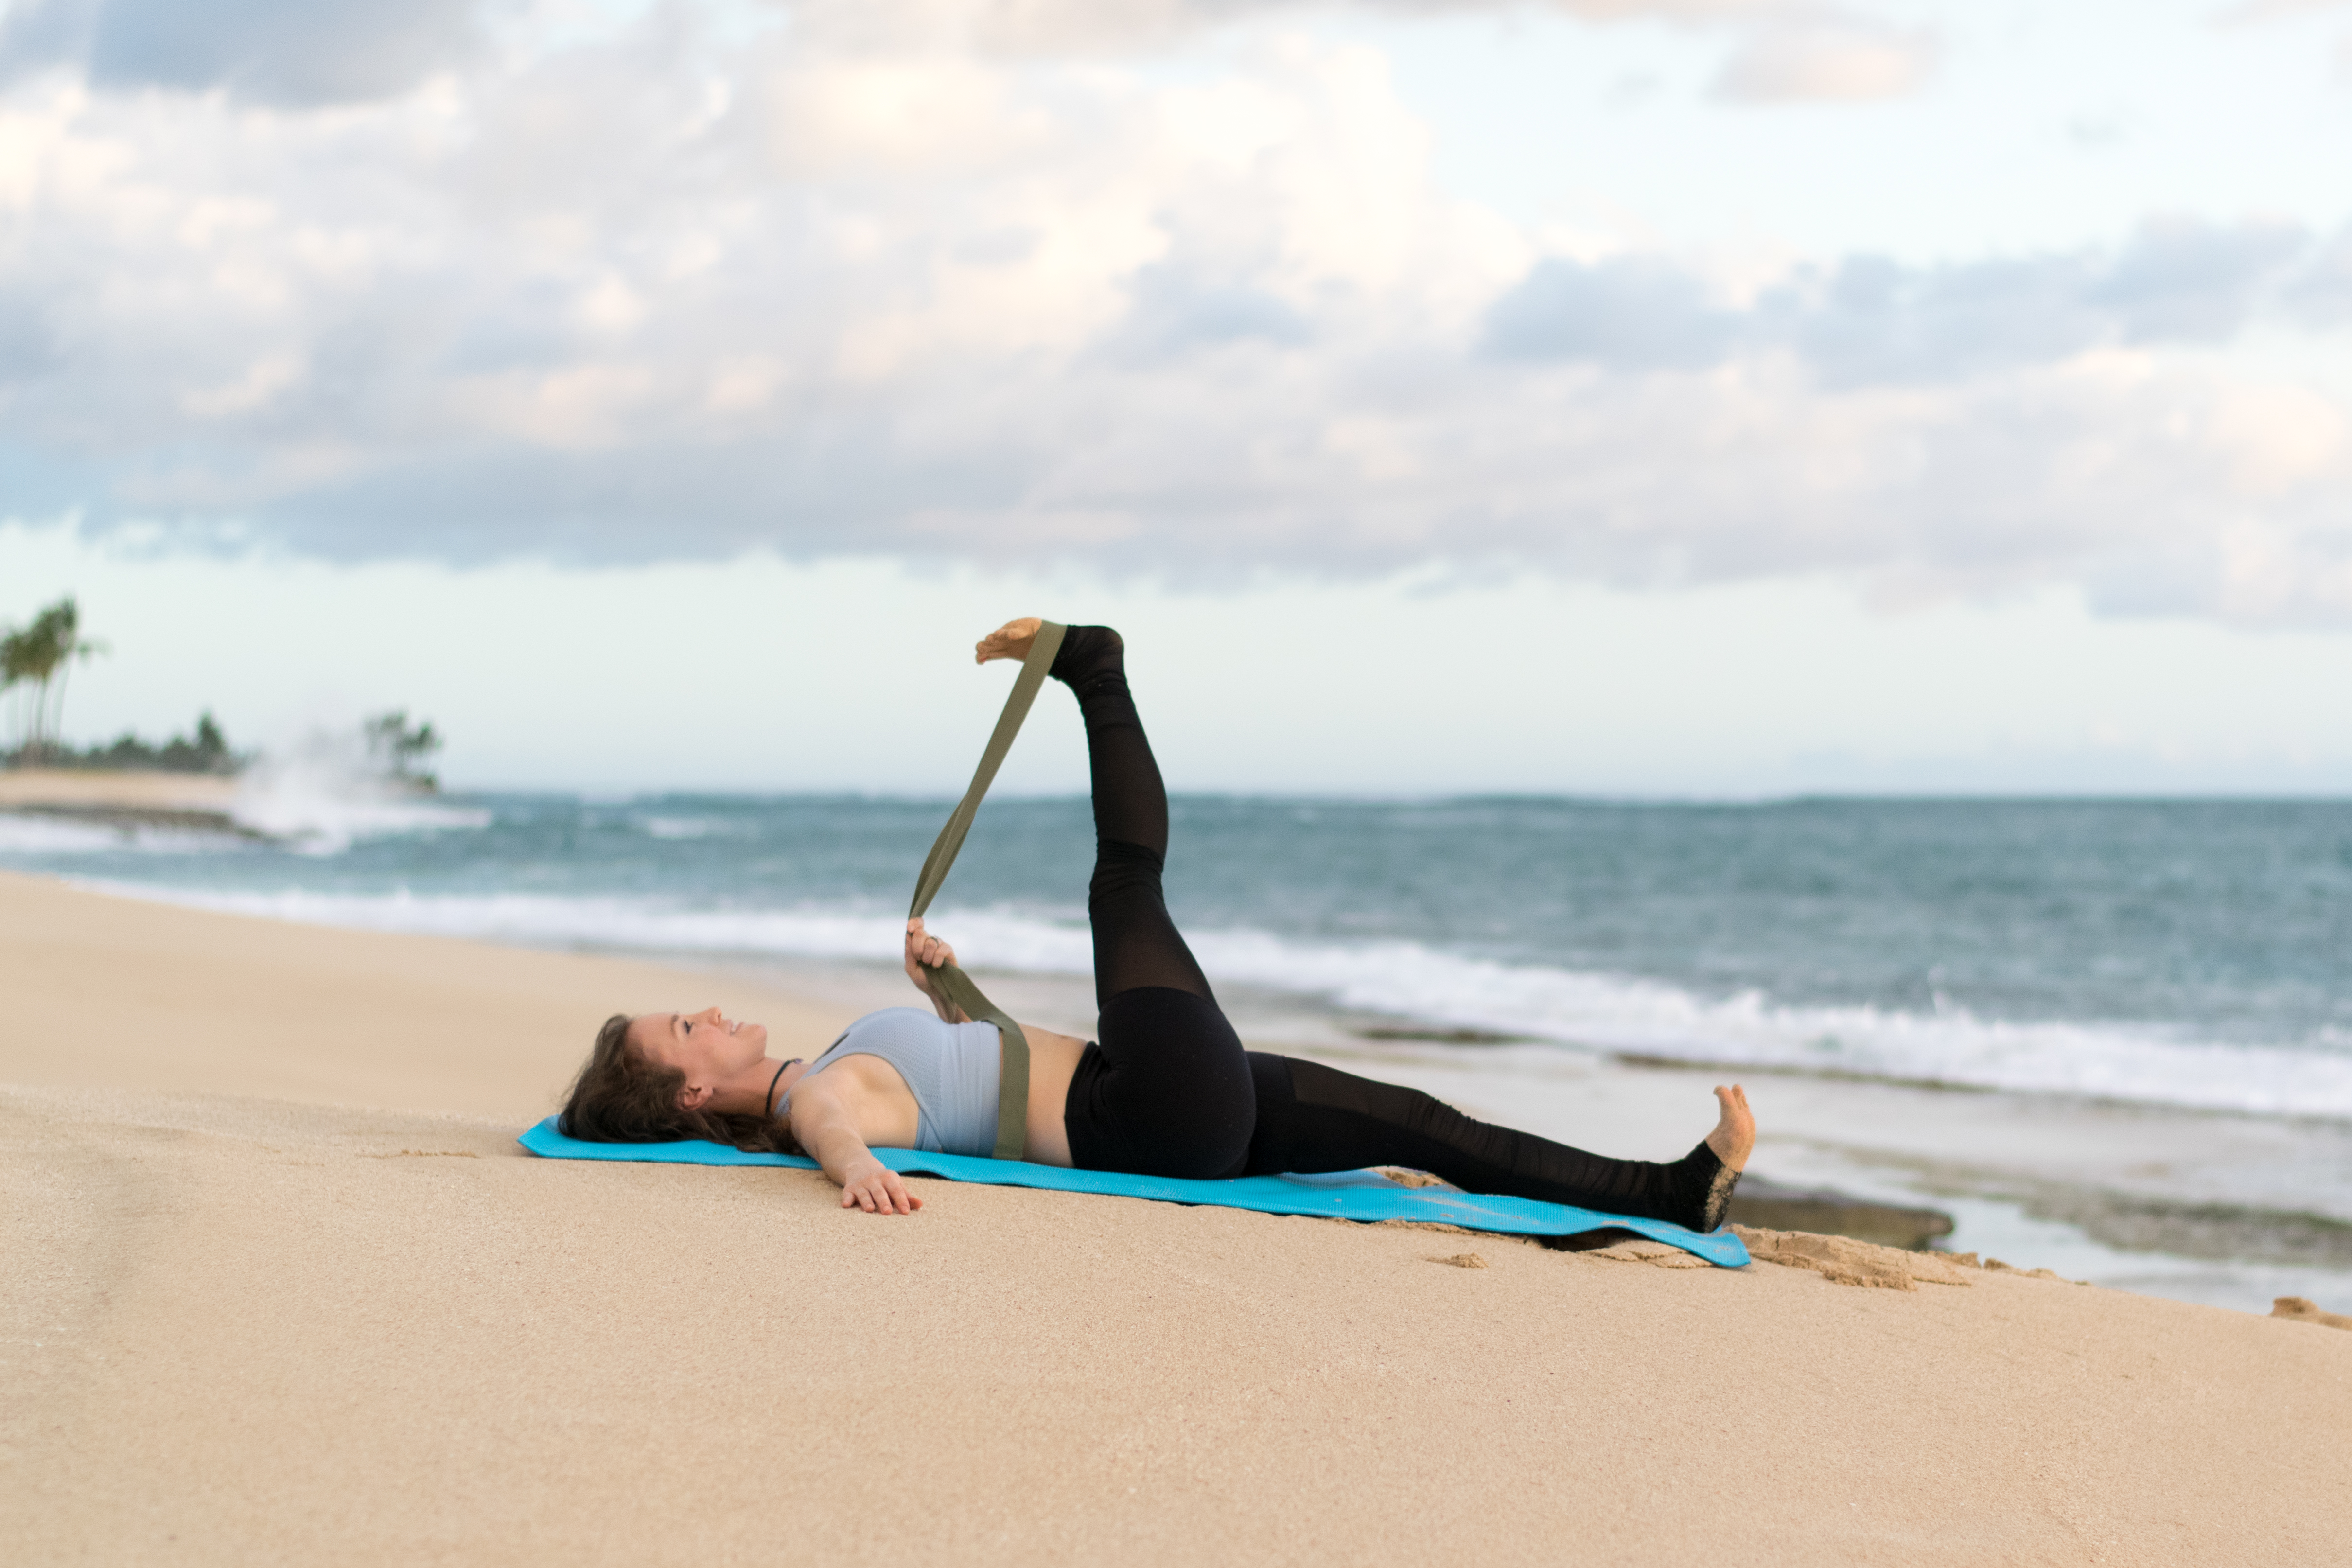
    9. » Revolved Reclining Hand-To-Big-Toe Pose, aka Parivrtta Supta Padangustasana

    Yoga Asana (Pose) » Revolved Reclining Hand to Big Toe » Stretch for Sacrum + Low Back » from Infinite Embers blog

    • From #8, take both ends of your strap in your L hand. Reach your R arm out to the side like a T.
    • Bend your R knee. Keep your R foot flexed. If it’s not already, straighten your L leg out onto the ground. Keep that foot flexed as well and point your toes and knee up to the sky.
    • Keeping both shoulders on the ground, guide your R foot across your body and over towards the L like you did in your Supine Spinal Twist.
    • Try to straighten out your R leg as much as you can. Keep tension in the strap by pushing your foot into the strap and your strap into your foot.
    • If it feels okay on your neck, turn your head to look to the R.

    10 » Repeat 7-9 on the L Side

    Yoga Asana (Pose) » Supine Pigeon » Stretches for Sacrum + Low Back » from Infinite Embers blog

    Yoga Asana (Pose) » Reclining Hand to Big Toe » Stretch for Sacrum + Low Back » from Infinite Embers blog

    Yoga Asana (Pose) » Revolved Reclining Hand to Big Toe » Stretch for Sacrum + Low Back » from Infinite Embers blog

    » Bonus: End with more Savasana, for as long as you want

    Even though bad things can (and will) happen to us, we get to decide how we react. When you injure yourself, I recommend thinking of it as an opportunity to reconnect with your body. The process of recovery can be hard, but it can also be an opportunity to grow and improve physically and emotionally, if you let it.

    » Song Vibes «

    Do any of you experience low back pain or pain around your sacrum? Got any good tips for things that help? Share them with me (and my husband) in the comments!

    xo,

    Amy

    This post is not sponsored, but there are affiliate links throughout this post. I genuinely love these products and know you will, too. Thanks for supporting the blog!

    Photos by Matthew Hanley, edits by me

  • Full 60 Minute Power Vinyasa Yoga Class Video

    Welcome to Infinite Embers!

    Oh my gosh, I’m so excited this day has finally arrived. I seriously can’t believe it, guys. Thank you so much for joining me for DAY ONE of my new blog.

    So – are you ready to get your wellness on?

    I sure am – I’ve been building up to this day for a while. I have spent most of my free time for the last year or so dreaming up this blog, and to celebrate its launch I wanted to throw you all a party. A virtual party, I suppose. On your mat. All by yourself.

    …dear god. No one’s going to want to come to this party.

    Okay, before I chase you away, let me explain: I feel my absolute fucking best after a good workout. Like, I feel strong and confident and focused and ALIVE.

    And after a yoga class, I feel mentally clear and reconnected with my spiritual self. So, when I take a challenging yoga class that really pushes me to be present and work to my limits – I feel unstoppable.

    I want to give you the gift of feeling that way, too – because it really is addictive. Helping you feel incredible is the point of this whole blog. If you think I’m absolutely insane, because working out is painful/hard/the worst, that’s okay too. Honestly though, working out never really should be easy. That’s not the point. The point is to prove to your body and mind that you are stronger than you think you are, that the only obstacles are in your mind, and that you can take something that hurts and turn it into an opportunity to emerge more powerful than before.

    So I’m throwing a party where we all move and sweat and let go of life’s bullshit, and you’re invited! I created this free full Power Vinyasa yoga class for you to do any time you want to move your body and work your muscles.

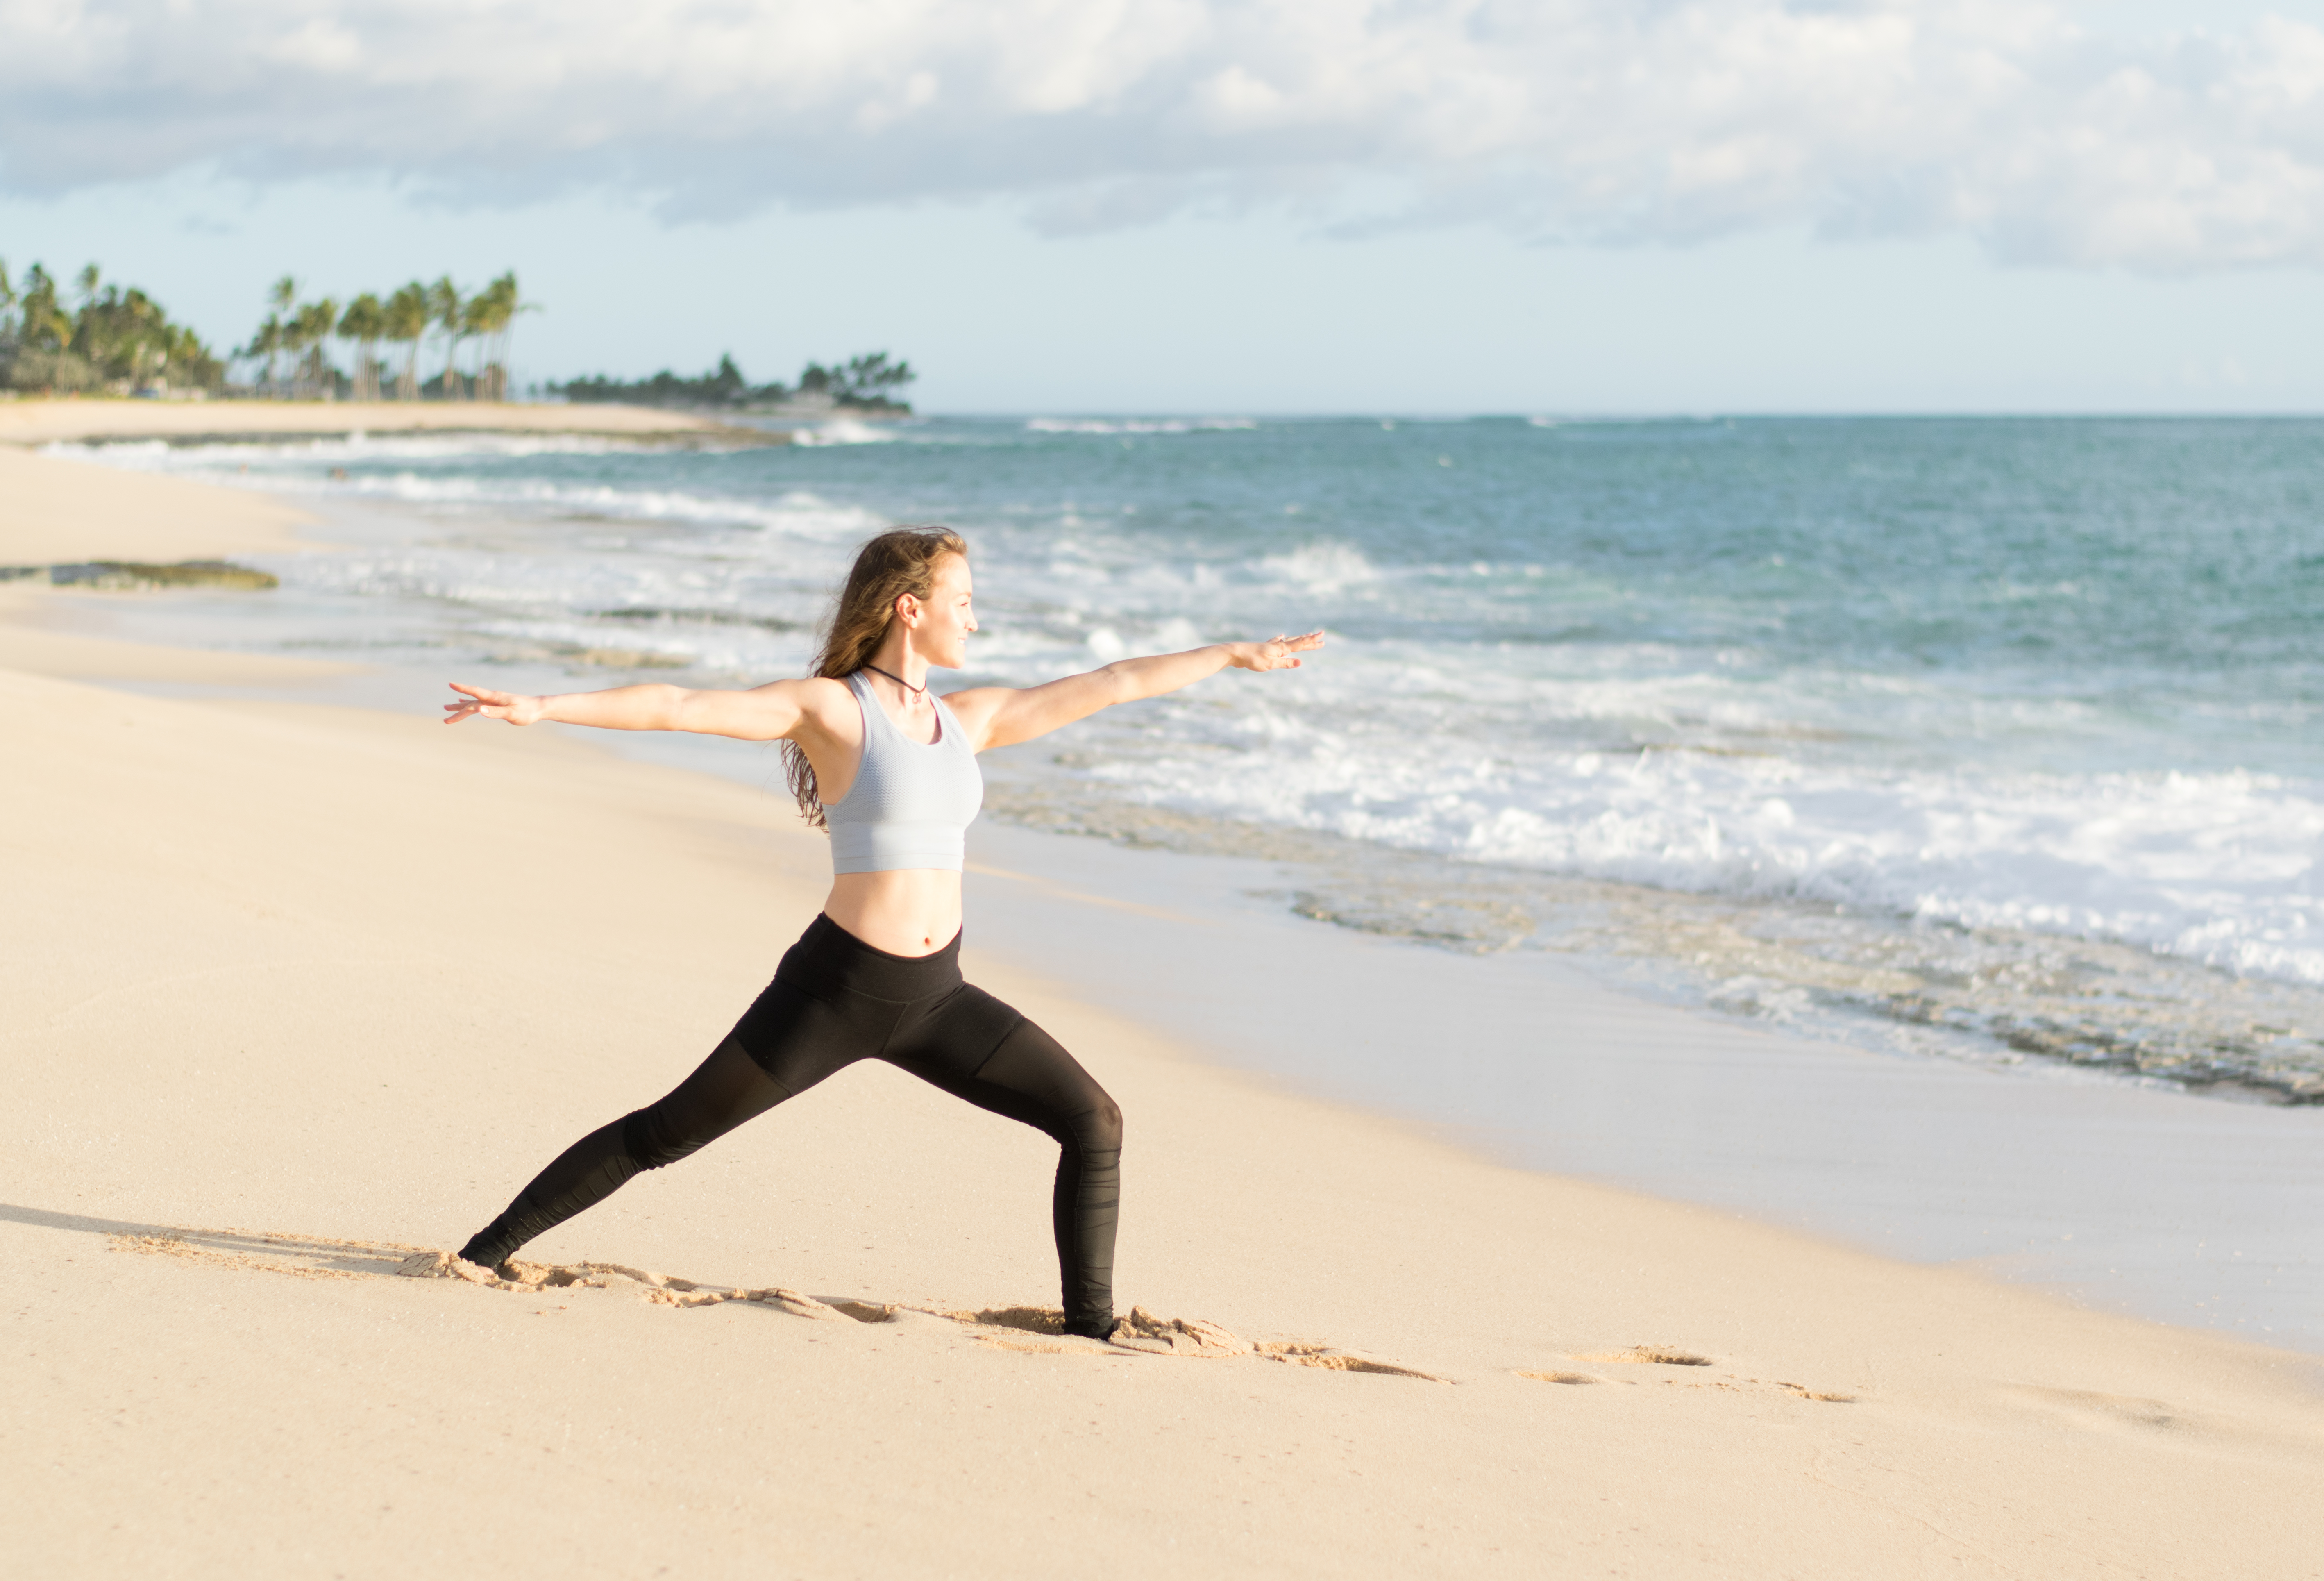
    Warrior 2 Yoga Pose Oahu Hawaii Beach» Get ready for 60 minutes of yoga that will challenge your body and clear your mind while helping you feel incredible.

    This is an all-levels class (but it will push you), and you only need yourself and maybe a mat. (glass of wine optional)

    This is the first of many more videos to come!

    And since we’re just getting acquainted, I encourage you to explore a little more by clicking here to read about the Infinite Embers blog and clicking here to learn about me.

    If you’re feeling lazy, here’s the fast version: my name is Amy, and I’m a 200 hr Registered Yoga Teacher with the Yoga Alliance and fitness instructor. I teach dance-on-a-bike spin, barre, aerial yoga, and the Megaformer workout. And yoga, obviously. If yoga’s not your thing, don’t worry – I’ll be bringing you a wide assortment of free workout content, from as many fields as possible. (but you really should give yoga a shot) On this blog I’ll be sharing posts about how to find health in both your body and mind. I hope to serve as a resource for you to become empowered to transform your life and find lasting health and happiness.

    Life’s short. There’s no good reason not to throw a party for yourself today. So have at it, and enjoy your workout! And again, thank you for joining me. I can’t wait to share with you everything I’ve been working on.

    Have a lovely Labor Day weekend, everyone!

    xo,

    Amy