Searching for "spin"

Number of results 45

  • Got Pain or Anxiety? Try Noise-Canceling Headphones

    Headphones Anxiety

    This just in: Noise-canceling headphones aren’t just a fun accessory—they’re actually an amazing mental health tool.

    I use noise-canceling headphones all the time and have noticed they have a major impact on my mental state. Regular headphones don’t hit the same way, and there’s a reason. Noise-canceling headphones reduce both anxiety and pain.

    That deserves some talking about.

    My love affair with headphones goes way back. Keep reading, because I share the best noise-canceling headphones below!

    I’m obsessed with music. I’m not personally musically talented, but I will listen to it and dance all day, every day. As a full-time fitness instructor, I constantly create new playlists for my classes.

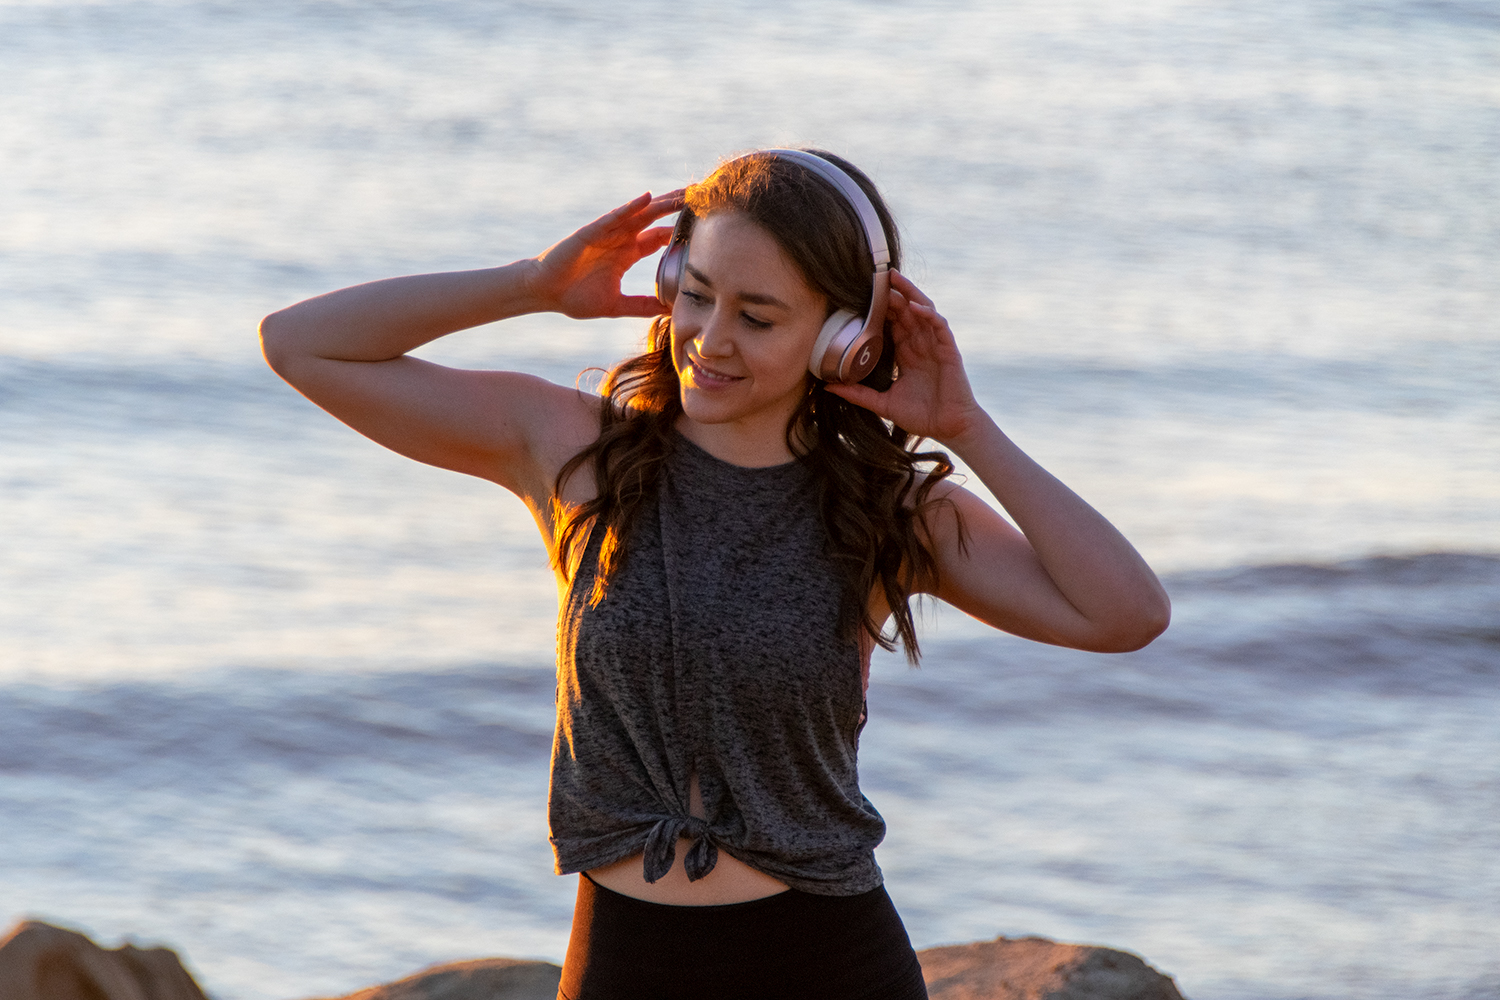
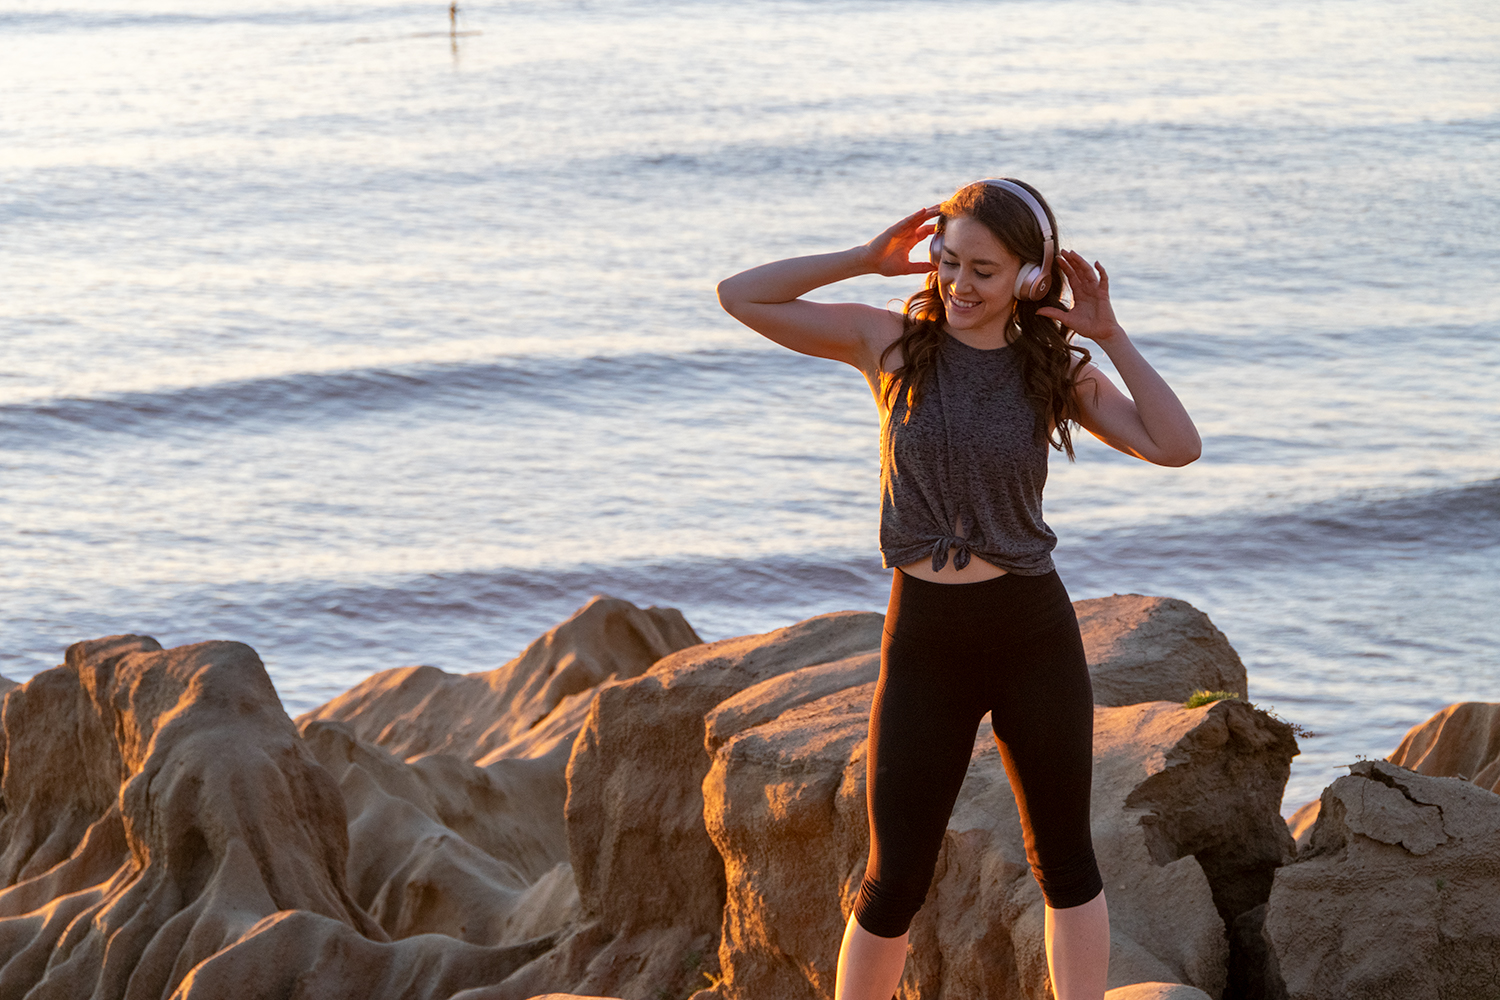
    So a few years ago, I wanted to be able to focus easier while memorizing the drops for my spin classes, so I upgraded to the noise-canceling headphones world and bought myself a pair of rose gold Beats.

    As soon as I put on my new headphones it was love at first beat.

    Like, woah. The noise-canceling aspect makes such a big difference in how you experience the music. It was definitely an upgrade—and not just because I could hear the music in more detail.

    I felt different.

    I noticed quickly that I have much less anxiety and pain when I use my noise-canceling headphones. They help me focus and tune out the rest of the world easier, especially in high-stress situations like the airport.

    Because the headphones reduce the amount of stimulation you’re experiencing, you feel like you’re in your own little musical pod.

    (If you’re an empath, this is super useful to block out the energies around you.)

    Turns out, what I experienced personally has also been proven scientifically!

    Listening to music with noise-canceling headphones has been proven to reduce pain and anxiety.

    Headphones Anxiety

    Yes, the noise-canceling part is important.

    This study from the National Center for Biotechnology Information examined subjects’ pain and anxiety levels while receiving electrical shocks. It measured listening to music from regular headphones, noise-canceling headphones, or just a speaker somewhere else.

    And guess what? The results showed significant differences between the ones who used noise-canceling headphones and everyone else, with a bigger reduction in reported anxiety and pain.

    It’s helpful to listen to mood-boosting music either way, but using noise-canceling headphones is specifically effective.

    Loud construction going on outside? Roommate getting on your nerves? Crying baby in the DMV?

    Noise-cancelling headphones come to the rescue every time.

    Tuning out the rest of the world helps you tune in to yourself. It lets your brain feel that you have the space and safety to calm down. It’s a powerful mindfulness assist.

    Everything you experience is a dual effort on the part of your Mind and your Body. They’re always working together, as one. If your brain experiences too much stress, your pain will definitely get worse.

    On the other hand, if you can calm down both your Mind + Body, you’ll turn on your body’s parasympathic nervous system. That’s the opposite of your Fight or Flight reaction; it’s when your body repairs and recovers.

    This is how you heal.

    Of course, what you listen to matters, too.

    I think it’s safe to say your anxiety isn’t going anywhere if you start blasting death metal music. Or, maybe death metal is really your thing, in which case it helps! We’ll all prefer different sounds.

    What I ask is that you be mindful of how what you’re listening to is making you feel. If it’s not helping, you need to change to something that will.

    Ideally, to reduce pain and anxiety and shift your body into a state of healing, you’ll want to listen to calm, soothing music, positive mantras or affirmations (I love this album by Beautiful Chorus), guided meditations, ASMR, or even calming audiobooks.

    Keep in mind that your favorite up-tempo songs, though positive, may be too stimulating. You want to go for a spa-like vibe.

    Be sure to read the rest of these tips to help reduce your anxiety (and, as a result, your pain)!

    Headphones Anxiety

    Here are my top noise-canceling headphone recommendations:

    • Apple AirPods Pro
      • These are currently my #1 choice, because the noise-canceling feature works even when you’re not playing any sounds through these; they can act as a sort of earplug. You can also turn the noise-canceling off for safety, like when you’re walking through traffic, or when you need to be able to hear your kids.

    The noise-canceling feature (which is only on the Pro model) is incredible. I like that I can wear them while I do my hair etc when I get ready in the morning without bumping around my bulkier headphones.

    • Beats by Dre
      • Obviously, I am in love with mine! They’ve held up incredibly well over time, and the sound quality is worth the cost. The ear cushions on mine did start to kind of fall apart by year 3 (with constant, daily use, mind). But I found these incredible replacement pads, and now my headphones are as good as new! I use this case to transport them safely, since they don’t come with one.
    • Sony Headphones
      • These are what I would buy if I needed another pair. They boast music industry-standard sound quality and awesome reviews! I haven’t tested them personally, but they come highly recommended.
    • Mpow Headphones
      • Coming in for a steal of $40, these are the best budget option I could find for you, with outstanding reviews. Most of these noise-canceling headphones are at a notably high price point, but these will deliver the same benefits, for less!

    I hope this helps you remember that you CAN feel better—and sometimes all it takes is pressing play.

    » Song Vibes «

    Have you noticed that using noise-canceling headphones helps when you have anxiety or pain? I’d love to hear your experiences in the Comments below!

    xo,

    Amy

    This post is not sponsored, but it does contain affiliate links. I truly love these products and know you will, too. Thanks for supporting the blog!

    Photos by Matthew Hanley, edits by me

  • The Different Types of Yoga Explained, Finally

    Different Types of Yoga

    You’ve probably noticed by now that there are MANY different types of yoga.

    I remember feeling completely bewildered when I first wanted to get into yoga. It was 2013, when my chronic pain was fresh. I’d done yoga before, but only at school and 24 Hour Fitness where it was just called, simply, “yoga.” I knew the practice was supposed to be able to help me feel better, and I wanted to dive deeper.

    But I didn’t understand which type of yoga I should try. Do I want Vinyasa? What does Ashtanga mean? What’s like the basic, you know, standard, yoga? Who can explain these words to me?

    It doesn’t help that yoga literally uses a different language: Sanskrit, a language we in America generally aren’t exposed to outside of the yoga sphere. So trying to figure out what it all means can feel a little intimidating, especially to the newbie.

    I’m here to help you decode all of it so you can decide which type of yoga is best for you.

    I did a LOT of exploring on my path to now being a full-time yoga instructor. (Btw—You can learn more about my teachings here!)

    To start, there is no “standard” for yoga. I know that can make things a little confusing, but it’s a thousand-year old practice that originated in India, with many lineages of gurus (teachers) over the years who have all developed their own style. It’s constantly evolving—we practitioners continue to make changes as we learn more about the body and the ways we can use yoga to heal.

    So there’s lots to choose from! And all forms offer different benefits. There’s not one that’s necessarily better than the others—it depends on what your specific needs are. Whichever of these different types of yoga you’re drawn to is a great place to start.

    » Want me to recommend what I think might be best for you? Post in the Comments section below and I’ll be happy to let you know my thoughts!

    It might take some trial and error to find the style that fits your needs. Keep in mind that your yoga experience will vary greatly depending on your teacher, and which studio you go to, so explore around a bit and try a variety of classes. You’ll always learn something new in every practice, no matter where you go.

    Try out multiple types of yoga and decide what’s right for you!

    Different Types of Yoga

    Vinyasa Yoga

    This is the most common and popular form of yoga here in the U.S. It’s probably what comes to your mind when you think of modern yoga.

    Vinyasa yoga is a more vigorous practice that focuses on movement, flowing your body in sync with your breath through sequences that build. Each sequence ends with a Vinyasa, which is the action of going from Plank to Chaturanga to Upward Facing Dog to Downward Facing Dog.

    The Vinyasa action itself is, by the way, a pretty challenging and advanced movement. It takes a lot of strength to do a proper Chaturanga, and enough openness to safely go into Upward Facing Dog. These are often taught without much warm-up, because this style is so popular. But I cannot tell you how many wrong Vinyasas I’ve seen students do. It hurts my heart.

    I recommend, if you’re newer or not sure if you’re nailing it, to practice this motion with your knees down on your mat, and modify with a low Cobra until you feel warm enough to go into Upward Facing Dog. Like I said, that’s hard. Don’t sacrifice form just because other people in class are! Yoga is not about how you look, it’s about how your body feels. So set ego aside, no matter what you practice, and move more mindfully.

    Hatha Yoga

    This one is a little tricky because Hatha is a very wide umbrella. Most forms of yoga are a branch of Hatha yoga. It focuses on postures (asana) and breath. You can think of it as the foundation of Vinyasa, which is a style of Hatha. (I know it’s a bit of a web lol)

    You move from one pose to another, sometimes in sequences. Nowadays, this label usually refers to a class that has none or much less Vinyasas. It typically moves slower than a Vinyasa style class, with longer holds (which is sometimes more challenging!).

    Ashtanga Yoga

    Ashtanga is a form of yoga created by yoga master K. Pattabhi Jois. It’s super structured: you do a traditional series of postures performed in the same order every time. There are six series that have various advancement options to work up to.

    The class flows like a Vinyasa class but even more so—you move nonstop, with zero pausing for adjustments. The result is a solid and challenging cardio workout. The nonstop flow is also helpful to quiet a nonstop mind.

    Different Types of Yoga

    Power Yoga

    Power yoga is new to the yoga world, created in 1995 by Beryl Bender Birch. She wanted to introduce Ashtanga to the Western world, so she rebranded it and gave it an American-friendly spin in a smart move that made it more accessible. Remember, even though it’s super common now, yoga was still considered new and weird and different in the 90s! But people could get down with a good workout, which is what Power Yoga delivers.

    These days, Power Yoga can kind of mean… kind of anything. The term has branched outside of Birch’s practice and now can refer to basically any form of vigorous Vinyasa yoga class. You’ll want to clarify with the teachers and studios you find to see how exactly they define Power Yoga.

    Yoga Sculpt

    Yoga Sculpt is basically a new level up from the Power Yoga branch. This style has been popularized by the megastudio brand CorePower. It usually incorporates hand weights while flowing through a Vinyasa style class. It may also involve other functional movement exercises, like jumping jacks, squats, and an abdominal series.

    Many Americans are introduced to the yoga practice through this style, but I encourage you to branch out. With such a strong focus on the body and getting a workout, these classes often are too far away from the real foundations of yoga that they don’t give you many of the benefits of mind-body connection and stress relief. I know, because I began my yoga practice going to CorePower! Yoga is so much more than a workout—while it definitely is great for that, there are many ways to go deeper. And that’s where the magic lies.

    Iyengar Yoga

    Iyengar Yoga was created by B. K. S. Iyengar, and is hyper-focused on alignment. Which I love! Poses are usually held much longer than other Hatha style classes to really perfect them, and you’ll use alllll the props. (you know how I’m a fan)

    This style is especially beneficial for those with injuries, the elderly, or anyone new to yoga/movement. It really builds the mind-body connection as you become more aware of exactly how you’re holding your body in space. Practicing Iyengar will improve your form when you practice other types of yoga, keeping you healthy and mobile.

    Hot Yoga

    I don’t want to even bring it up, but you may have heard of a little something called Bikram yoga. Well, Bikram is an evil dude, so let’s just stay away from supporting him or his schools.

    Instead, look for Hot Yoga! That’s basically what Bikram is, anyway (essentially it’s its own specific, highly branded form of hot yoga). And hot yoga is exactly what it sounds like—yoga in a heated room.

    Temperatures vary, with studios ranging from 90-120 degrees F (that’s right!). Some people swear by it. And if you don’t sweat very often through other means, it can be great to get in a hot yoga session, since the sweat can be detoxifying for the body.

    But I’ll be honest, this is firmly NOT my jam. I’m not a fan. For me too much sweat can be dehydrating and inflammatory for my body, and I have a stronger practice at room temp. But if you love hot yoga or want to try, then awesome! Whatever brings you to your mat. (which you’ll want to clean)

    Kundalini Yoga

    Kundalini is a unique style that I haven’t tried yet. Like Hatha yoga, Kundalini involves poses (asana) and focuses on breath, but also takes it a step further and incorporates mantra chanting and meditation. This style was introduced to the Western world in the 1970s by Yogi Bhajan.

    The name derives from the Sanskrit word kundal, which translates to “coiled energy.” It centers on the concept that we each have energy in the base of our spine that we can release through the seven chakras, up the spine, by practicing Kundalini. A typical class “is comprised of three parts: an opening chant (known as “tuning in”) followed by a brief warm-up for your spine, a kriya (which is a sequence of postures paired with breathing techniques), and a closing meditation or song.” (via MindBodyGreen)

    Restorative Yoga

    Restorative Yoga is the relaxing and therapeutic form of yoga. Instead of focusing on a workout, the goal is exactly as the name suggests: to restore the body back to health. This style uses props, like Iyengar, in poses that are held for a long time to align and gently stretch the body. You do most if not all of the practice on the ground. This style is best for post-workout recovery and to relieve stress and insomnia. It’s great to heal and prevent injuries!

    I love teaching Restorative Yoga, because I think that in today’s go-go-go world, we all need more slowing down.

    Yin Yoga

    Yin is a specific type of Restorative Yoga. It boasts the longest asana holds of all the different styles, with poses typically held anywhere from 5-20 minutes, usually using props, all on the ground. It’s super relaxing and slow, so again a wonderful option if you feel stressed, overloaded, or unwell. I practice this late at night, because I always want to fall asleep afterward.

    There are tons of other types of yoga, too!

    These are just the main ones, but there are tons of styles that I didn’t get to here. There are now even variations on yoga that include aerial yoga (which I teach and is amaaaazing), acro yoga (where you and a partner+ work together to create shapes), SUP yoga (yoga on a Stand Up Paddleboard, which I also have taught). If you ever run into me, ask me about my days teaching SUP yoga at the Oahu Disney resort Aulani. I have the best story.

    I’ve seen yoga that uses a special prop wall, and there’s even goat yoga—which is exactly what it sounds like, yoga with goats. (I’ve done it and it was rad fun.) The variations are becoming endless!

    When you’re choosing which yoga practice is right for you, be sure to look for a studio and teachers with proper education credentials (200 or 500 hr RYT with the Yoga Alliance) and a strong knowledge of anatomy and the body. Because there are so many types of yoga now, there are just as many types of teachers, and the industry’s not really regulated or standardized. I’ve seen plenty of people teach yoga with zero training at all.

    Don’t automatically trust that your teacher is an expert—you and your body are always the best guide. Listen to it and do what feels right for you! And if something in class ever doesn’t vibe with you or feel good, Child’s Pose, Savasana, and the word “no” are always available to you.

    Yoga is an incredible methodology that has the power to heal and strengthen both your body and mind.

    Whatever variation you choose, you’ll be giving back to yourself in a powerful way!

    » Song Vibes «

    What’s your favorite type of yoga? Share your thoughts with me in the Comments section below!

    xo,

    Amy

    Photos by Scott Bennion

  • Immune-Boosting Vegan Miso Soup Recipe

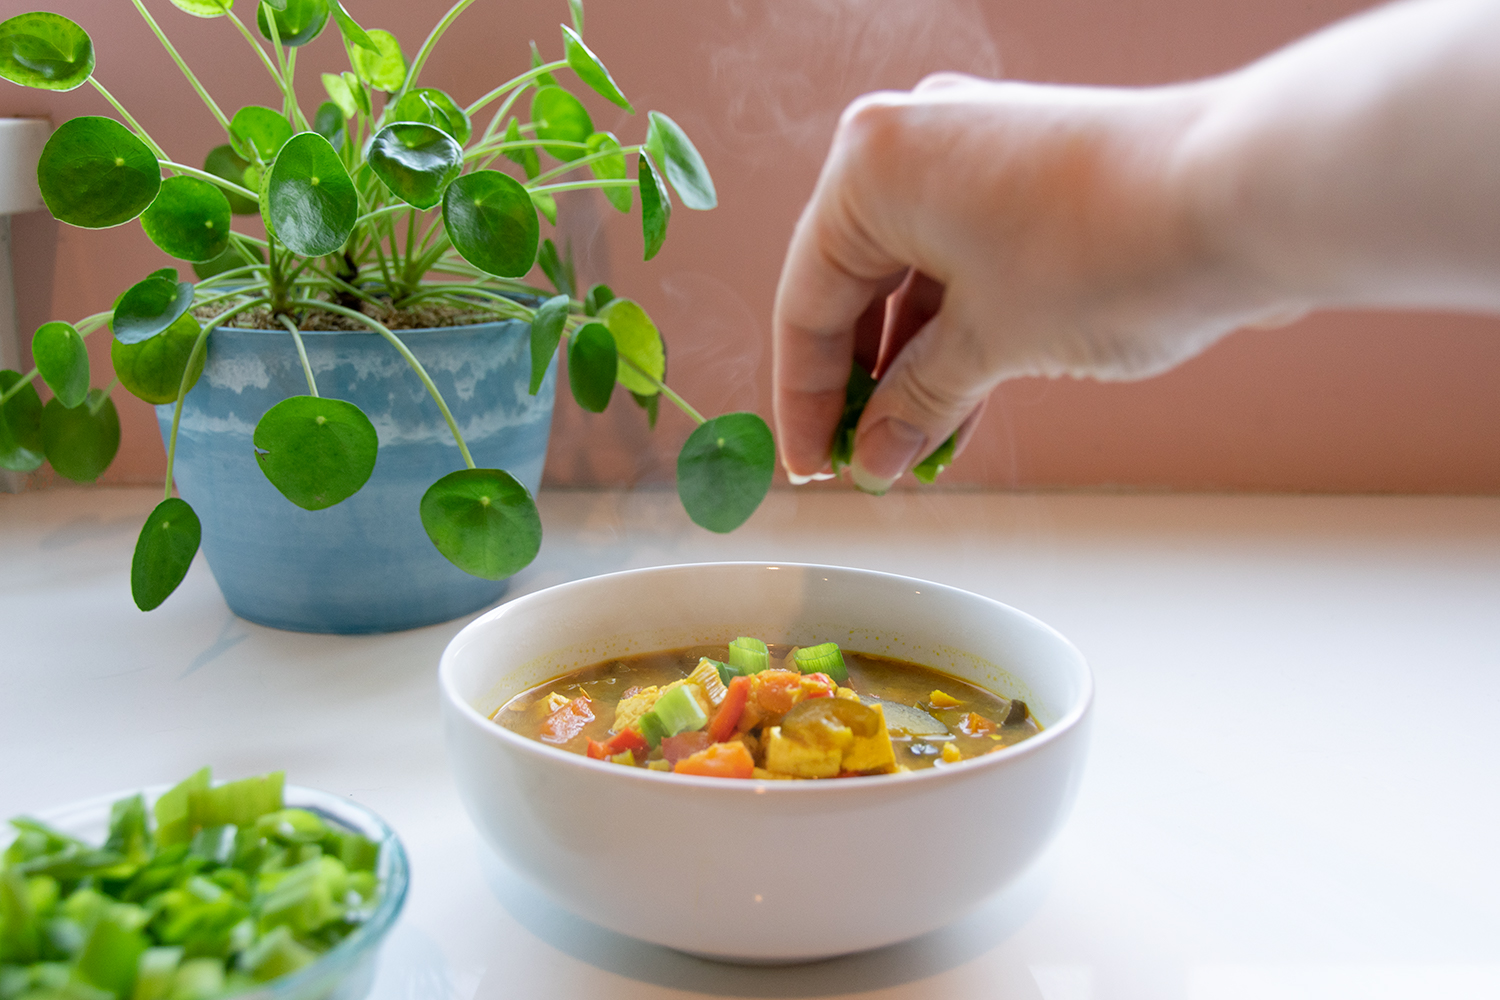
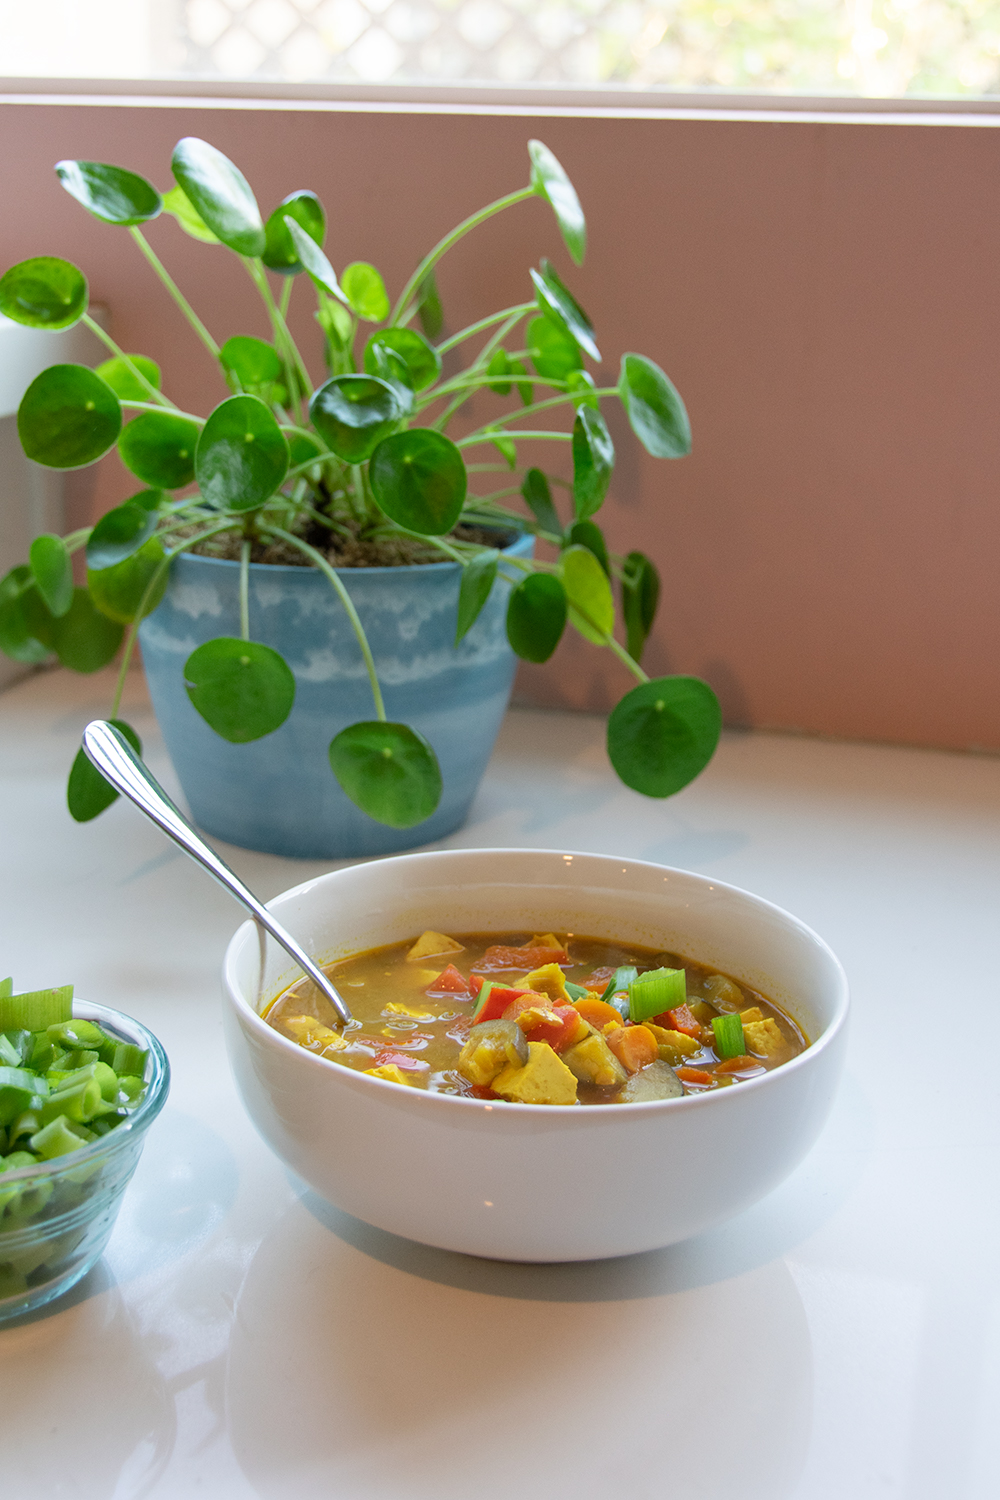
    This vegan miso soup is healthy, delicious, and healing.

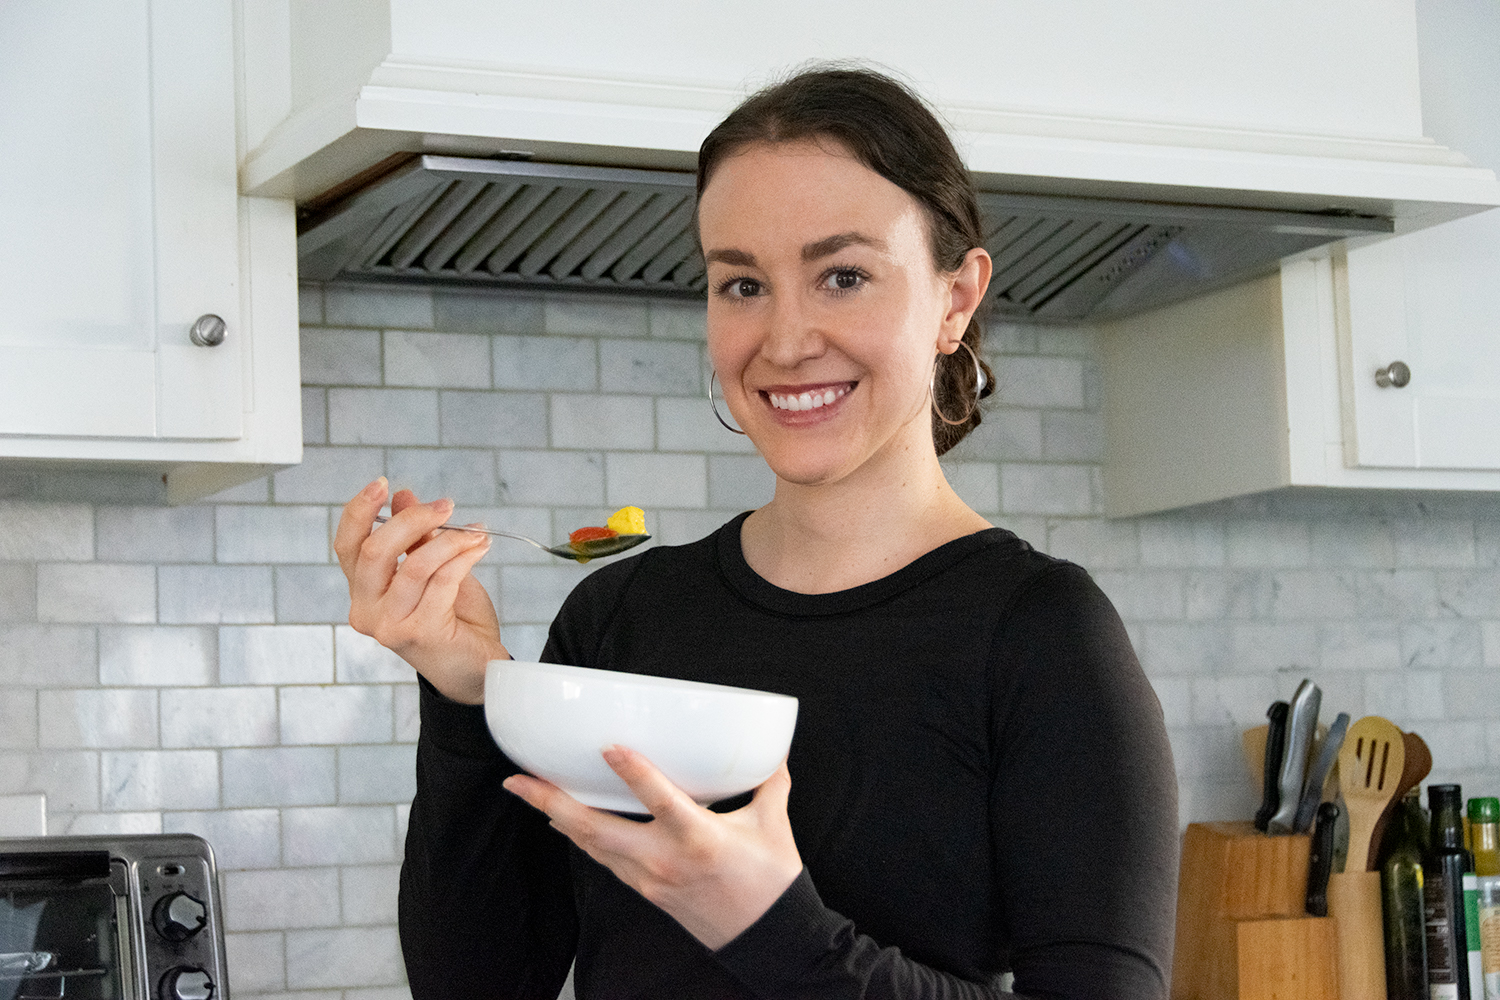
    It’s a standout recipe for sure among the healthy eats I’ve been making lately! I’m excited to share this one with you. This miso soup is MAGIC. You guys are going to love it. It’s so good—light and savory with a tiny spicy kick, my favorite soup for lunch.

    All credit for this recipe goes to Matt, my former husband and still-friend. He’s such an awesome vegan chef! He’s helped me create all the other plant-based recipes I’ve shared here on the blog, which I encourage you to check out. And don’t be scared off if you’re a meat-eater. All are welcome here, and you’re going to love this miso soup! It’s a hit with just about everybody.

    This is a spin on traditional Japanese miso soup. We really amp up its already immunity-boosting powers. I always aim to make my meals as nutrient and plant-dense as possible, and this is no exception. We can use food (namely plants) to help nourish our bodies to the max!

    I had surgery recently, and this meal really helped my recovery.

    I shared all about my repair surgery here, and this recipe is one of the ways I helped myself heal. It is an immunity-boosting powerhouse meal, full of ingredients designed to fight inflammation and aid healing. I had it nearly every week.

    Since as I write this we’re in the middle of the COVID-19 pandemic, I think we could all use this soup. Can’t hurt, right? And it’s definitely the perfect meal to make for a loved one who’s not feeling well. It’s light enough that you can eat it without a huge appetite, and nutritious enough to give your body a major health boost.

    This meal is also really fast and easy to throw together, like all my recipes. Because wellness means not slaving away in the kitchen for hours, amiright? This one comes together in about 45 min.

    What makes this miso soup so good for you?

    The spices, including ginger and turmeric, have anti-inflammatory and immunity-boosting properties. The soup has fresh vegetables and a complete vegan source of protein in the tofu. (Try to find sprouted tofu, which is easier for your body to digest!) There are tons of antioxidants, which help fight disease. Also, I always recommend choosing organic when you can, for all ingredients, to minimize pesticide exposure.

    Most importantly, miso itself is known to contain nutrients that help your immune system, including gut-strengthening probiotics, antioxidants, and E + several B vitamins. Miso is a fermented paste made from soybeans, sea salt, and a fungus called koji. The fermentation process is what creates those much-needed probiotics.

    If you’re not vegan, you can use bone broth in place of vegetable broth for an extra collagen boost. This is really helpful for post-surgery recovery. As a vegan I obviously think the less animals we can eat, the better, but collagen can be incredibly helpful for injury healing, and there’s sadly currently no vegan source of it. (I trust science will get us there soon!) So that’s an option for meat-eaters.

    Also—if you want to learn more about transitioning to a plant-based diet, read my Vegan 101 post.

    Now to the best part—the recipe:

    Immune-Boosting Miso Soup

    Makes 4-6 servings

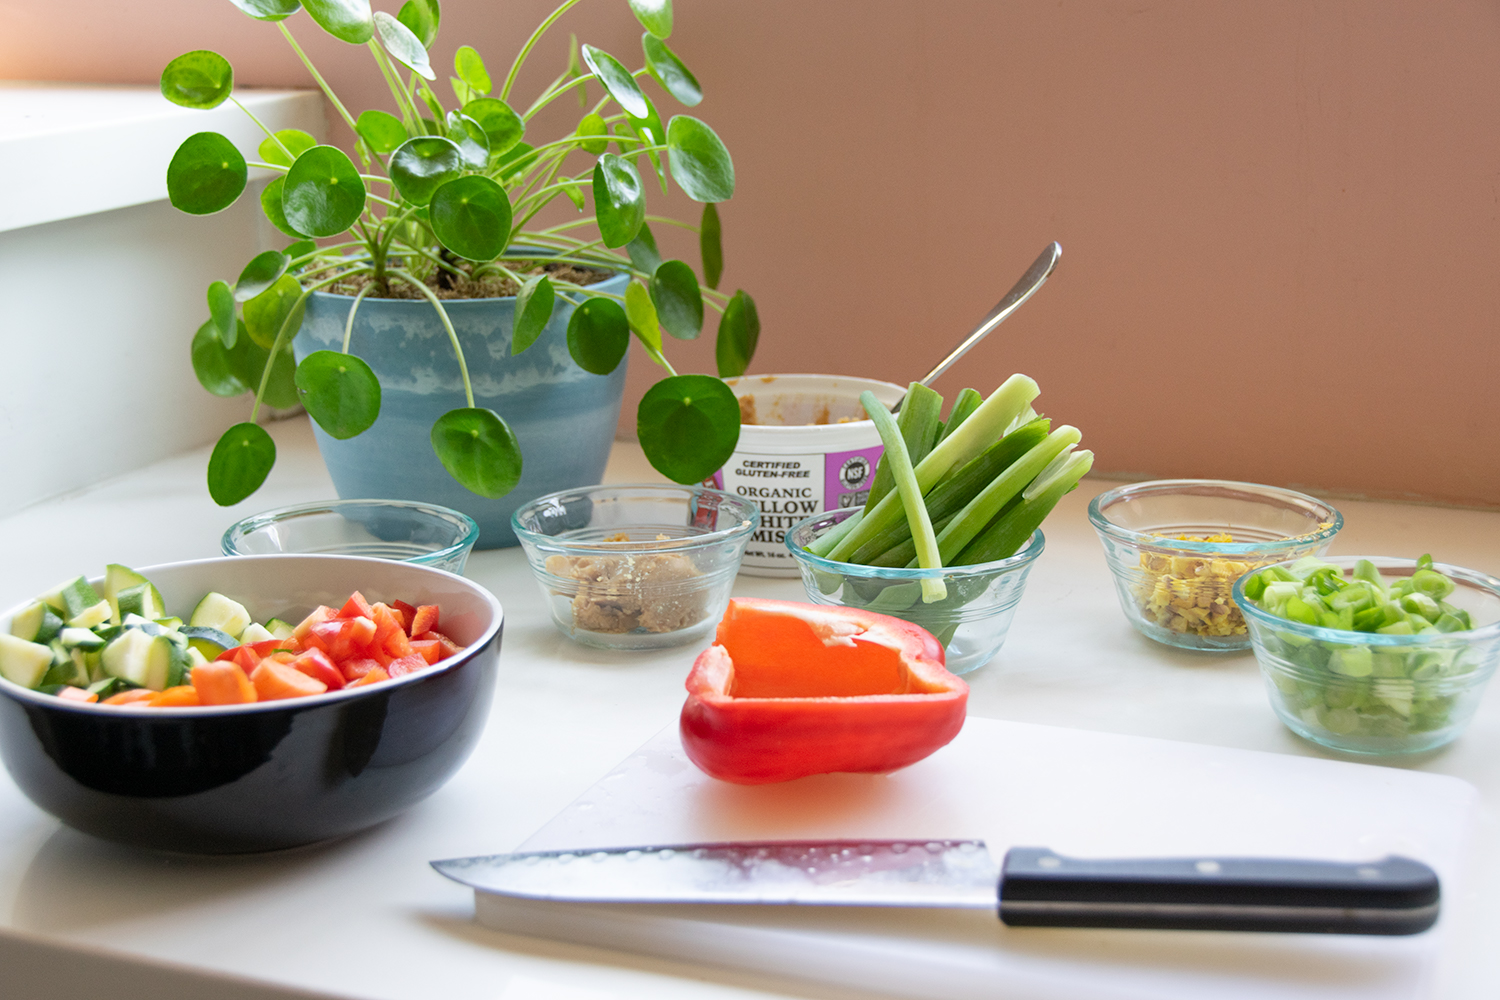
    Ingredients:

    1 Tbsp Coconut oil

    5-7 cloves Garlic, minced

    2-3 inches Ginger root, minced

    1-2 inches Turmeric root, minced (you can sub 1 Tbsp Ground turmeric if you can’t find the fresh root in the vegetable section)

    Handful of Green onions, diced (separate the whites from the greens)

    1 Jalapeño, minced

    3 large Carrots, diced

    1 medium Zucchini, diced

    1 large or 2 small Bell peppers (any color—I like red), diced

    2 Tbsp Tamari sauce (or more to taste)

    1 Tbsp Apple cider vinegar or White wine vinegar (apple cider vinegar gives a sweet kick)

    3 Tbsp White or Yellow miso

    4-6 cups Vegetable broth (or optional Bone broth for non-vegans)

    1 block of Tofu, extra firm, cut into dice sized cubes

    Directions:

    (Pro tip: Chop everything up beforehand.)

    In a large pot, heat up your coconut oil until melted on medium heat.

    In the oil, sauté your garlic, ginger, turmeric, the whites of your green onions, and the jalapeño. Cook until the onions soften.

    After that, throw in your carrots, zucchini, and bell pepper. Cook until soft, mixing in your tamari sauce and vinegar.

    Add the miso and briefly allow your veggies to cook into it before adding the broth. Lastly, add the tofu.

    Slowly bring the soup to a boil. Then turn down your heat to bring to a simmer.

    Let cook 20 minutes. Taste and add more tamari as needed.

    Stir in the remainder of the green onions just prior to serving!

    » Song Vibes «

    Let me know when you try out this recipe! I’d love to hear what you think in the Comments section below.

    xo,

    Amy

    There are affiliate links throughout this post. I genuinely love these products and know you will, too. Thanks for supporting the blog!

  • 5 Secrets You Should Know About How to Trust Your Intuition

    First off—I’m excited that you want to learn how trust your intuition!

    Thank you so much for reading this post, for taking the time to learn how to transform your life by tuning in to your inherent inner knowing. When you know how to trust your intuition, you make the best possible decisions. Ones that lead you towards your most peaceful, healthy, whole self. Your inner voice will guide you to live your best life, to speak and act on your truth, and authentically love yourself.

    Learning to trust your intuition definitely is a practice, and takes commitment and dedication just like building any new habit. But the process is easier than you might think, and it’s powerfully rewarding.

    So what exactly is intuition?

    Our intuition is a loving inner voice that always guides us toward positive actions and peaceful outcomes.

    You’ve experienced it before, even if you didn’t notice. It’s that gut feeling that steers you in the right direction, even when we’re not always aware of it. Intuition can sometimes sound like a whisper in your ear, or like a thought that lands just a little bit different than other thoughts. It’s a bit tricky to explain, to be honest. It’s more of a feeling, or a state of being, that is in the Light and wants only what’s good for you.

    Many religions have a name for it; Christianity calls it the Holy Ghost. Other names could include Spirit, angels, guides, the Virgin Mary. I believe we’re all talking about the same thing.

    And even if you’re not religious, you could look at intuition as part of our very evolutionary makeup—it’s part of our survival instincts, part of being a human. We all have an inner navigation that helps us make the right choices, or that tells us information about what is to come so we can be better prepared.

    It’s often hard to tell which of these messages are coming from yourself or your intuition—which is why you’re in the right spot! In order to learn how to trust your intuition, you need to know these five secrets.

    Secret 1: Everyone has a sense of intuition.

    Your intuition is essentially a magical companion you have your entire life. Its mission is to protect you, and it never steers you wrong. Some people seem to hear their intuition loud and clear, and for others, it’s more quiet. But don’t worry—you do have one! Hearing your intuition is a skill you can develop with practice, by following the secrets here.

    Everyone has a voice of intuition (except, perhaps, some with personality disorders like Narcissism, but we can’t know for sure). Like I said above, you’ve experienced it, even if you weren’t aware. Try to think back to any time in the past where you just …knew… about what the right step for you was. That was your intuition speaking! And maybe you acted on it, and it worked out in your favor. Or maybe you didn’t, and over time you realized you took the wrong road.

    To be honest, I haven’t listened to my intuition for most of my life. The decisions I made, both small and large, while ignoring that voice always felt like varying degrees of self-betrayal. For years I could hear my intuition telling me I was struggling in my marriage, but I chose to drown it out, trying to force my will and make my life fit into the image I’d dreamed of instead. Since I finally listened and acted upon my intuition, it’s gotten easier to hear. My self-knowing has become sharper. But it’s still something I work on every day.

    It’s hard for most of us to hear our intuition naturally. There is no reason to judge yourself for not being able to hear or trust your intuition in the past! You were doing the best you could at that time. That’s all we’re ever doing.

    Which leads me to the next thing you need to know—

    Secret 2: To hear your intuition, you must begin by practicing self-love.

    Trusting your intuition is the ultimate act of trusting yourself. It requires some serious self-love.

    What do I mean by “self-love”? It’s what it sounds like: fully LOVING your amazing self! Just like you would your child, or your dog, or your partner, or anyone you love unconditionally: without judgement, without limits, with full acceptance.

    Self-love is pretty foreign to most of us. We live in a world completely starved of it. There are so many more examples around us of people hating themselves than loving themselves, so it’s only natural that this is how we become, too. We’re born with self-love, but we grow up to learn the voices of judgement, anger, criticism and plant them in our own minds.

    All of these voices are boiled down to one root source: Fear.

    You know it. I know it. That poison that spins your brain and eats at your gut. It’s high time Fear took a freaking backseat and stopped running our lives, right?! Fear, and pain, are the main obstacles that block us from hearing our intuition. But they can be overcome.

    Your intuition is part of you—you and it are one. So to listen to and trust your intuition is to trust yourself. And I believe that this —TRUST— is the key to what helps us build self-love. It’s treating your relationship with yourself the same way you ideally would your best friend: doing what you say, being honest, and making time to nurture the relationship. You follow through on promises you make to yourself, you build confidence, and you practice forgiving yourself and letting the negative thoughts go.

    Self-love is formed by showing up as your authentic self in all aspects of your life. You stay true to you. And that helps quiet the noise of Fear. With self-love, you know that no matter what happens, you’ve got your back.

    Secret 3: You also will need to stop caring what other people think about you.

    Easier said than done, I know! But it’s essential. If you want to hear your intuition, you can’t be thinking about what everything else thinks. It’s just more noise.

    Making decisions based on what will “look” the best to other people, or on what society else believes is best will only lead you to heartache. It’s time to put the voices of the world to rest and decide based on what feels right for YOU, and you alone. Everyone under the sun will have an opinion, but the only one that matters is yours.

    When I was trying to figure out how to end my chronic pain, both of my parents strongly discouraged me from proceeding with surgery to fix it. It was a huge, expensive, terrifying decision, and I had to really trust my intuition and do it anyway. And, guess what? I’m SO glad I did. It was the right choice for me.

    It takes real commitment to set aside what your parents think (or your boyfriend, or your sister)—but you won’t be able to hear yourself clearly until you silence those outside voices. No one can really know your life and what’s right except for you. (and your intuition, of course!)

    “The reason you have a hard time trusting your intuition is because you are still convinced that some outside authority knows better than you.” — Maryam Hasnaa

    Similarly, you must stop comparing yourself to others. Comparison comes from fear and lack—from thinking other people have something you don’t and that this will prevent you from . But the world is wide enough for all of us. If you want to learn more, I wrote about how to stop playing the comparison game here.

    Secret 4: Intuition can only happen when you’re in the present moment.

    The number one secret weapon to learn how to be present enough to hear your intuition is developing a Meditation practice. I’m actually a meditation and yoga teacher, so I wrote all about how to meditate here, and I have free guided Meditations on YouTube for you to use! You can also read about my favorite meditation apps here.

    Our intuition is often very quiet and subtle, which is why it’s easy to miss. And when you’re operating in Fear mode? There’s no way to hear that little voice through all the static noise in your mind. If you’re not in the present moment, you’ll miss it.

    Meditation will teach you how to silence the crowd of negative Fear voices in your mind. With practice, you’ll be able to bring meditation into every moment of your day, which called practicing mindfulness. Once you silence Fear’s BS, you create space in your mind for intuition to broadcast its messages clearly. You step aside and allow a higher knowing to enter. And all you have to do is stay in the here and Now.

    To be present, you can’t be obsessing about the past, worrying about some imagined future, or adding fear commentary to whatever’s happening right now. You have to just… be. Turn off your thoughts, focus on your breath, and ground yourself.

    I like to use this mantra: I am here, now.

    Secret 5: Intuition has no emotion attached to it.

    This is the final secret you need to know to trust your intuition again. When you become present and have a strong foundation of self-love, the final way to know whether a thought is coming from you or is intuition is to notice whether or not you feel any emotions as you have the thought. Intuition is totally neutral, which is why it can often sound or feel… odd. Like a thought that makes you pause and go —huh.

    Intuition is the exact opposite of Fear. So if you’re feeling knots in your stomach, that’s Fear talking. Not intuition.

    However—the Fear may be reacting to whatever your intuition said! So it’s a clue to explore. For example, if your intuition says, “I need to leave my husband”, we can expect something like this to be your reaction: “But how?! What about our life, our kids? There’s no way….” or how about, “No way, how could I not be happy? I’ve got it all! How could I even think such a thing?” or something else along those lines. And you know what? That’s all Fear. But that initial voice, that first inclination, had no emotion attached to it. Just a message from the loving Universe—do with it what you will.

    It takes practice to start to notice your intution when it first enters your mind, before Fear has the chance to react and get all emotional about it. That’s why intuition will come to you only when you’re meditating, or particularly present in a given moment. You won’t have that hurricane of thoughts in your head to confuse you. You’ll feel at peace, and in that silence you’ll notice which thoughts rip you out of that peace (Fear), and which speak to you like an all-knowing friend that you trust (your intuition).

    Your intuition will only continue to get stronger if you follow this guide!

    In fact—you can thank your intuition for bringing you here. It says it’s time to start listening, to begin following your heart. It’s time to live your life to the fullest.

    If you feel stuck in your life, like your intuition wants you to do something so scary that you don’t feel capable—first of all, know that it’s okay, and you’re not alone. It’s often difficult and painful to act on your intuition. My advice is to keep returning back to self-love. I promise you, there is no situation you can’t overcome. You are strong enough to do anything your intuition calls you to do.

    Soon, you may even deepen your intuition skills so much you start to get downloads about things that are going to happen in the future. Your intuition can reveal many different kinds of truths. It’s pretty amazing—like having magical powers. Which it is, basically!

    This is a super specific reference, but I grew up playing video games with my younger brother, and the popular character Link of The Legend of Zelda has a tiny little fairy (that appears as a floating orb of light with wings) called Navi. Navi shouts “listen!” whenever she has something useful to share to help guide you through the game. This is what I picture every single time I think about intuition—it’s our own personal Navi, and it’s up to us whether or not we accept her help.

    Developing a relationship with your inner voice of intuition strengthens your relationship with yourself. It’s the most rewarding result of this practice, and I’m excited for you to continue.

    » Song Vibes «

    Do you feel like you know when to trust your intuition? Share your experience with me in the Comments below!

    xo,

    Amy

    Photos by Matthew Hanley

  • How To Meditate

    How To Meditate » From the Infinite Embers blog

    Learning how to meditate will change your life.

    Well, a lot sure has changed since I posted last, hasn’t it? I had already planned to write about the fundamentals of how to meditate (I’m a meditation and yoga instructor here in San Diego), and now it just seems like divine timing because we all need it now more than ever.

    Right now in San Diego we’re been under lockdown for the coronavirus for about two weeks. And, incidentally, on Feb 5th I underwent major surgery—so I’ve been in my house for months already, not able to do much. I’ve basically been quarantining for a while! I have one more week to go before I get to start using my upper body more, but I am excited to report that everything went well and I’m healing perfectly so far.

    Here’s the full report of my recovery. Needless to say, meditation has been my biggest ally through all of this! I meditate every day—lately, multiple times a day since I can’t do much else. I’ve had to really learn how to surrender to what IS and find peace. That’s an important lesson for all of us right now.

    I had expected to be able to keep blogging through my recovery, but my body told me to slow way down and I haven’t been able to use my arms at all up to this point. And it feels good to rest, to be honest. I thought it might be challenging to not be able to workout or have my typical movement to turn to, but meditation has kept me really positive and calm while healing, even during this crisis of a global pandemic.

    Be sure to download the FREE Basics of Meditation e-book I’ve created! It’s the perfect handy resource so you can start meditating today.

    The benefits of meditation include:

    • increasing calmness
    • improving mind-body connection
    • reducing anxiety and depression
    • increasing physical relaxation
    • improving sleep
    • reducing high blood pressure
    • improving psychological balance
    • aid in coping with pain or illness
    • relieving symptoms of irritable bowel syndrome
    • enhancing overall health and well-being.

    Sign me up, right?

    (Source: National Center for Complementary and Integrative Health)

    Meditation is a simple but powerful mental exercise that’s accessible everyone to do. Even better, it’s free and doesn’t require any equipment! It’s also been scientifically proven to have nearly endless positive effects on your mental AND physical wellbeing and health. And no, meditating doesn’t have anything to do with religion, though it is practiced by some, including Buddhism and Hinduism. Anyone can do it, and everyone should.

    It’s kind of like allowing all the snowflakes to settle in the snow-globe of your mind, allowing you to find stillness and clarity.
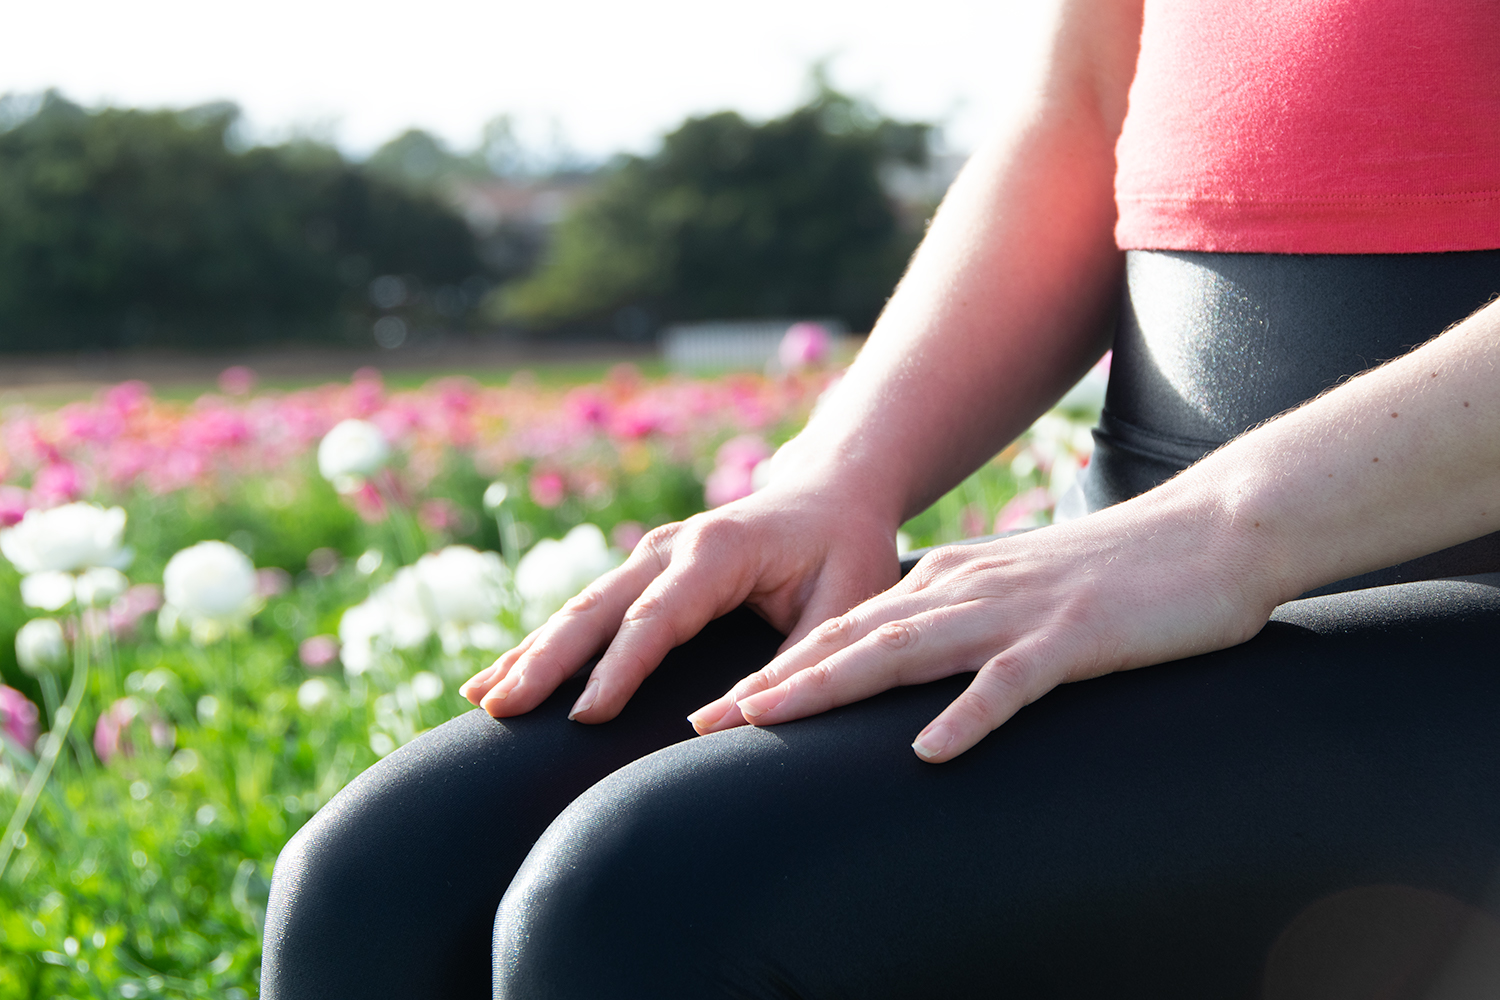
    How to Meditate » From the Infinite Embers blog

    Meditation does not mean you have to empty your mind.

    The goal is to become aware of your thoughts.

    Our minds are like computers. They get programmed (primarily in our adolescence) by the people who raise us and the society/culture we grow up in. But here’s the magical thing: our brains can get reprogrammed, by us, with meditation. Becoming aware of our thoughts eventually leads us to being able to control and choose our thoughts to the ones that serve us best.

    I always thought that meditation = silencing the mind completely. I found it tedious and frustrating. So my world was rocked when we studied meditation as part of my yoga teacher training and the teacher explained that that’s actually a misconception.

    Meditation is actually this full-circle practice:

    • You try to find stillness
    • Your mind starts wandering down a train of thought
    • Eventually you catch yourself
    • And the cycle repeats

    That IS meditation. It’s a process, not a destination. You don’t need to silence your mind. You’re training yourself to become AWARE of your thoughts, so you control them—not the other way around.

    Eventually, you’ll have spaces of time where you find your mind quiets down so much you don’t have any thoughts. And with time, those spaces will last longer and longer. And when you get there, those pockets of time are bliss.

    But it’s also really okay if you find meditation challenging—most of us are not Zen Buddhist Monks devoted to the practice of meditating for life to achieve enlightenment. We’re real people who live in a crazy amped-up world, so it’s okay if you feel like you have a “monkey mind” that’s constantly ON. Meditating will help you get tame it.

    Every time you catch yourself thinking about something else when you meditate, that’s a win—because you’re beginning to separate You from your mind. You’re stopping the old negative patterns of thinking so that you can form new ones.

    Your goal when you meditate is simply to become present.

    Our minds are always running a commentary track, or thinking about the past, or imagined futures. But when we make the intention to just be here, now, everything slows down.

    You want to be aware of your thoughts, examining them as they come up and then choosing not to follow, so that you can stay here in the now. I often use this metaphor when I’m teaching: your mind is the sky, and your thoughts are just clouds floating through. So you can see them, and acknowledge them, but then choose not to engage with those thoughts. Just let them continue to float on by, and stay rooted in your power as the enveloping sky.

    I highly, highly recommend The Power of Now by Eckhart Tolle, a master meditation teacher. It really helps explain in greater depth what it means to be present.
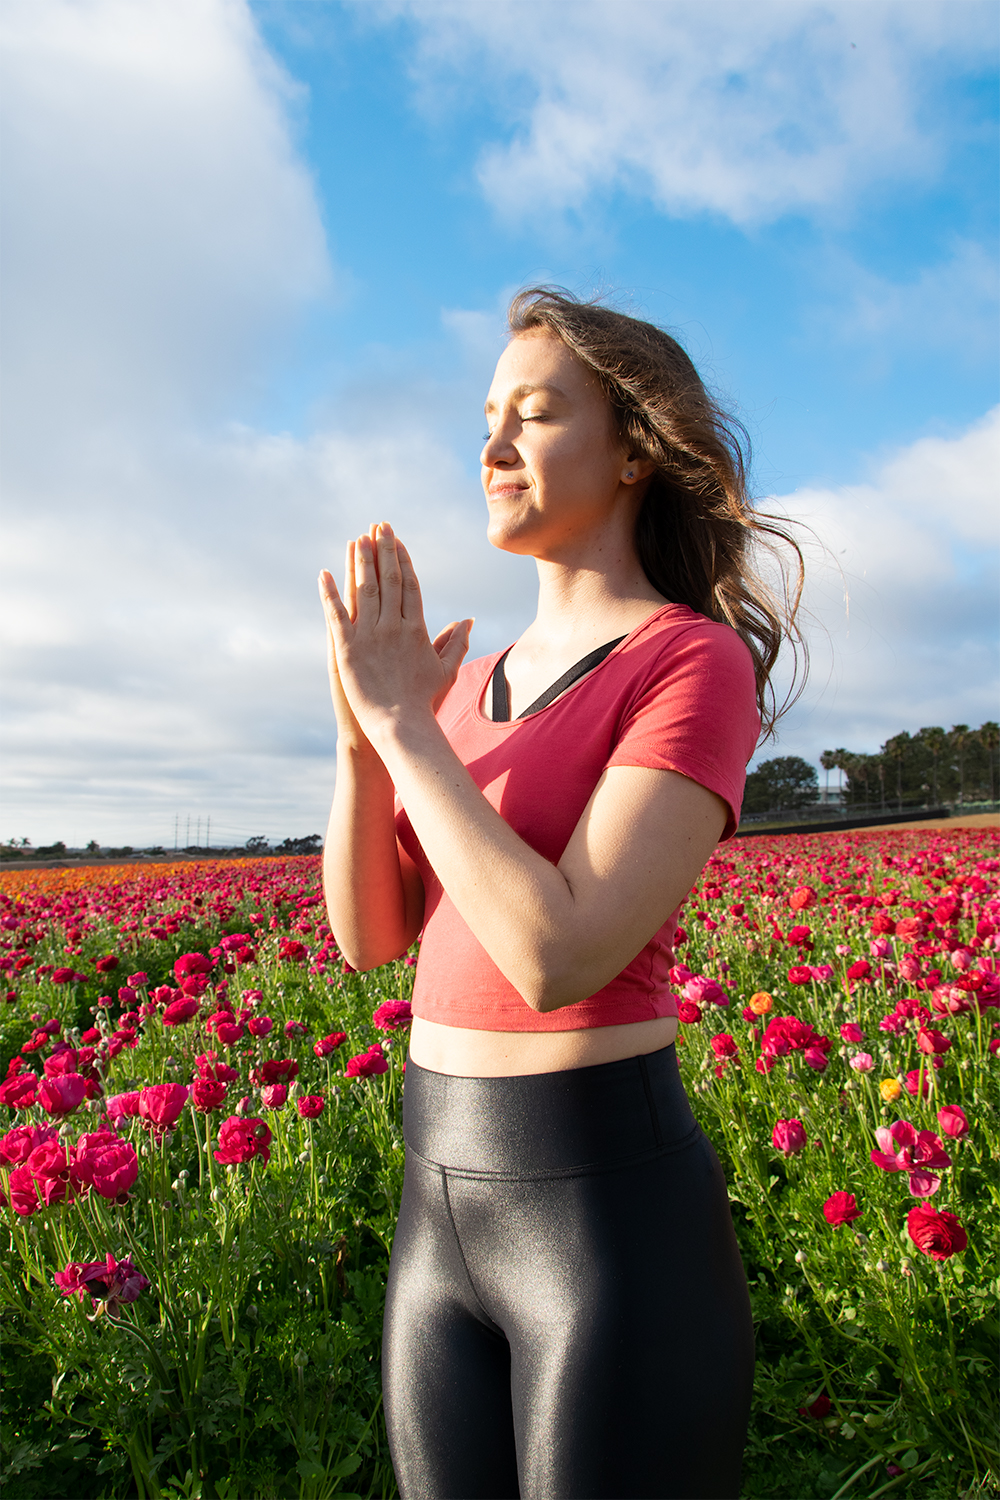
    How to Meditate » From the Infinite Embers blog

    Focus on your breath when you meditate.

    Breathe in and out of your nose, as deeply as you can. Try to breathe into the lowest part of your ribcage, then back to your spine and out to the right and left sides of your belly, like you’re inflating a balloon inside of you. Slow down your breaths.

    Notice if it’s hard to breathe deeply (that’s very common, and will improve with practice). Try to relax your tongue and the back of your throat. Soften your forehead and your jaw. Become aware of how you’re holding your body. If there’s anywhere you can relax just by bringing your attention to that area, let the tension go.

    Your breath is your best tool to get into a deeper meditative state, so it’s key. Meditation switches on your body’s parasympathetic nervous system, which helps bring you back to a calm state of healing and restoration. It’s the opposite of the flight-or-fight stress response that many of us live in. The more you breathe deeply, the more you activate your vagus nerve, which helps turn on that relaxed state.

    You can also try tuning in to everything happening around you using your senses. Notice the floor underneath you; notice any smells, any sounds. Try to bring yourself into this present moment, and think about only this present moment.

    There’s no “right” or “wrong” way to meditate.

    Just like with yoga, there are many different types, or schools, of meditation. With yoga, there’s Vinyasa, Yin, Kundalini… and with meditation, different styles include Transcendental, Qigong, and Mindfulness. There’s no correct method—they’re just different paths to take to get you to the same destination. The techniques I described above are part of the Zen/Mindfulness meditation practices, which is what I mainly teach. Some people find it more helpful to pick a specific mantra, or to count numbers, rather than focusing on your breath, which is why I encourage you to try out many different styles.

    And remember, you can’t be bad at meditation. It’s an exercise, a practice. We’re essentially training our minds the same way we would our muscles, or our dogs.

    I’ll be honest; when I first tried meditation about ten years ago, I hated it. I thought it wasn’t for me, that I was terrible at it—but let me remind you that that’s just not possible. You will probably find it challenging at first to find any spaces of silence in between thoughts, but don’t let that discourage you.

    It takes patience and repetition to build any habitual pattern. So be patient with yourself and the process. As long as you’re trying, you’re doing it right.
    How to Meditate » From the Infinite Embers blog

    You can meditate for as long or as little as you want.

    Any little bit you can fit into your schedule is great, but the longer you can do it, the better! But you can meditate for one minute, or one hour. It all counts. Commit to what you know you can realistically do every day.

    You can meditate in any position.

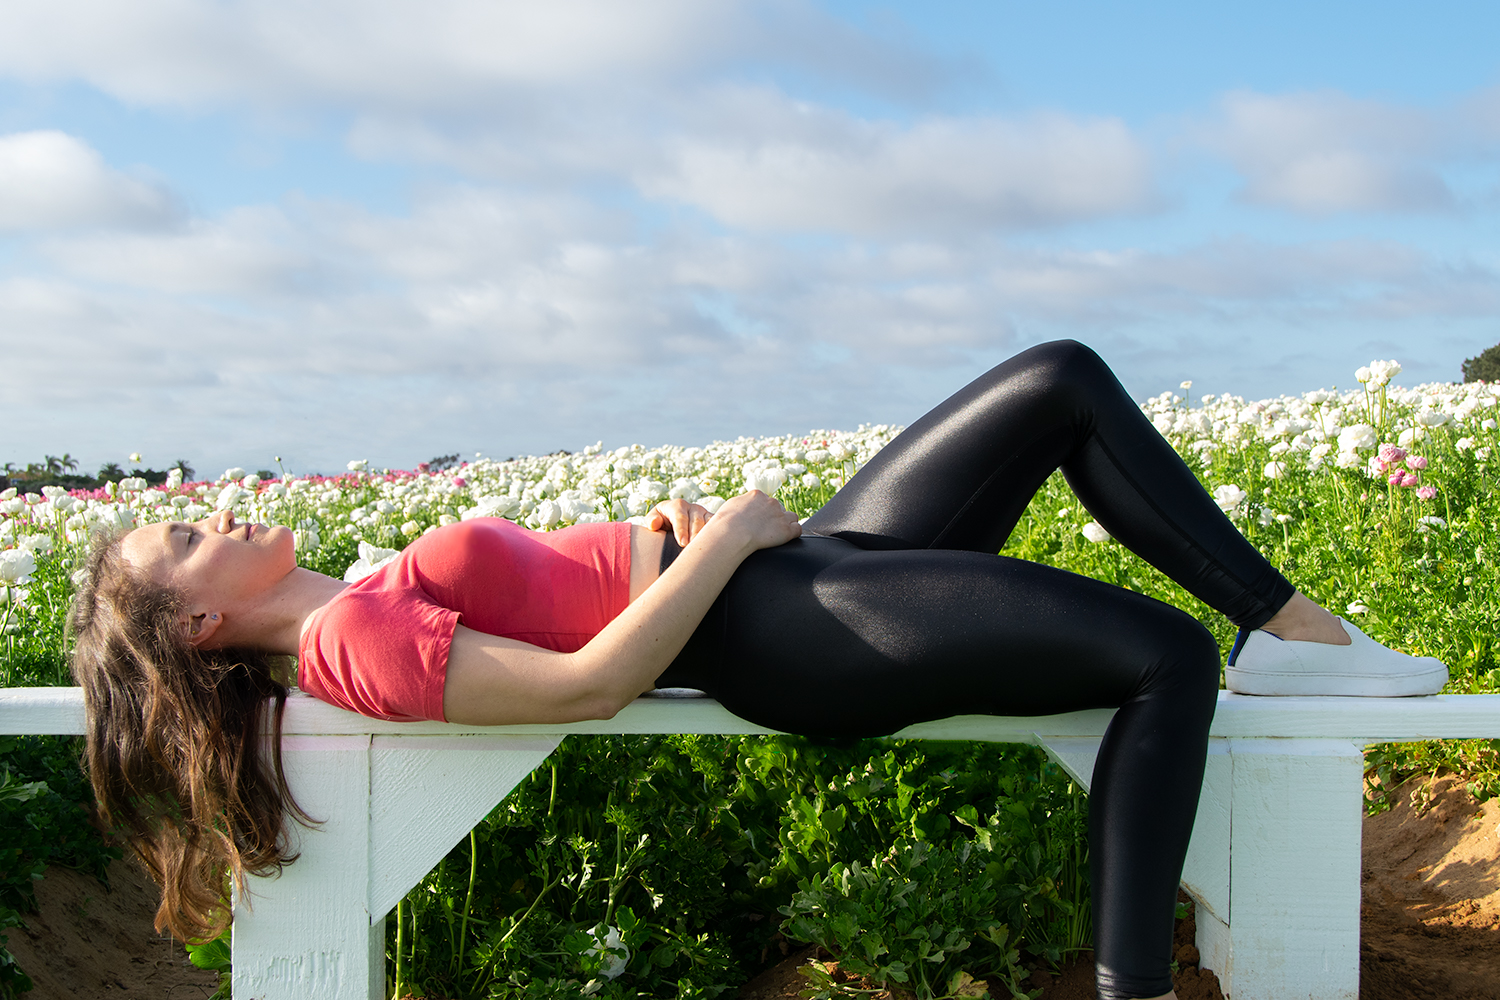
    This is a slightly controversial professional opinion, but as a meditation teacher I encourage my students to meditate in any position that feels comfortable for you. Also—you can close your eyes, or leave them open! You don’t have to sit in the stereotypical perfectly straight, cross-legged position. The reason this is so important is that you will find it very difficult to relax and meditate if you’re in any pain or discomfort. You’ll keep getting distracted, or want to shift around.

    That’s why I’m personally a big fan of meditating lying down. I lived with chronic neck pain for years, and lying down was the only position where I’d feel enough relief to focus. Some teachers are very vocally against this, mainly because you’re more likely to fall asleep. But I don’t think this is a bad thing, unless you tend to oversleep, need help staying alert, or want to feel energized by your meditation rather than further relaxed. Then you may find it more useful to be sitting, or reclining in a chair. Experiment a bit and find what works for you.

    I highly, highly recommend you try laying on an acupressure mat to help you meditate. I wrote all about this tool in this post, and why I use it every day. It really helps your body shift into a relaxed, deep meditative state more quickly.

    You can meditate while DOING, as well—you don’t have to be still.

    I believe strongly in active meditation—in fact, I created a FREE 20 minute guided Active Meditation for you to download here!

    When I was a teen I had severe depression and anxiety, and I found that the only thing that kept me sane was movement—in my case, running. It’s what fueled my passion for fitness.

    And many of you feel the same! I know because as a yoga instructor I’ve had many clients say that they get into a meditative, focused state when doing their flow—and that’s the goal! It’s a time where you can tune out the world around you and really focus your mind on its more primal state, where you are simply breathing and rooted in your body. It’s meditation.

    Again, some teachers disagree with me on this, but I strongly believe meditation applies to all aspects of our lives. It’s being mindful—becoming aware of our thoughts so that we can choose them, to become more in alignment with the higher version of ourselves. You mind find it meditative to wash the dishes, or paint, or garden. I love to go on long, meditative walks out in nature.

    If you find yourself getting more anxious trying to force yourself to be still, find a soothing movement that works for you instead.
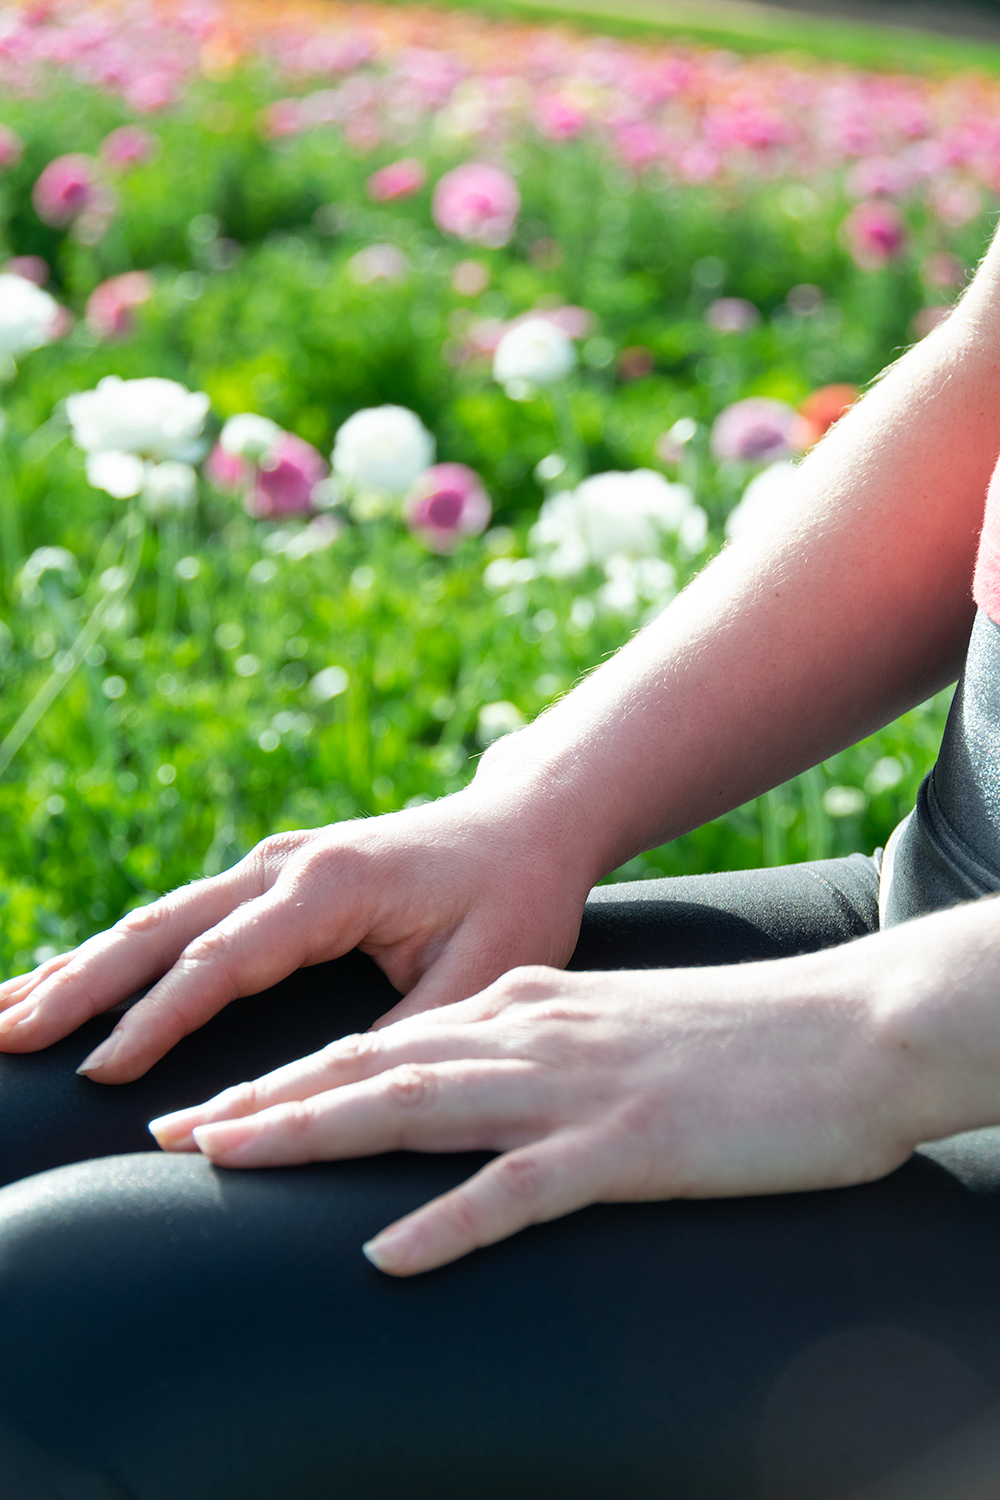
    How to Meditate » From the Infinite Embers blog

    Beginners often find it most useful to listen to guided meditations.

    I know I sure did when I first started my meditation practice about four years ago: I wrote all about my favorite apps to use here on the blog a few years back, and those are still my top recommendations.

    It may take a few tries to find a teacher whose voice and technique works for you. Lately I’ve been focusing my teaching primarily on meditation, and I’ve created a series of FREE YouTube guided meditations for you to try out, as well! I hope you enjoy.

    One element that’s important is to have minimal distractions. You can’t really meditate when someone’s trying to talk to you (although meditation will teach you to become more mindful in conversations), when you’re working, or when your phone is dinging with notifications. Set yourself up for success by carving out time in your schedule specifically to meditate, putting your phone in Do Not Disturb mode (if you have an iPhone), and going somewhere you won’t be with someone who wants to chat.

    Try practicing both guided meditations and meditating on your own, and see what works best for you! You may find that you prefer one or the other, and again—there’s no right or wrong.

    Stay consistent with your practice.

    Meditation works best when you do it every day, so make a resolution to stick with it. Remember that it gets even easier and more enjoyable over time! And what better time to practice than quarantine season?

    Trust me—the benefits of meditation are worth the commitment. I have become genuinely happier and more peaceful, and I feel stronger and more powerful every time I meditate. It really is magical!

    Whenever you’re feeling fearful, anxious, or sad—meditate. It’s the best antidote.

    When we meditate, we discover that we are not our thoughts—that we have control over what we think, and thus who we are. We have the power to change our lives by changing our thoughts. And meditation reminds us to slow down enough to realize that in this moment, everything is okay.

    If you want to learn more, be sure to sign up for my Shortcut To Calm Mediation online course—you’ll get a bundle of 7 different guided meditation downloads from me, plus so much more! Learn more here.

    » Song Vibes «

    This is part of a fantastic guided meditation series by none other
    than RZA from the Wu-Tang Clan.
    I highly recommend.

    What have your experiences with meditation been like? Did this post change how you meditate? Share with me in the Comments below!

    xo,

    Amy

    This post is not sponsored, but there are affiliate links throughout this post. I genuinely love these products and know you will, too. Thanks for supporting the blog!

    Photos by Matthew Hanley, edits by me—at The Flower Fields at Carlsbad Ranch
  • My Favorite Sustainable Activewear Brands

    Best Sustainable Activewear » From the Infinite Embers blog

    Want to help the planet? Choose sustainable activewear!

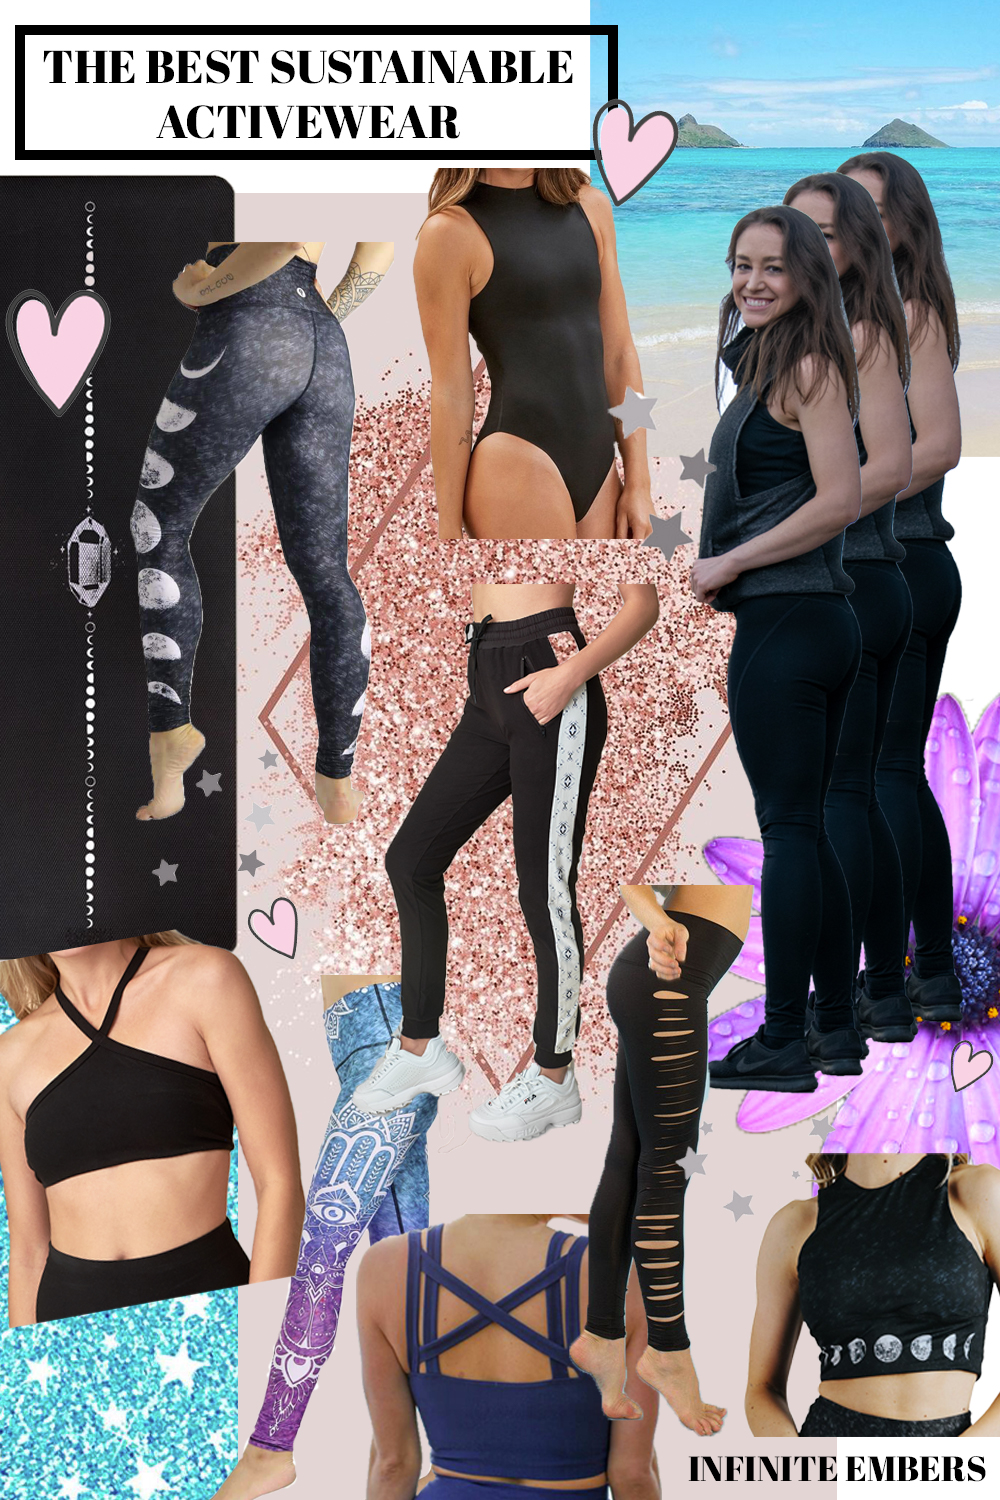
    All the activewear featured the collage above is all eco-friendly and made out of recycled materials, proving that you don’t have to sacrifice fashion for sustainability. I’m super passionate about the environment—I believe the health of our planet is directly linked to OUR health. After all… if the earth is poisoned, then the plants that grow in it become sick, and then the animals that eat those will become sick—including us. It just trickles up the chain. But the good news is that small changes can make a huge trickle-down impact as well: like where you choose to buy your leggings. Sustainable activewear is the next cool trend, merging fashionable clothing with a commitment to clean up our planet.

    Unfortunately, the fashion industry is one of the worst current destroyers of our planet.

    In fact, it’s the second-largest polluter in the world. These four sustainable activewear companies have chosen to fight this problem. All the ones featured below use post-consumer recycled materials to create their clothes. among other green practices. They turn trash like plastic water bottles into super cute and high-performance activewear in the form of recycled polyester! Plastic bottles can take 400 years to fully biodegrade when thrown away. (Don’t worry—these brands always make sure there is no BPA or toxins in the materials they use.)

    As a full-time yoga and former fitness instructor, I’ve tried just about every brand of activewear out there to put their clothes to the test. I’m always in search of activewear that’s stylish, form-flattering, and can hold up through a lot of wear and tear (and sweat). I also tend to like a little compression, which adds a flattering lift to your booty.

    And the great thing is, these sustainable activewear brands hold up against their less-earth-friendly competitors!

    I genuinely love their products—it’s like the fact that they’re helping to save the planet is a beautiful cherry on top. The clothes truly sell themselves.

    To show you what I mean, I’ve gone through all of their websites and picked out my top picks in their current designs! I know, you’re welcome—such a hard job, but someone had to do it.

    By the way, online shopping is even more fun when you’re choosing brands that are leaving a positive impact on the environment, rather than hurting it.

    So, without further ado, here are my…

    Favorite Sustainable Activewear Brands

    Yoga Democracy

    Yoga Democracy was my first sustainable activewear love. They even featured me once on their Instagram! That’s where I first came across their leggings—I was drawn in by how cute they were on a fellow yogi, and then when I saw that all of their activewear is made from recycled materials, I had to try them. As you might be, I was skeptical at first. But the leggings I bought quickly became one of my favorites.

    The best thing about their leggings is that they’re incredible at wicking away moisture—I used to wear them when I taught spin, which is the ultimate leggings endurance test. And let me tell ya: Yoga Democracy holds up. I’ve owned four pairs of their bottoms so far, two leggings and two crops.

    And another major plus: they really hold you UP. Their leggings are slightly compressive, which I LOVE. It gives you a lift and support in all the right areas.

    ALSO—I  got the hookup and have a code for you guys to get

    20% OFF any purchase!

    Just enter code INFINITE20 at checkout to save on your order.

    Here are my top picks:

    Bottoms:

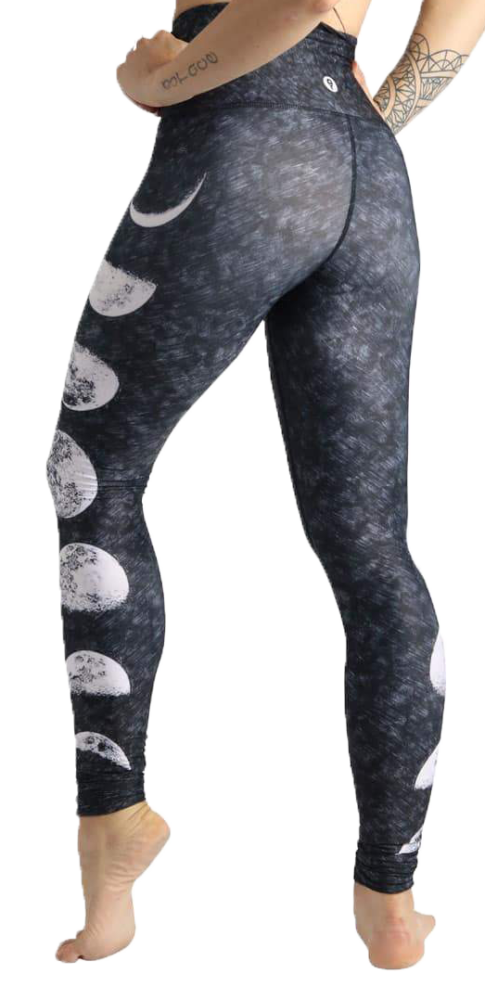
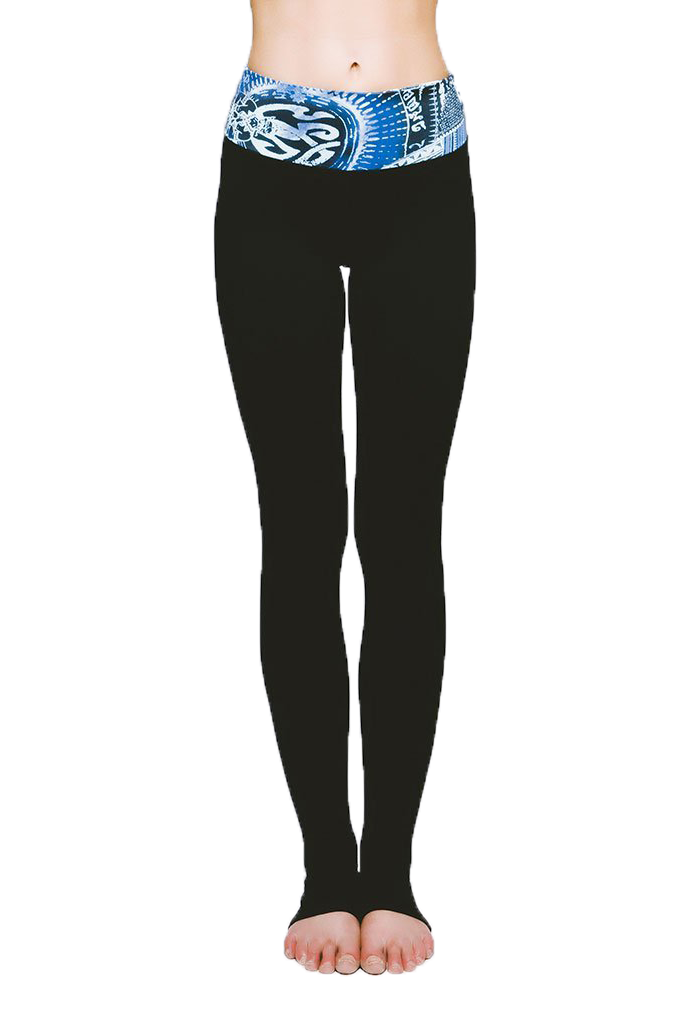
    Just a Dark Moon Phase Printed Yoga Legging

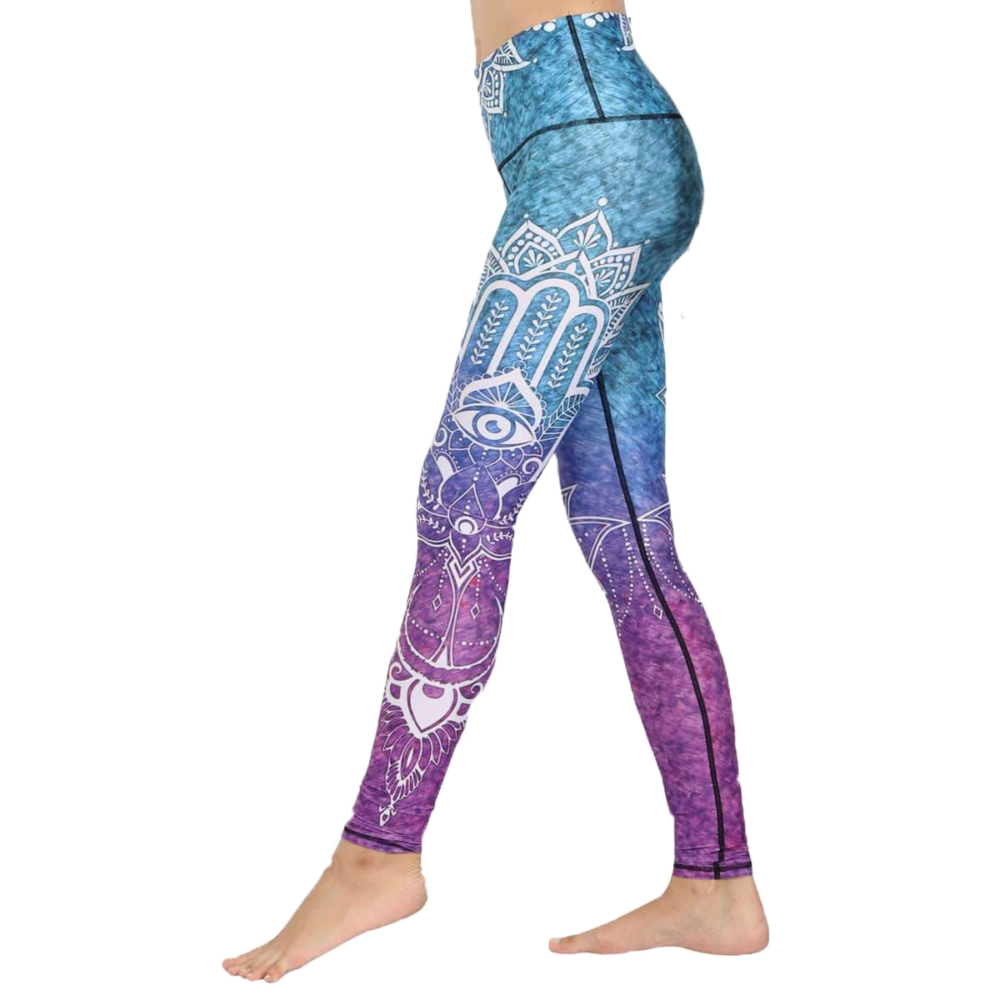
    Third Eye Chakra Printed Yoga Legging

    Yoga Democracy Legging » From the Infinite Embers blog

    Essential Legging in Cool Cirebon/Jet Black

    Yoga Democracy Legging » From the Infinite Embers blog

    Tops:

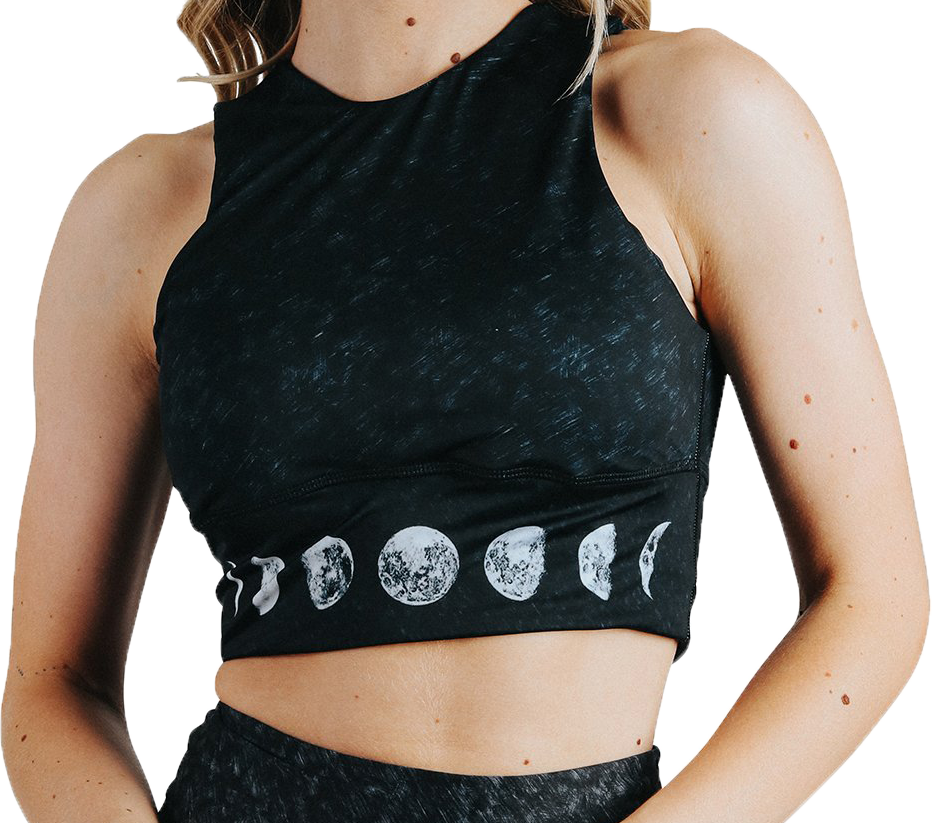
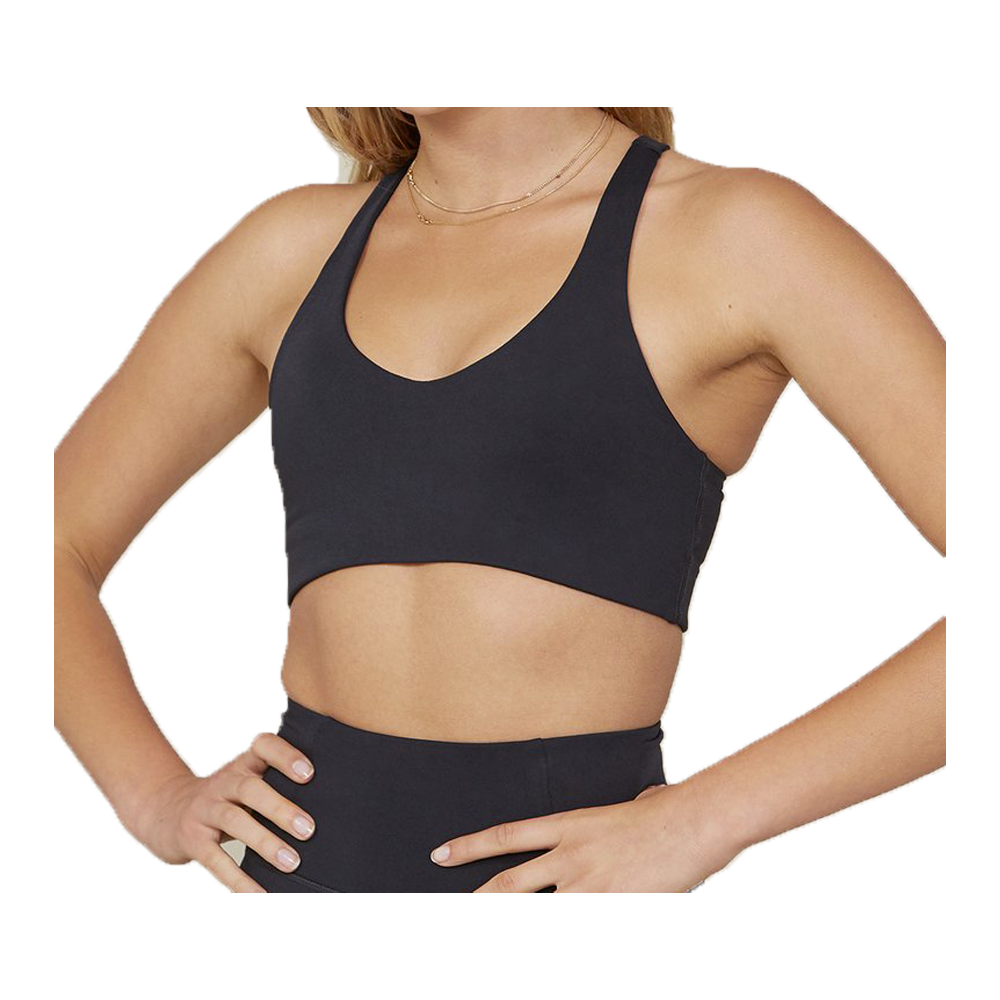
    Free Range Sports Bra in Just a Dark Moon Phase

    Yoga Democracy » From the Infinite Embers blog

    Perfect to go with the Just a Dark Moon Phase Leggings above for a super cute set. Definitely top of my wish list!

    Peaceful AF Bamboo Muscle Tee

    Yoga Democracy » From the Infinite Embers blog

    From the Yoga Democracy website:

    Virtually everything we produce is made from recycled polyester or nylon. We source all of our fabric in Italy from a supplier that even by European standards is ahead of the game when it comes to wastewater treatment and green energy. By sourcing from somewhere with strict labor and health and safety standards already in place we can be sure people as well as the planet are not left short changed.

    The process starts with PET bottles being shredded into flakes, which are then converted into pellets and melted down. That material is then spun into new polyester yarn which is used to create the recycled polyester that goes into brands like ours.

    Our supplier uses a type of yarn called ECONYL® to produce our nylon. That yarn comes from a process carried out by a company called Aquafil SpA which reforms fishing nets collected from the world’s oceans, carpet fluff and other nylon containing material that would otherwise end up in landfill into new fabric.

    Science is so cool.


    Girlfriend Collective

    In terms of quality, it really doesn’t get much better than Girlfriend Collective. Seriously, this brand blows me away. They’re doing everything right. The material of their compression leggings is nice and thick and really well-constructed.

    When they first launched a few years back, they did a campaign that I saw on Facebook giving away free leggings. Genius. I got mine (the Compressive High-Rise Legging in Black below—I’m wearing them in the collage at the top of this page) and have been in love since.

    I also really love this brand for their INCLUSIVITY. They use a variety of bodies for their models—all ages, races, and sizes! (Girlfriend Collective offers a large range of sizes from XXS-6XL) They are definitely paving the way for the future of sustainable activewear.

    As a bonus, when you’re done with your Girlfriend Collective clothes, you can recycle them again with their new ReGirlfriend program! They give you a $15 credit to use on future purchases when you send them your worn out clothing—and the clothes get re-recycled for use #3 (and 4… and 5…). Even still, my leggings still have a few years to go. I have had them for 4 years now, worn them a lot, and they’ve held up incredibly. Like, they still look brand new.

    Did I mention Girlfriend Collective provides free shipping on everything you order online? Boom.

    Bottoms:

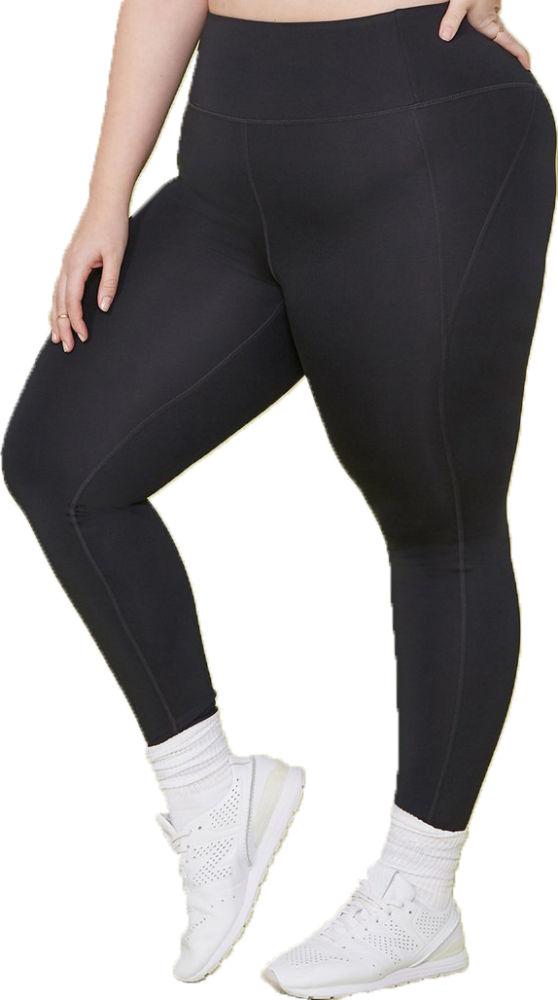
    Compressive High-Rise Legging in Black

    Girlfriend Collective Legging » From the Infinite Embers blog

    These are Girlfriend Collective’s flagship leggings—the tried-and-true unbeatable staples. These leggings are also pictured on me in the collage at the top of this page! I’m absolutely in love with them.

    I’m particularly living for these leggings in this set with the:

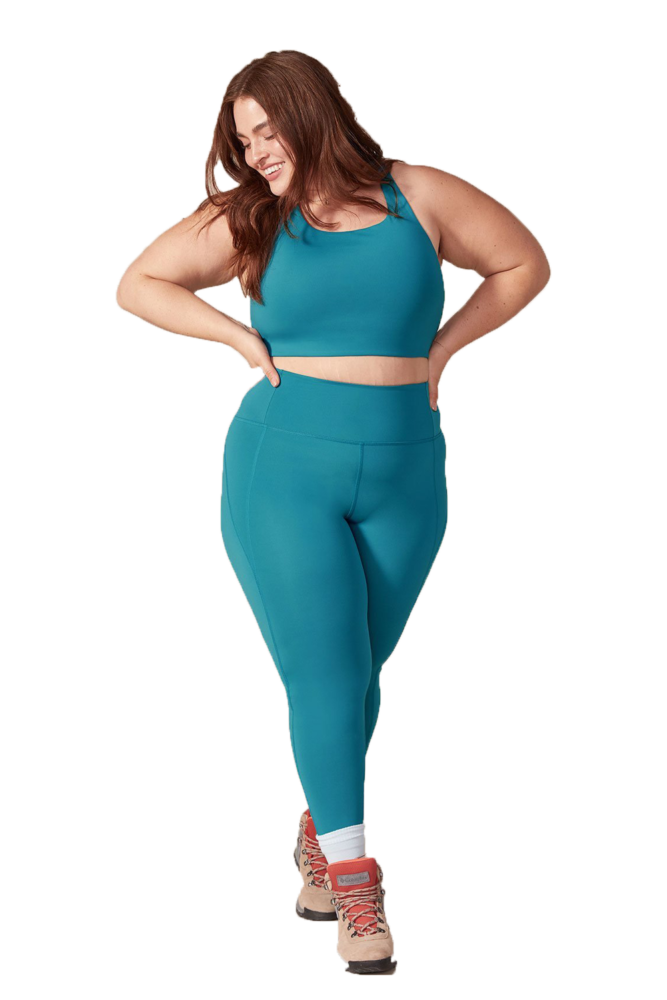
    Olympia Compressive High-Rise Legging and Olympia Topanga BraGirlfriend Collective » From the Infinite Embers blog

    Olympia’s the color and I’m in love—it’s the perfect shade of teal blue.

    Tops:

    Lola Bra in Black

    Girlfriend Collective » From the Infinite Embers blog

    Bodysuit:

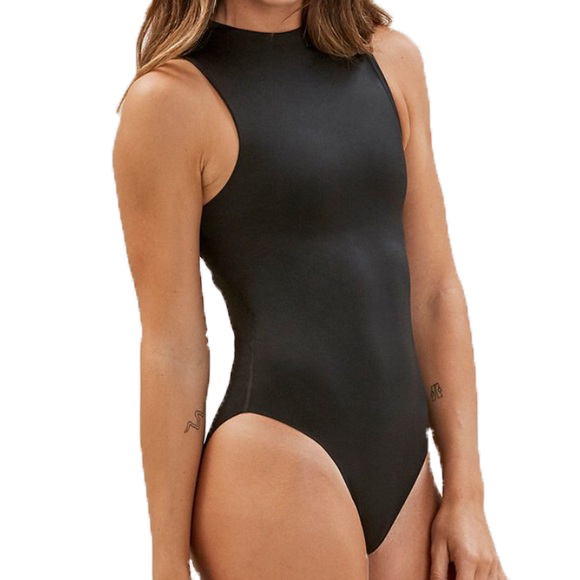
    Black Flex Bodysuit

    Girlfriend Collective » From the Infinite Embers blog

    From the Girlfriend Collective website:

    Here’s a breakdown of each of our products and how it stacks up.

    Packaging: Our packaging is 100% recycled and recyclable, so don’t throw it away!

    Compressive Leggings + Bras: Made from 79% recycled polyester (or RPET) and 21% spandex, our leggings are made from 25 recycled post-consumer bottles and our bras are made from 11.

    LITE Leggings: Made from recycled fishing nets and other waste using ECONYL® yarn, our LITE fabric is made up of 83% recycled nylon and 17% spandex.

    Cupro: Our tees and tanks are 100% cupro, a delicate fiber made from waste the cotton industry leaves behind. Our yarn is made in a zero-waste, zero-emission facility in Japan, then constructed at our SA8000-certified factory in Hanoi.


    Wolven Threads

    Wolven Threads‘ main campaign is to Make Sustainability Sexy, and I am here. for. it. They probably have my favorite designs out of the group—super fashionable cuts and trend/sexy designs. I’ve only tried one piece by them as well (the jogger pants below), and absolutely adore them!

    As if they weren’t already sustainable enough, Wolven Threads aims to be completely carbon neutral and donates 1% of sales to organizations that do important work to create positive environmental change.

    ALSO—I have a discount code for you to use for their clothes, as well!

    Use my code INFINITE20 for 20% all purchases.

    Happy shopping!

    Bottoms:

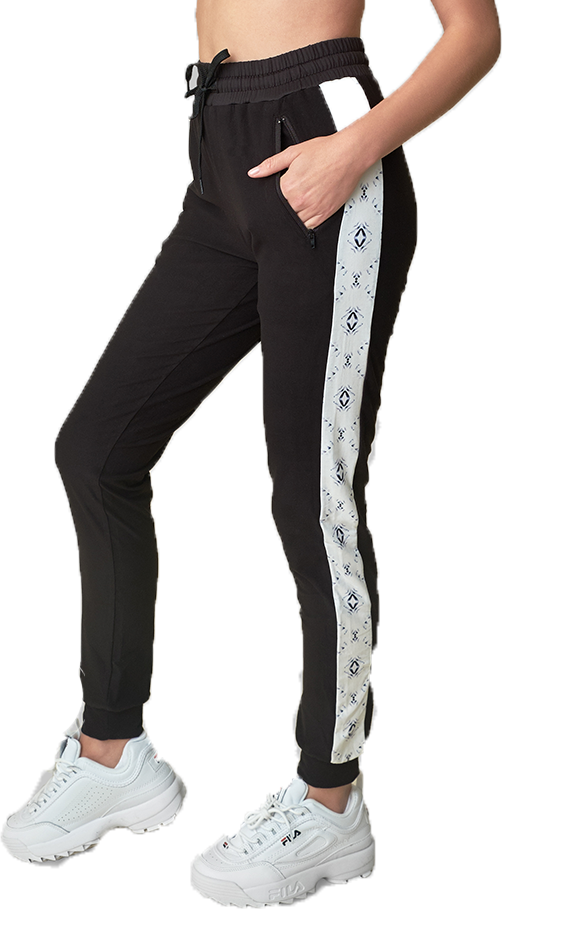
    Alpine Line Jogger Pants

    Wolven Threads » From the Infinite Embers blogSo comfortable you’ll never want to take them off.

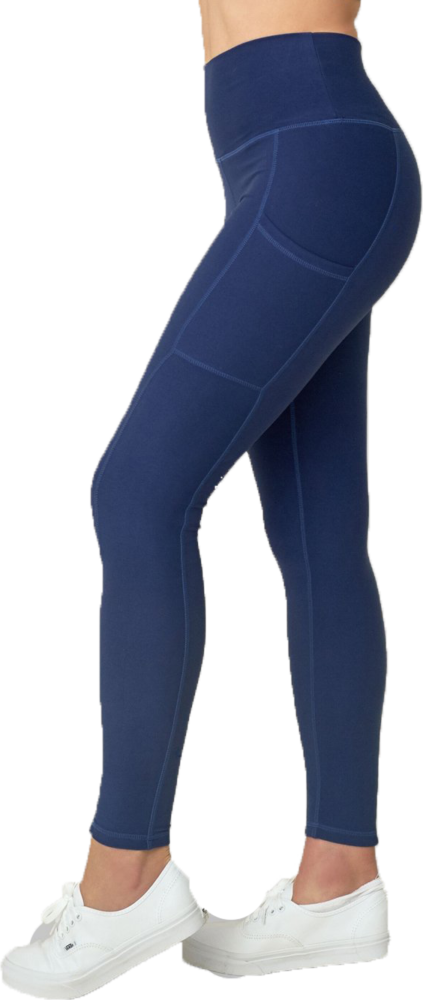
    Indigo Legging

    Wolven Threads » From the Infinite Embers blog

    Tops:

    Onyx Pyramid Top

    Wolven Threads » From the Infinite Embers blog


    Wolven Threads » From the Infinite Embers blog

    Available in a variety of beautiful colors—I just have a thing for black.

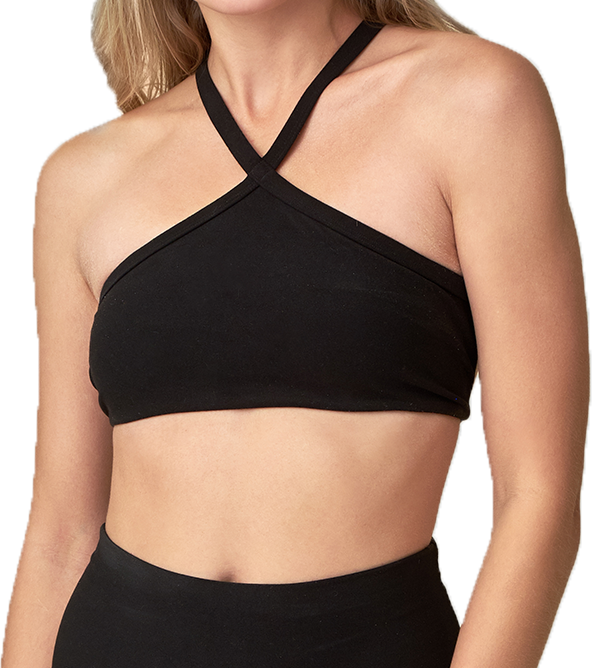
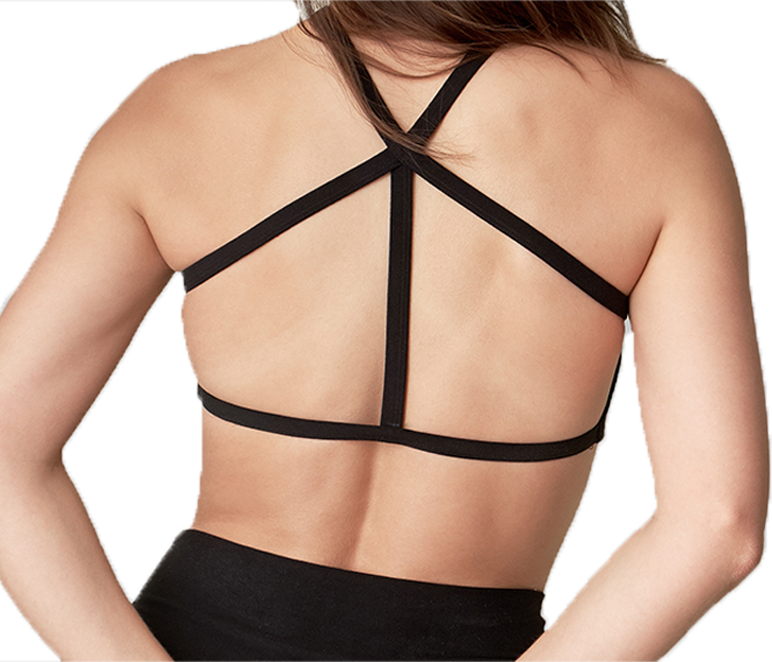
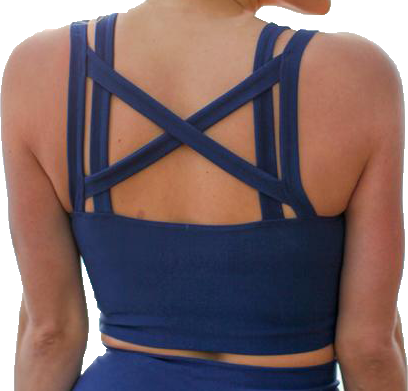
    Indigo Double Cross Top

    Absolutely love the back on this bra.

    Bodysuit:

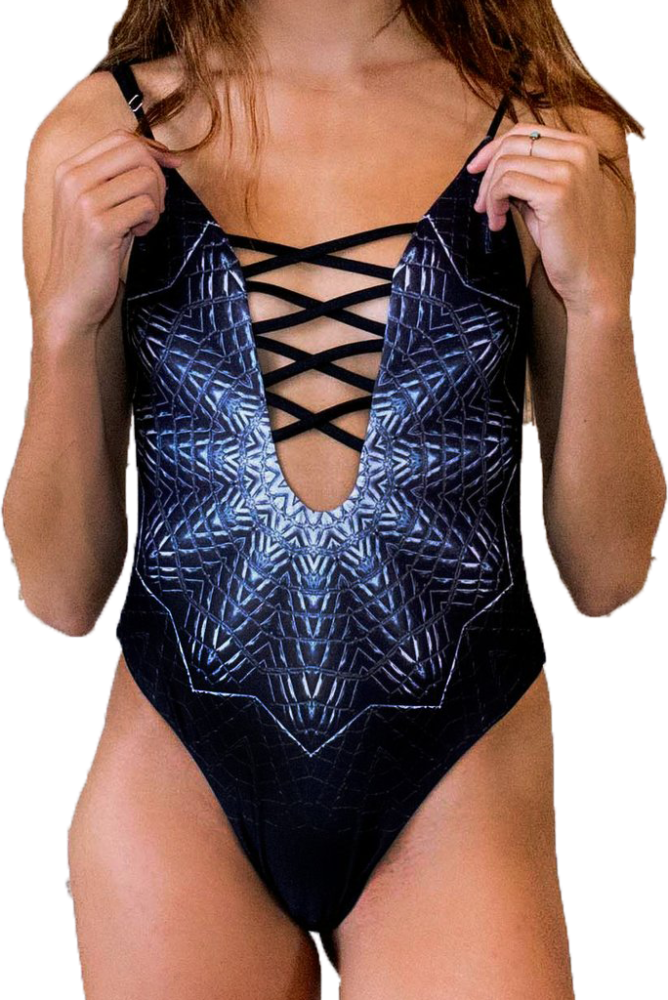
    Astral Ranger Reversible One Piece

    Wolven Threads » From the Infinite Embers blog

    From the Wolven Threads website:

    We believe that beautiful fashion should not come at the expense of our planet. Our garments are made with OEKO-TEX certified Recycled P.E.T fabric (RPET), a fabric made from recycled plastic water bottles. This certification ensures that our material is free of harmful and toxic chemicals. Over 6.4 million tonnes of plastic trash enters the world’s oceans each year. RPET creates a second life for plastics, helping to keep plastic out of our planet’s delicate eco systems.

    When we say we want to Make Sustainability Sexy, we truly mean it. We are a team of artists and activists, working to erase the negative footprints on our earth. Our sustainability practices are rooted in mindfulness and the power of choice—from day-to-day decisions to major resolutions. We believe that a collective effort of sustainability has the ability to change the trajectory towards a healthier, more verdant planet. See? Sexy.

    Sustainable activewear: it’s the way to go. I hope you all fall in love with these companies as much as I have!

    » Song Vibes «

    Did I miss any great sustainable activewear brands out there? Let me know your favorites in the Comments below!

    xo,

    Amy

    This post is not sponsored, but I am an ambassador for Yoga Democracy and Wolven Threads, meaning I get a commission if you use my discount code. Win-win! I genuinely love these brands and know you will, too. Thank you so much for supporting the blog!

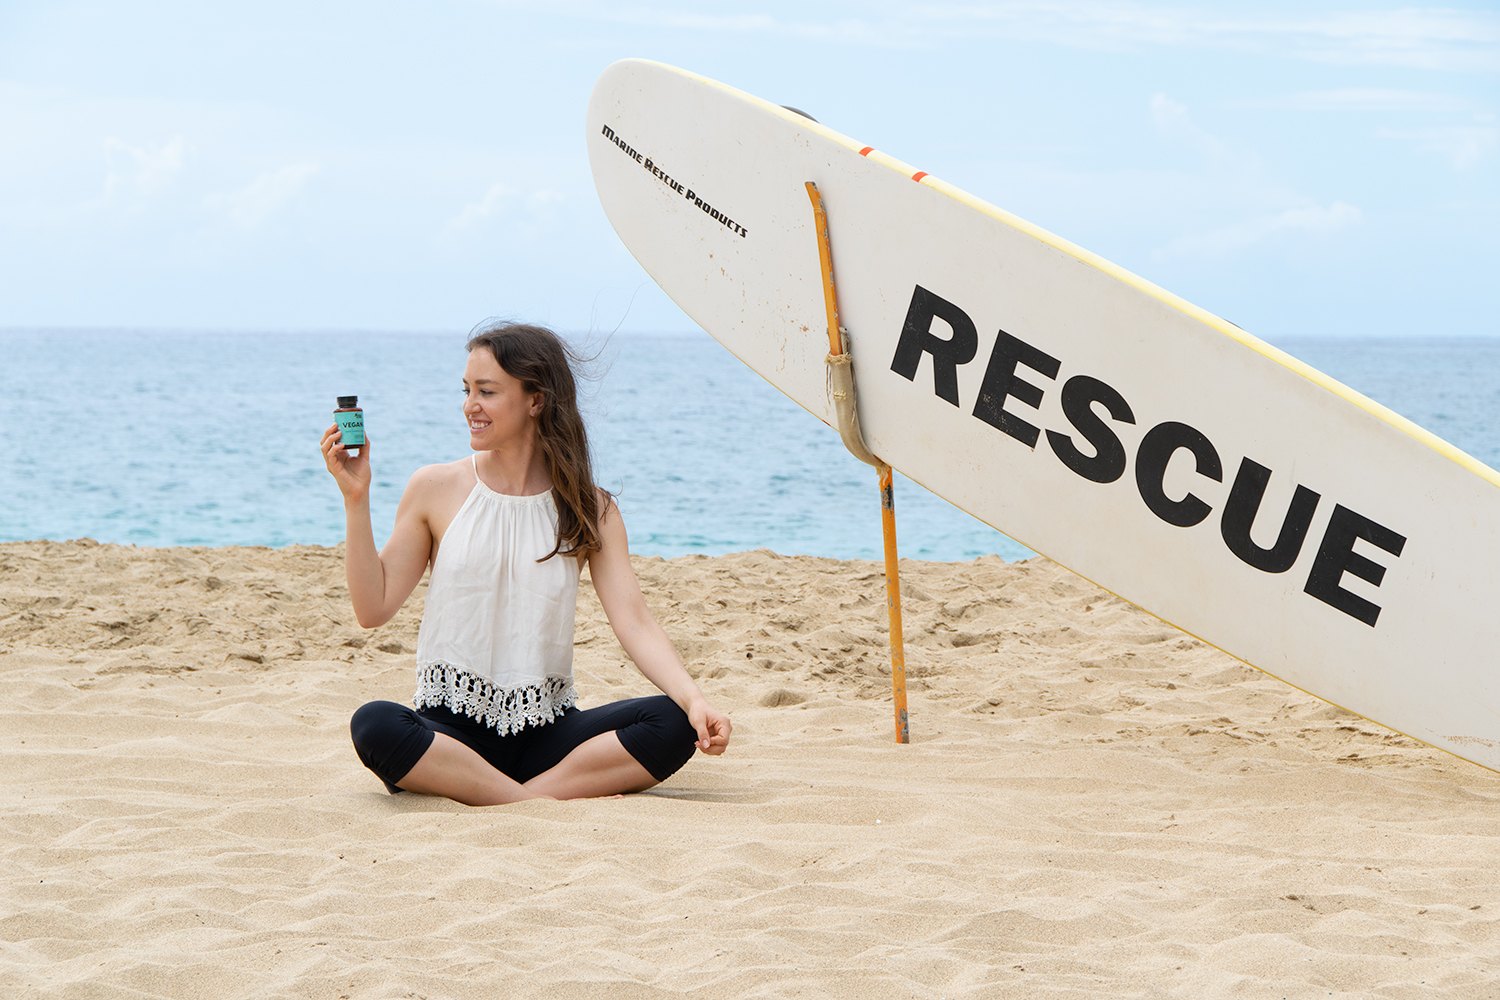
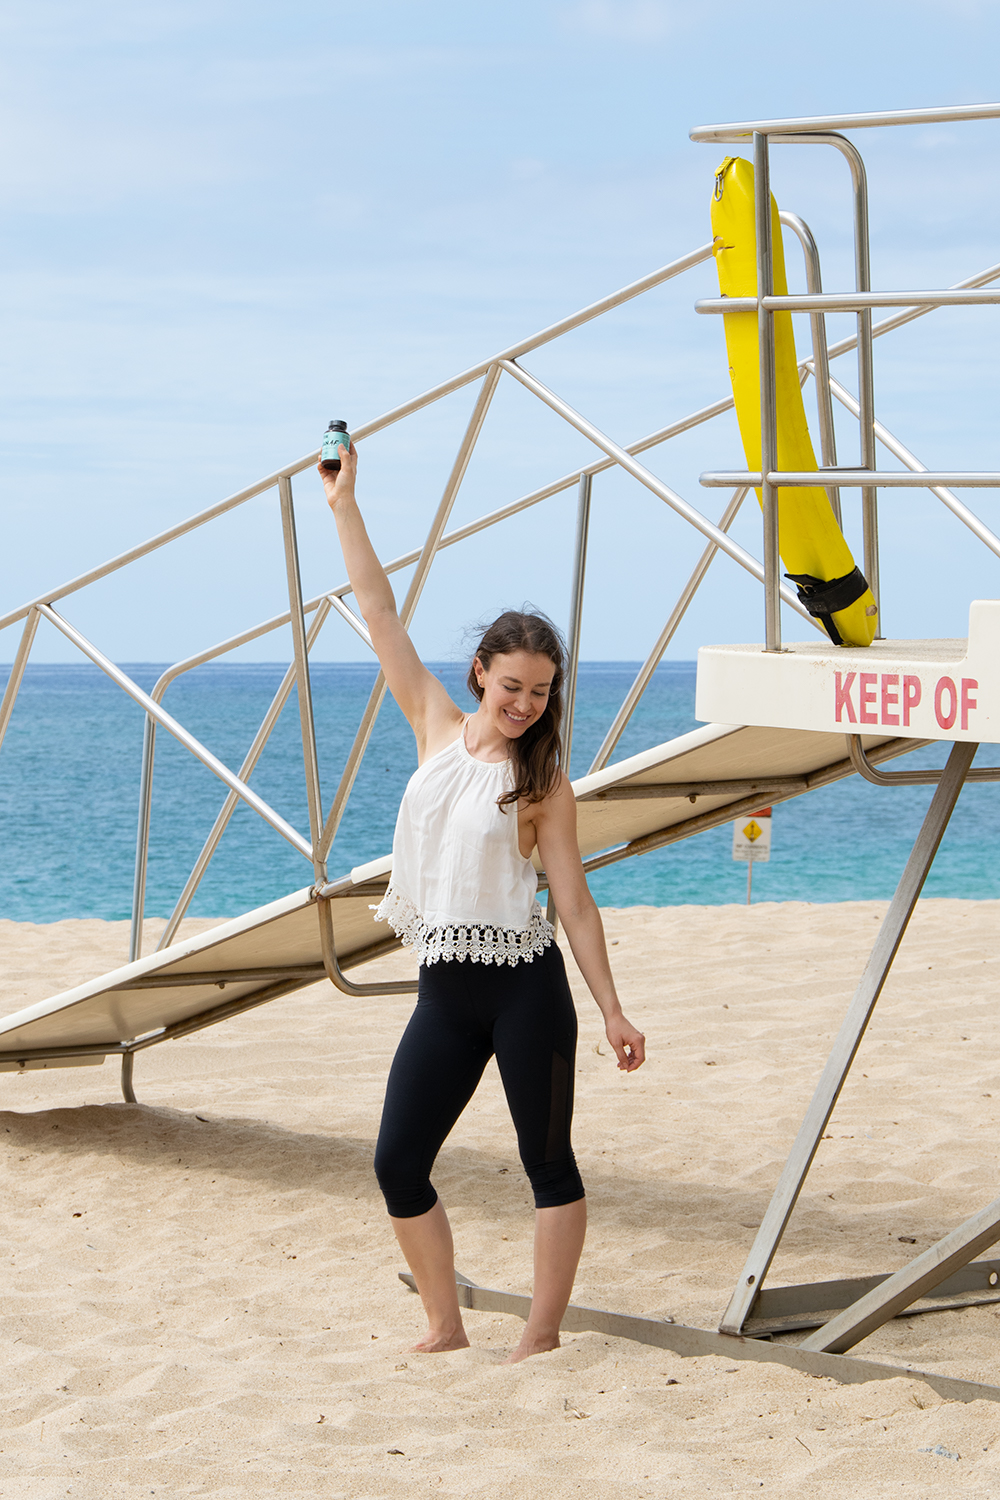
  • Anxiety Rescue: Why I Love CBD

    Anxiety Rescue: Why I Love Sunday Scaries CBD » From the Infinite Embers blog

    Have you tried CBD yet?

    CBD is finally getting its moment in the spotlight in the health and wellness world. I absolutely love it and use it all the time. But it’s also still very misunderstood—so let’s talk about it!

    I’ve struggled with anxiety and depression my entire life. CBD is like a warm, soothing blanket that helps take the edge off when my anxiety in particular spins out of control. CBD creates a calming effect mentally and reduces inflammation in your body. It’s like the ultimate chill pill for both your mind and body—a potential alternative to anxiety meds and a great tool to help your body recover.

    CBD stands for cannabidiol. And yes, cannabidiol is one of the active ingredients of cannabis, aka marijuana, aka weed. BUT it is not the component that gets you high—that’s active ingredient #1, THC. CBD is the beautiful healing part of the marijuana plant that has numerous health benefits and is prominent in medical marijuana.

    So, to reiterate: NO, it won’t get you high.

    Also, CBD on its own is derived from the HEMP plant, a cousin of the marijuana plant, so it’s not even around the THC. Not that there’s anything wrong with THC—I’m a huge fan of weed for all of its mental and physical benefits, which I plan to get into in a future post. But you just can’t beat CBD for ultimate anxiety and muscle tension relief, and it’s safe for almost everyone to take, so I had to bring it up with you guys.

    Bonus: you also cannot get addicted to CBD! According to a report from the World Health Organization, “In humans, CBD exhibits no effects indicative of any abuse or dependence potential…. To date, there is no evidence of public health related problems associated with the use of pure CBD.”

    If you haven’t tried it, it’s time!

    Anxiety Rescue: Why I Love Sunday Scaries CBD » From the Infinite Embers blog

    Because CBD is not marijuana, you can legally order it online anywhere in the U.S. But some states do still have some restrictions on it, and the federal government still (unfortunately) lumps it in with marijuana, so servicemen and women can’t have it or risk popping on a drug test. Which is a tragedy because our military needs far more mental health help, but that’s another rant. The good news is that times are changing rapidly and it will soon be 100% legal (along with weed one day!).

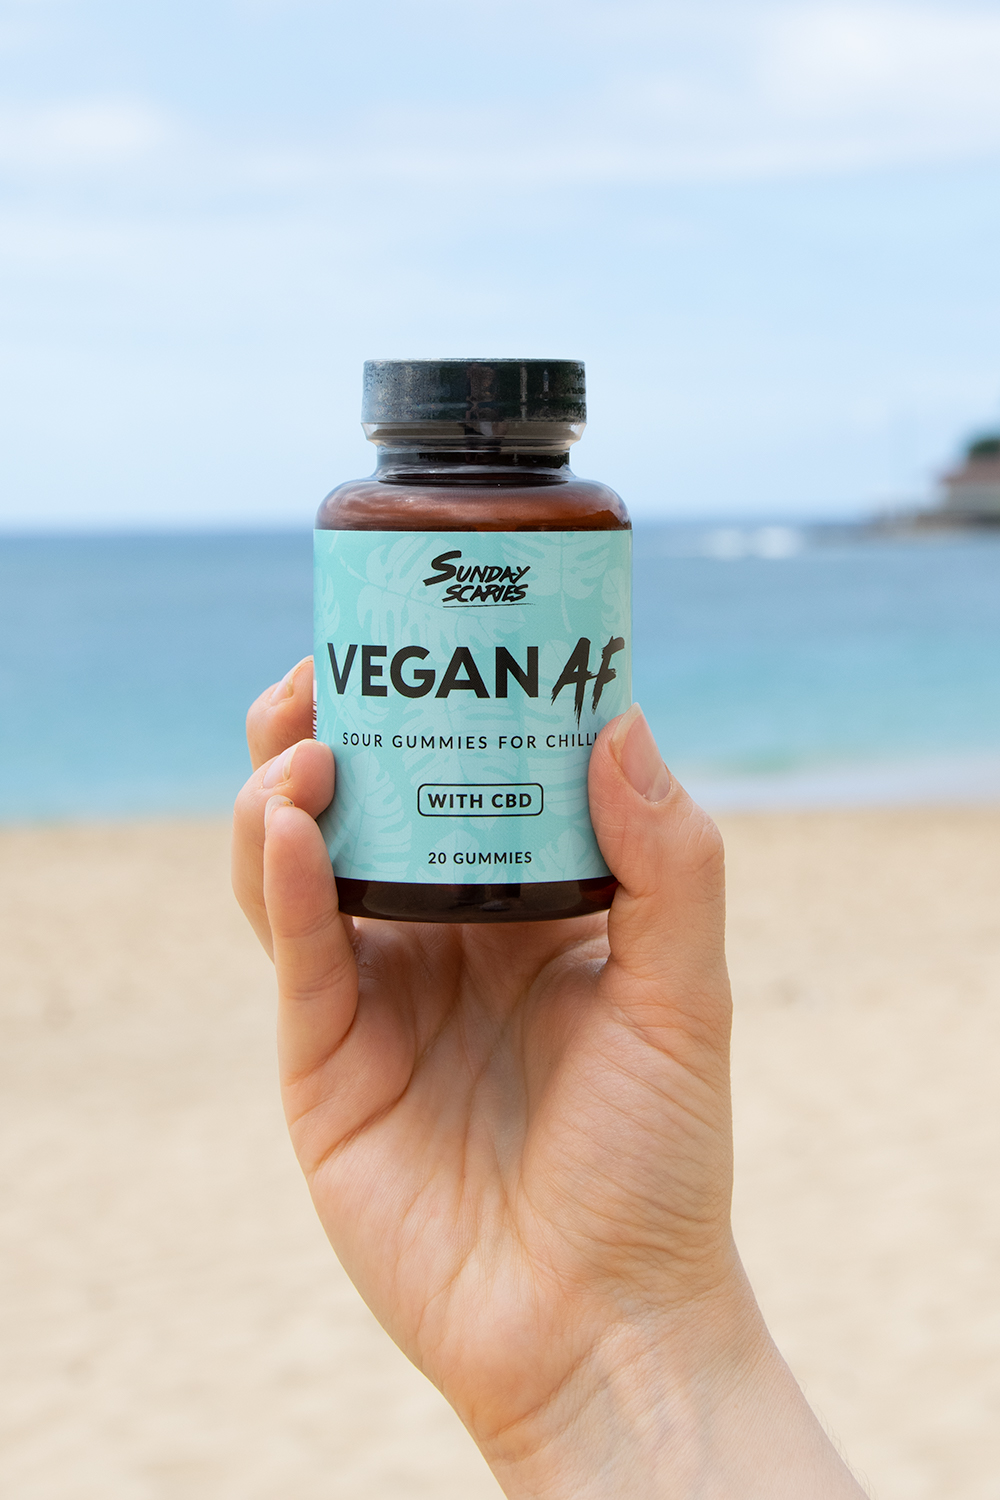
    This post is NOT sponsored, btw. But if you’re looking, I recommend trying the Sunday Scaries Vegan AF CBD gummies.

    Sunday Scaries is my personal favorite CBD brand, but there are lots out there to choose from, and more keep emerging every day. I encourage you to always do research and choose what works for you! But here’s an excerpt from Sunday Scaries’ website that helps explain some of the reasons I love this brand:

    Unlike some of our competitors who get a lot of their hemp from China and other overseas sources with loose regulatory requirements, our broad spectrum hemp is sourced directly from farms in the USA. Our hemp is grown in accordance with the 2018 Farm Bill so these farms are regulated by the states’ Agriculture Departments. This requires our hemp to be pesticide free.

    (Side Note: In case you didn’t know, the term “Sunday Scaries” refers to the feeling of dread and anxiety that most people experience on Sunday evenings as they realize they have to go back to work Monday morning. I can relate to this from back in the days when I worked as a television writer’s assistant. But it’s so important to also realize that gut feeling is our intuition calling us to change our lives and find work that fulfills us! Don’t settle!)

    Anxiety Rescue: Why I Love Sunday Scaries CBD » From the Infinite Embers blog

    Ways to take CBD:

    • Orally: The most effective and healthful method. One option is to place drops of CBD oil under your tongue (aka sublingual). Leef Organics is my favorite for drops! Or, you can take it in edible form, like the Sunday Scaries gummies. They’re yummy and also contain vitamins B13 (which vegans have to take as a supplement) and D3 (which almost everyone is deficient in). It can take about 30 minutes to up to 2 hours to feel the effects of edibles, so go slowly. You also may not feel the effects as strongly the first few times you take CBD, as it has to build up in your body. On the other hand, sublingual drops absorb much more quickly than edibles, since they bypass the digestive tract, so that’s a better option for faster relief.
    • Topically: You can also apply CBD directly to your skin to help target areas of tension/soreness/pain. The CBD will soak into the area to help reduce inflammation and promote healing. A 2015 study done on rats found that CBD gel applied to the skin greatly reduced joint swelling. This is great news if you have arthritis, or want to prevent it and other ailments!
    • Smoking/Vaping: Vaping is definitely preferable to smoking, but make sure you know exactly what’s in what you choose to smoke. I don’t typically want to inhale all the chemicals in most vape cartridges, so I choose to stick with the oral method. However, inhaling is a much faster method and will provide relief in 10 minutes or less.

    I find that the physical effects of CBD are pretty subtle, but everyone responds differently, so be sure to try it out at the end of the day when you’re done with your responsibilities to see how it affects you. It doesn’t make me drowsy or tired at all, just overall more relaxed and loose.

    Anxiety Rescue: Why I Love Sunday Scaries CBD » From the Infinite Embers blog

    Benefits of CBD:

    How does CBD work, exactly? Let’s get nerdy (here’s a great scientific article if you want even more). Our bodies have something called the Endocannabinoid System, or ECS. It runs throughout your entire body. The ECS regulates our mood, brain function, immune response, sleep, inflammation, stress, and pain. So, like, our entire wellbeing.

    CBD essentially flips the switch to ON for your ECS. It does this by activating one of the system’s receptors, CB2. This helps the body send signals back to the brain that all is well, which can promote healing and help you transition into a state of peace.

    To get specific, CBD can:

    • stabilize mood
    • reduce stress
    • improve sleep
    • provide feeling of calm
    • improve brain function
    • improve immune system
    • reduce inflammation
    • reduce pain

    But wait, there’s more! This excerpt from Daddy Burt Hemp Co. explains:

    In addition to CBD’s other effects on the endocannabinoid system, it also positively impacts the uptake and flow of chemicals in the brain. One of the most well-documented effects is CBD’s impact on serotonin.

    CBD has been shown to act on and stimulate serotonin pathways in the brain. Increased serotonin levels can help provide relief for anxiety, depression, and migraine symptoms.

    Research on CBD has also demonstrated an impact on the ‘glial cells’ in the brain. Glial cells provide support to the neurons in the brain. If glial cells become overactive for any reason, they can lead to hypersensitive responses to different stimuli, such as pain or light. CBD helps regulate the activity of glial cells, bringing them back to a normal level.

    This stuff may just be magic.

    Anxiety Rescue: Why I Love Sunday Scaries CBD » From the Infinite Embers blog

    As a yoga and meditation teacher, I of course recommend that you use CBD as a tool to help boost other healing-promoting actions, as well.

    Practice self-care while you let the CBD take its effects, and your body will respond that much better. I recommend:

    Remember to breathe deeply and send yourself loving thoughts to help encourage your body to switch off its Flight or Fight response and return to a state of calm clarity.

    By the way, CBD is great for dogs, too! I give Pet Releaf CBD to my corgi to help with his anxiety, and it works like magic! It was actually initially recommended to me by my veterinarian, but of course if you have any concerns please talk to yours before giving it to your furry friend. But it can really help if your dog has any high/nervous energy!

    The holiday season is upon us—CBD is a great stress-reliever to have on deck.

    The holidays can be super joyful for some, and incredibly stressful for others. There’s often a lot of family time and thinking about the past. Try to mindfully protect your energy with difficult family members, and be kind to yourself if you find yourself being triggered. Taking CBD always calms my nerves and helps me process difficult encounters with greater ease!

    I’m wishing you all a very stress-free second-half of November. My birthday is coming up (November 27, Sagittarius what’s up!) so I plan on treating myself to some CBD and a massage. Let me know what you think if you give CBD a shot! I hope you find it as helpful as I have.

    » Song Vibes «

    Do you love CBD? Have any questions about it before you try? Let me know in the Comments below!

    xo,

    Amy

    📸: Matthew Hanley

    This post is not sponsored, but there are affiliate links throughout this post. I genuinely love this CBD and know you will, too. Thanks for supporting the blog!

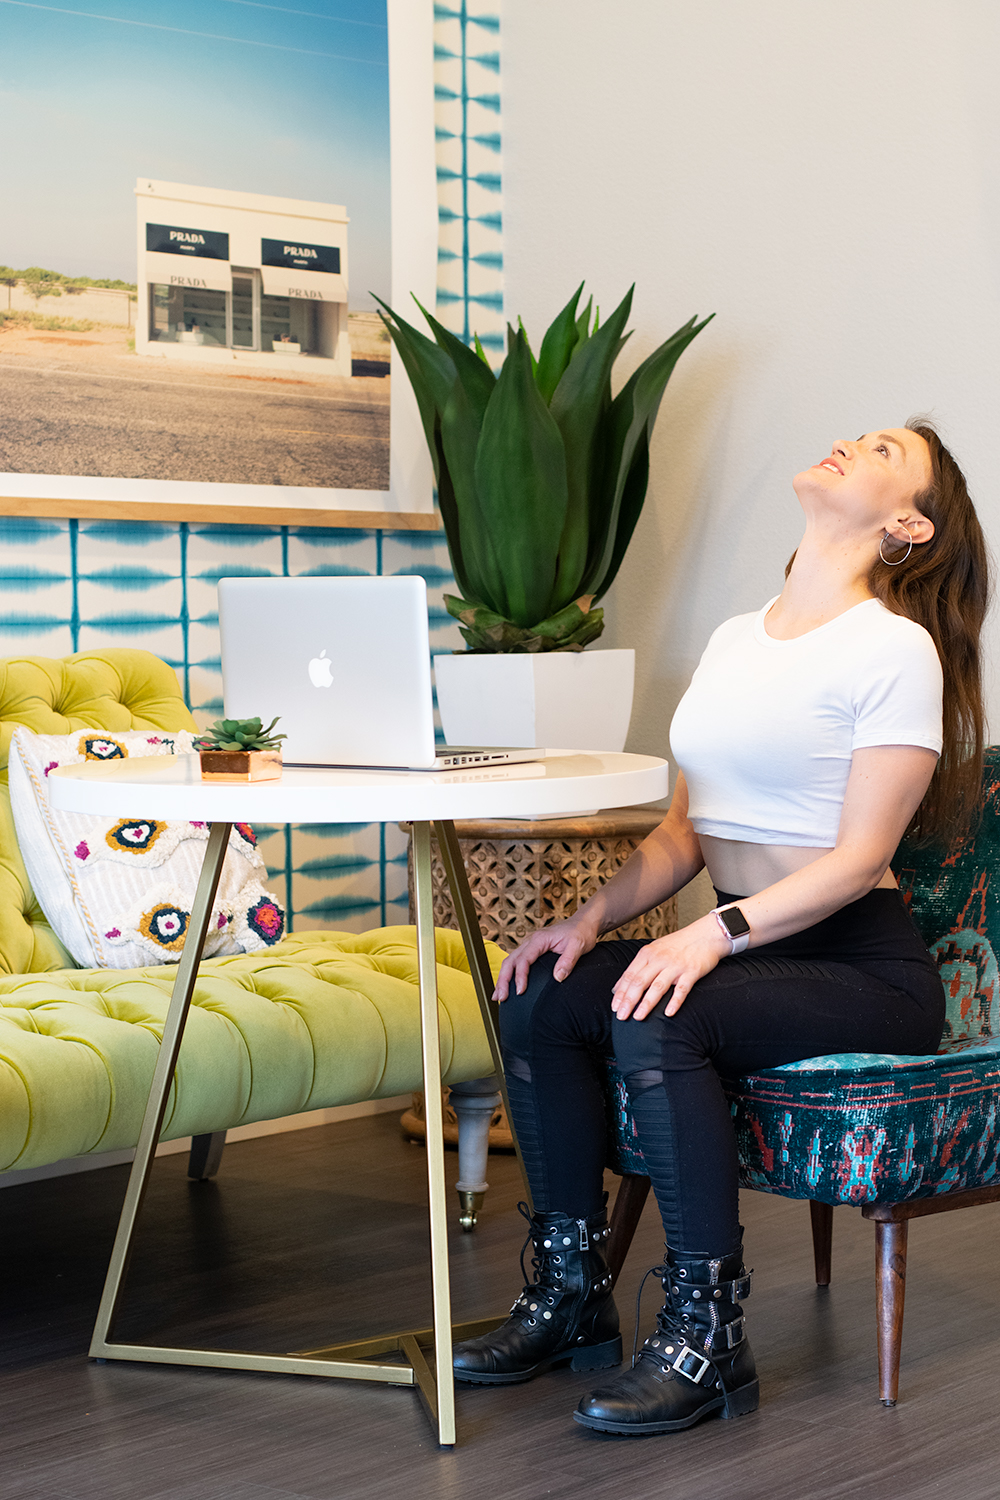
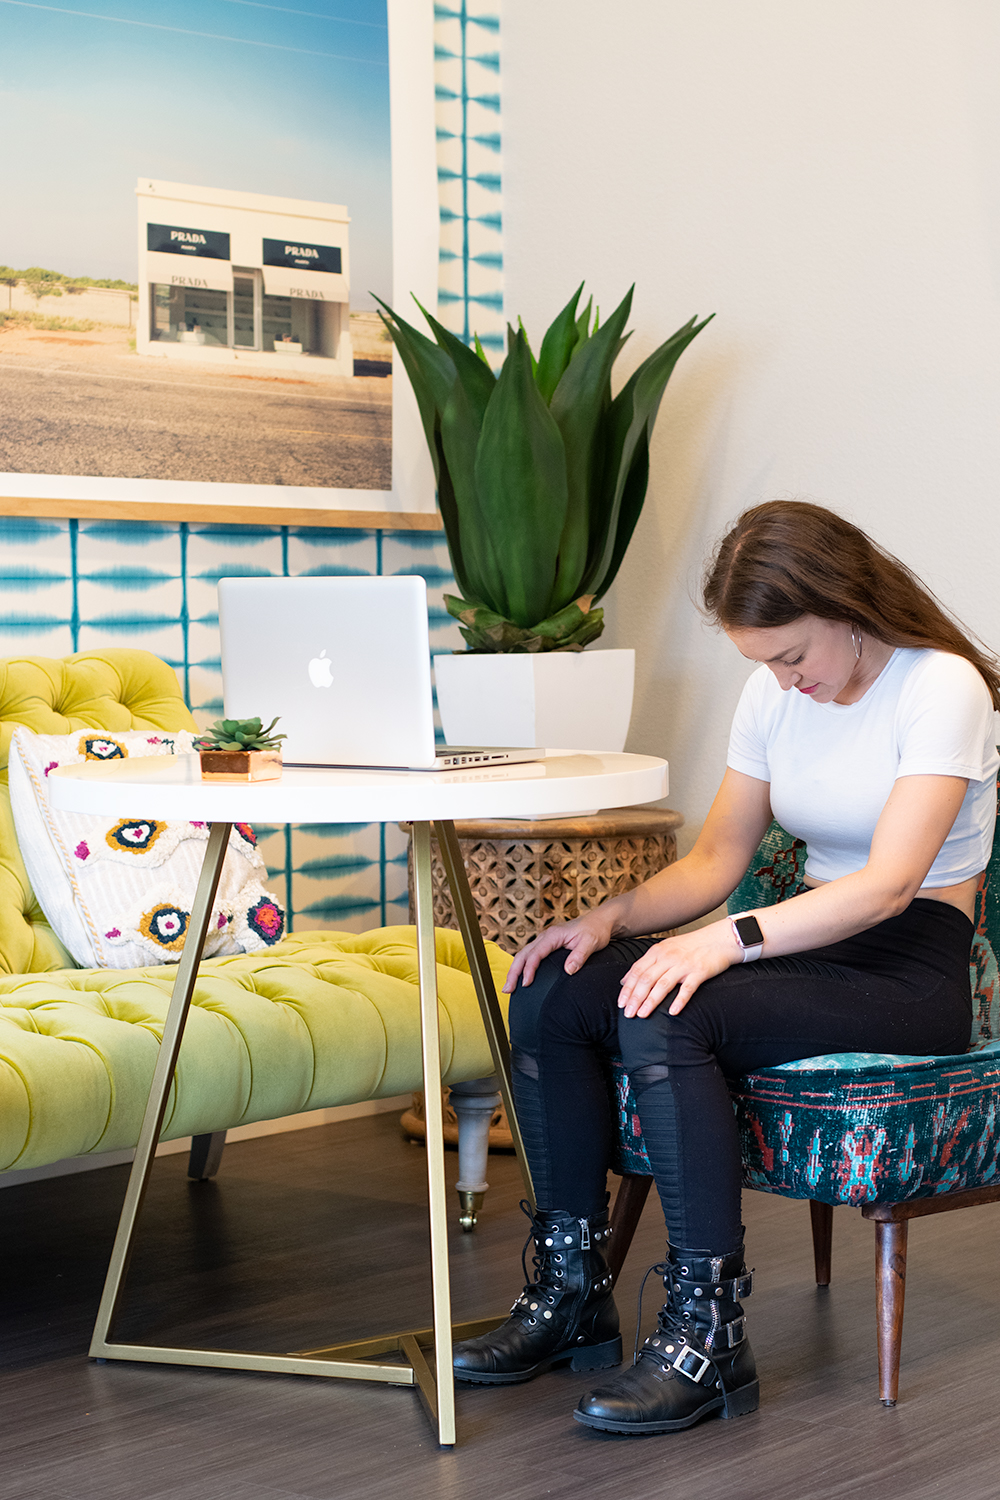
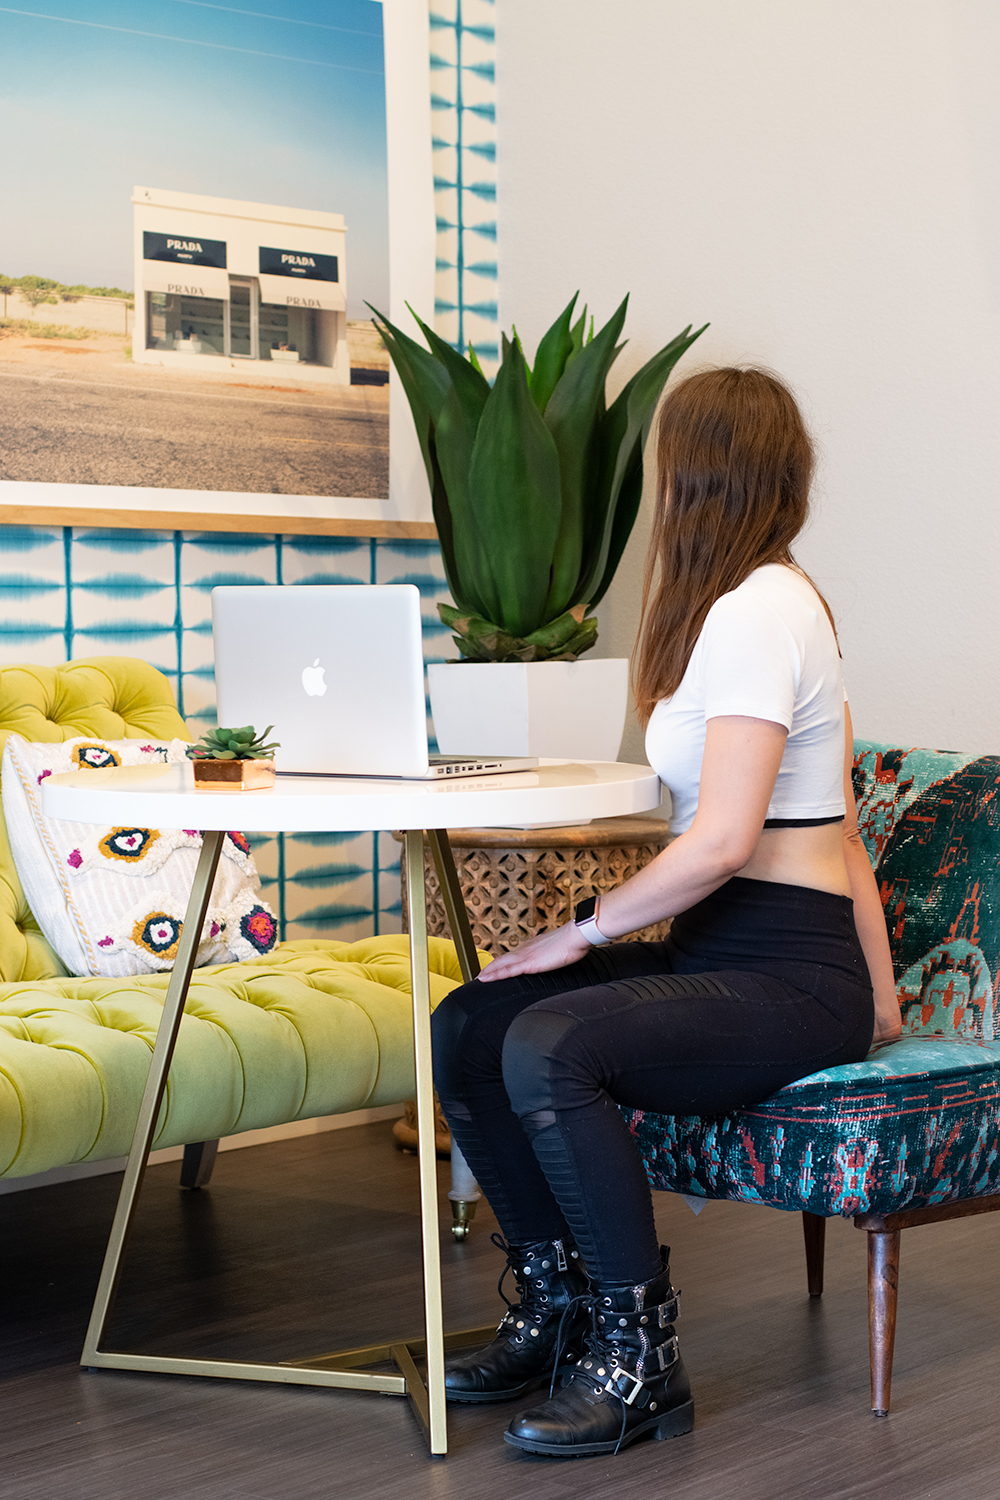
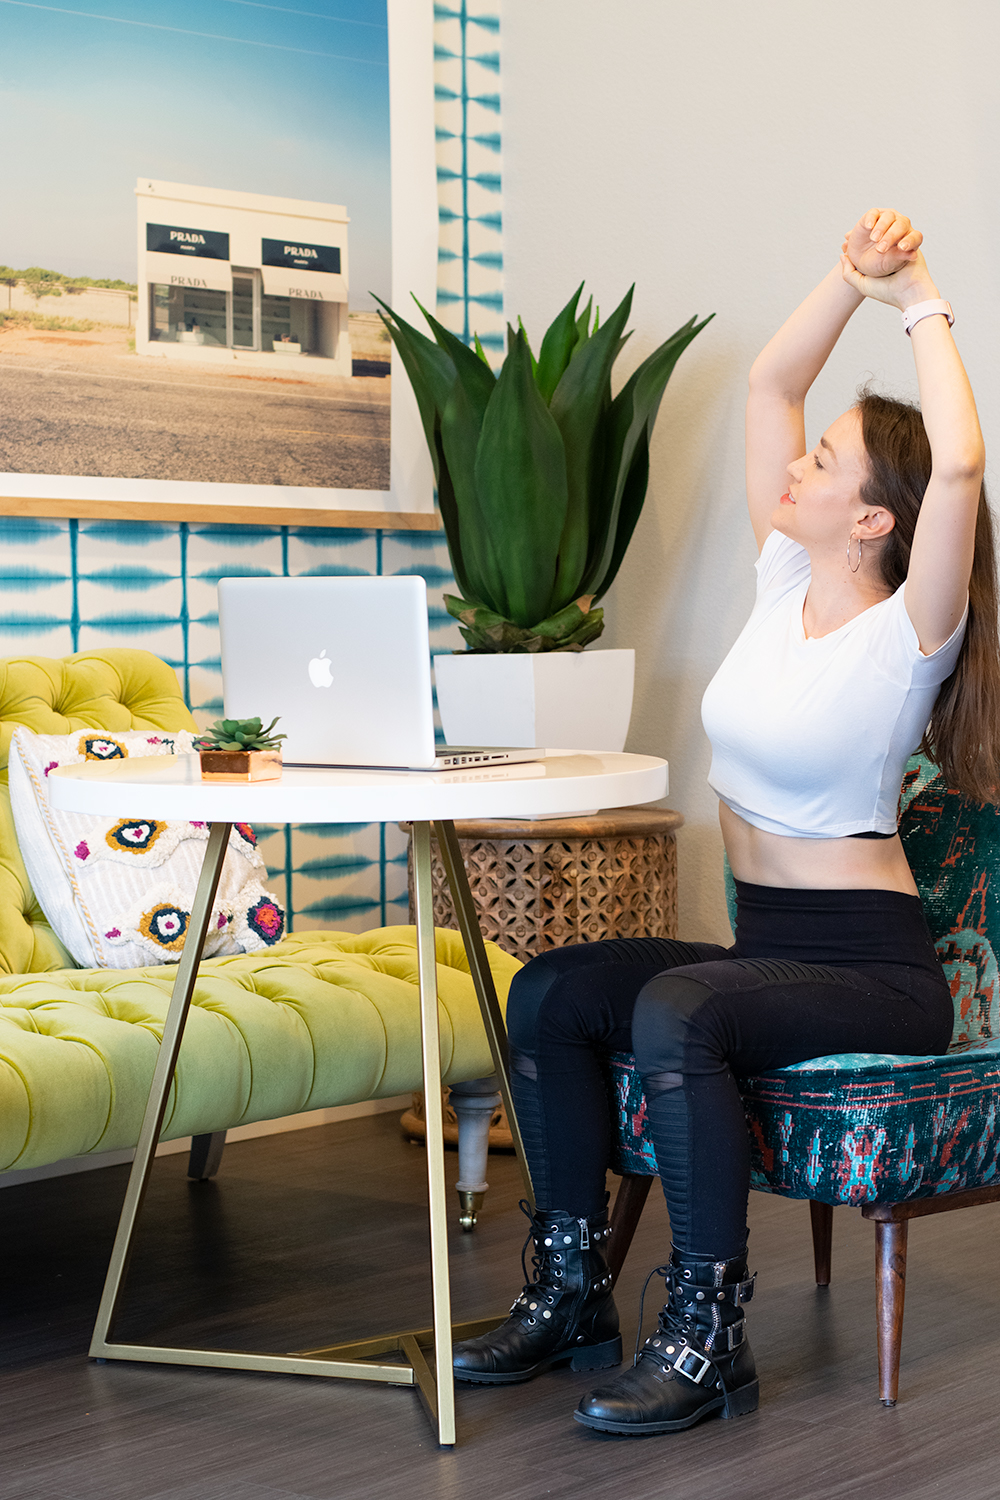
  • 10 Seated Chair Yoga Stretches

    Seated Chair Yoga Stretches

    Seated Chair Yoga Poses » From the Infinite Embers blog

    Stuck sitting for a long time? You need these chair yoga stretches in your life.

    Whether you’re on an airplane, spending hours in front of your computer, or waiting at the DMV, there’s bound to be a lot of sitting in your life. It’s just the modern way. Unfortunately, all those hours sitting can start to make the body tighten and stiffen, leading to loss of mobility and flexibility. I teach corporate yoga throughout San Diego, and oftentimes I work with my clients seated in suits around a conference table, which is how I came to create this chair yoga practice. I wanted to be able to help my clients feel better with stretches you can do any time in your chair.

    These stretches are, if I may daresay, a game changer.

    All of the following chair yoga stretches are done fully seated, making them perfect for when you can’t break out a full Vinyasa practice but still want to loosen up, regain energy and clarity, and relieve back and neck pain. These poses will move your spine in all directions to help keep you feeling great!

    Posture is everything when you’re sitting (try using a posture corrector for extra back support), and even more so when you’re stretching. These chair yoga poses require you to first sit up with your pelvis in neutral, reaching long through your spine to the crown of your head. Keep your ribs pulled in, your shoulders stacked on top of your hips, and your head up. Breathe deeply and relax. The goal is to feel good, so don’t force any of the stretches.

    Always, always, listen to your body!

    I should note: it is important to stand up at least once an hour and get some light movement in, if you’re able. Go pour yourself a glass of water or take a bathroom break! Also, if you’re interested, I highly recommend converting to a standing desk! I adore mine.

    Now to the chair yoga stretches:

    I go through the entire chair yoga flow with you in this video, or keep scrolling for the step-by-step sequence!

    You can hold each stretch for as long as you’d like. Repeat as often as possible.

    The Video:

    The Breakdown:

    1 » Cat/Cow

    Seated Chair Yoga Poses Cow » From the Infinite Embers blog

    Seated Chair Yoga Poses Cat » From the Infinite Embers blog

    • Begin seated, with your feet firmly planted on the ground at hips’ distance, hands on your knees.
    • Cow: Inhale, arch your back, and lift your head to the sky. Tilt your pelvis forward so your tailbone reaches back behind you.
    • Cat: Exhale, round your back, and tuck your chin to your chest. Tilt your pelvis backwards so your tailbone curls underneath you.
    • Flow between the two for as long as you want, moving with your breath. Be mindful to move more slowly through the part of your spine where you feel the most stiff.

    2 » Twists

    Seated Chair Yoga Poses Twist » From the Infinite Embers blog

    Seated Chair Yoga Poses Twist » From the Infinite Embers blog

    • Inhale and sit up as tall as you can.
    • Exhale and then rotate your torso to the Left. You can use your arms to help you. Try to lead the twist from your navel first, then ribs, then maybe neck.
    • Inhale and return back to center, slowly.
    • Exhale and repeat on the other side.

    3 » Side Stretches

    Seated Chair Yoga Poses Side Stretch » From the Infinite Embers blog

    Seated Chair Yoga Poses Side Stretch » From the Infinite Embers blog

    • Once again, sit up tall and reach your arms overhead.
    • Inhale and grab your L wrist with your R hand.
    • Exhale and stretch up and over to the R, breathing down the L side body.
    • Inhale and return back to center, grabbing your R wrist with your L hand.
    • Exhale and stretch up and over to the L, breathing down the R side body.

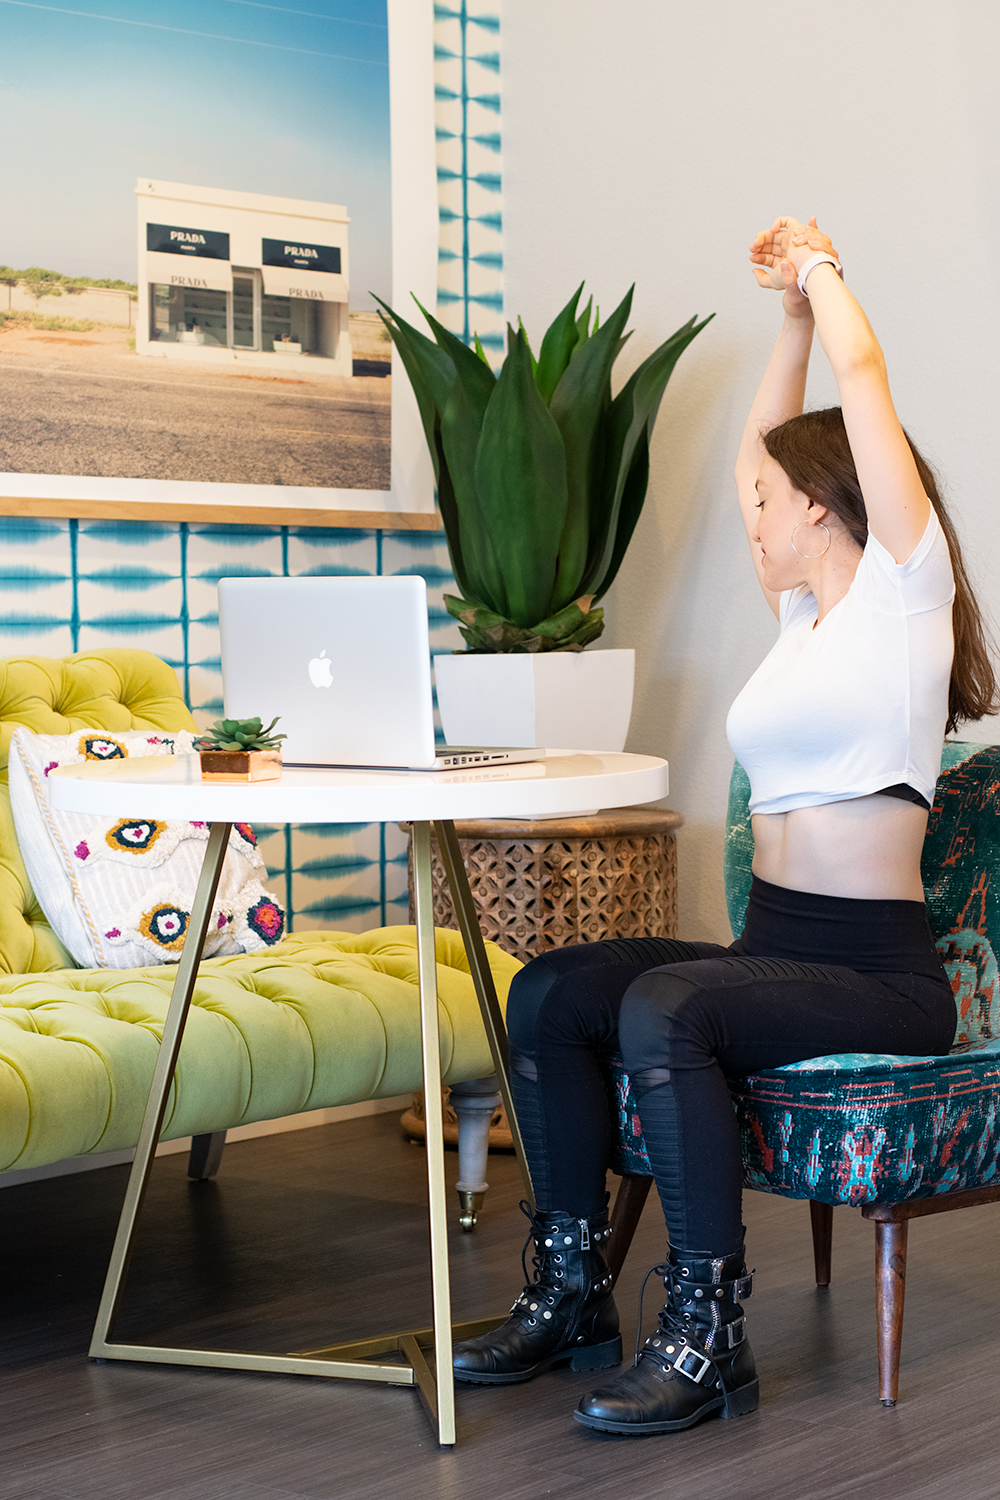
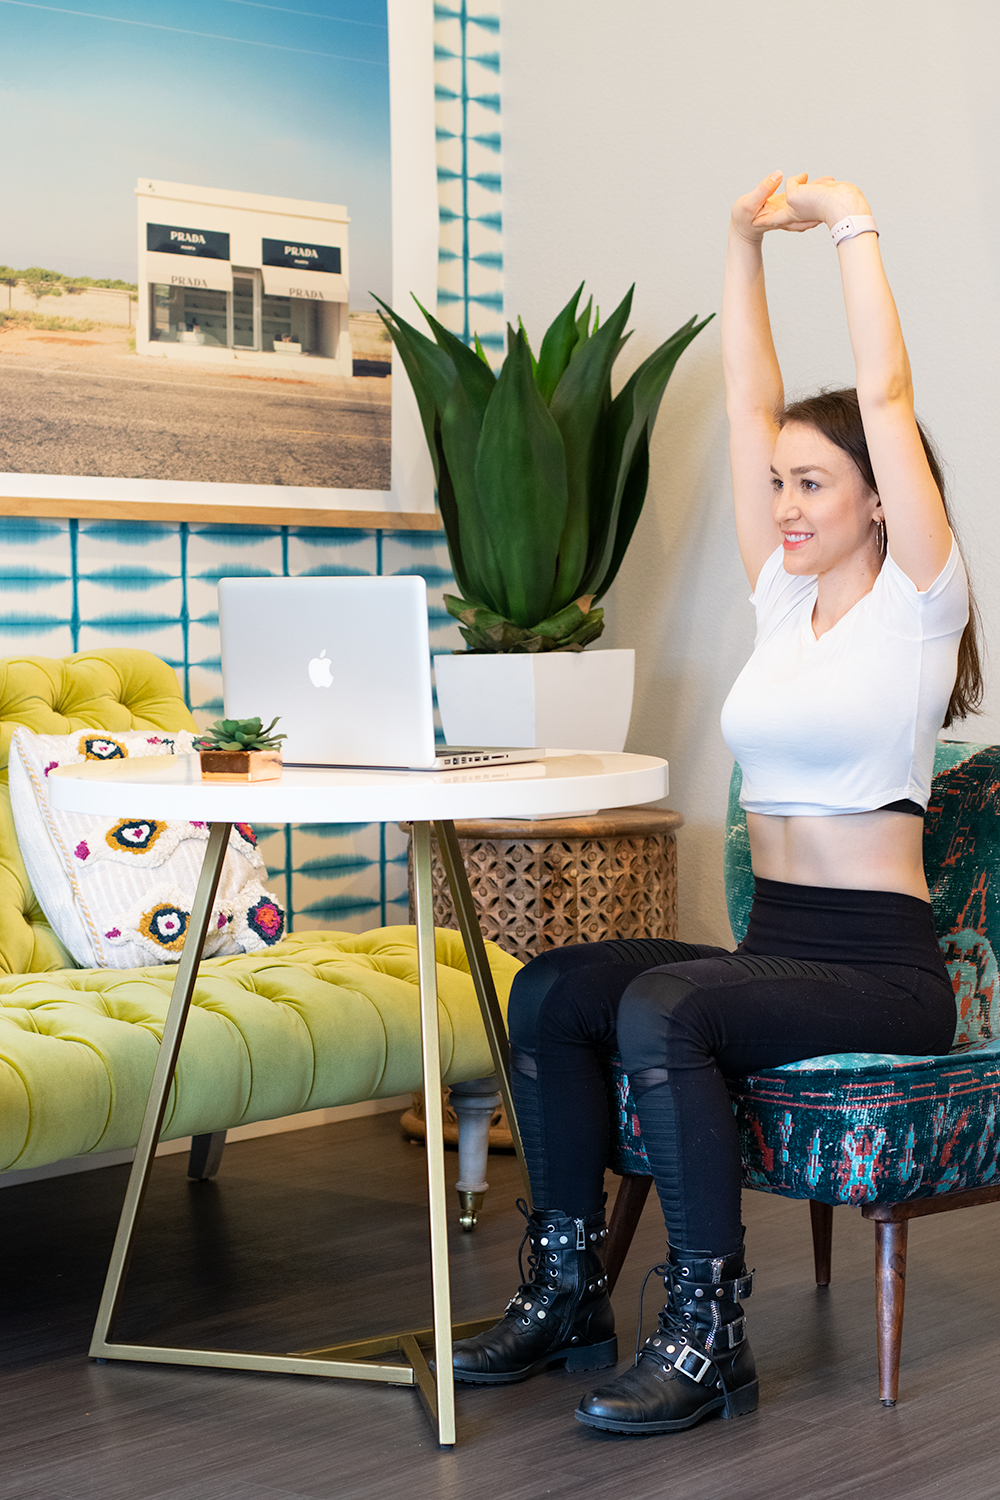
    4 » Overhead Stretch

    Seated Chair Yoga Poses » From the Infinite Embers blog

    • Sit up tall and interlace all 10 of your fingers.
    • Inhale and stretch your arms up as high as you can.
    • Exhale and relax your shoulders down away from your ears.

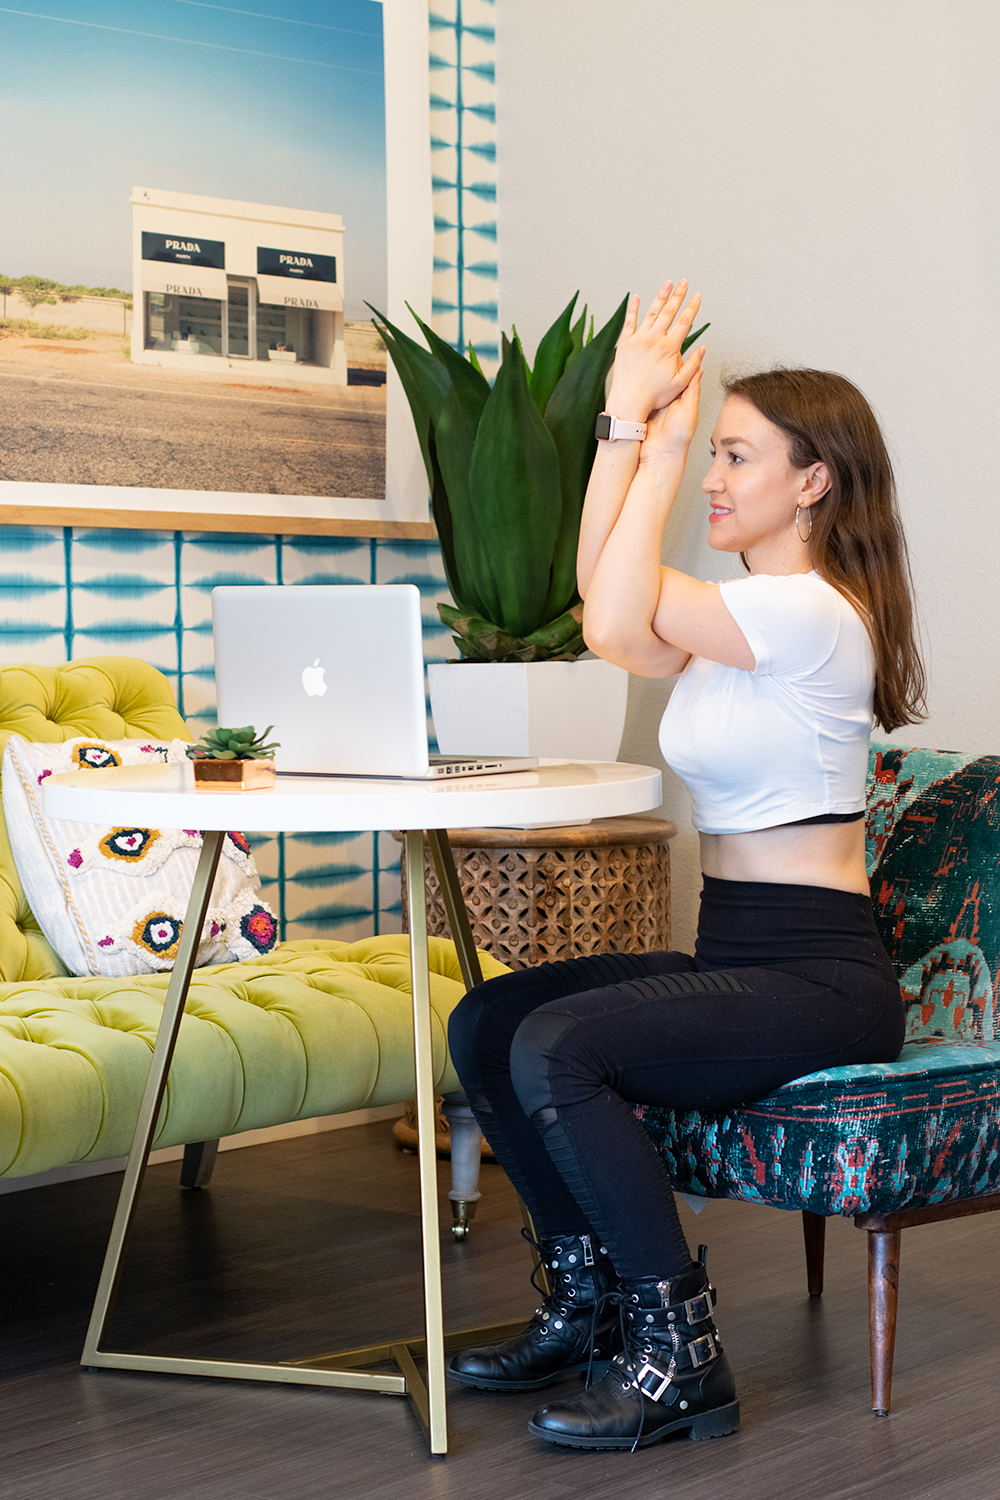
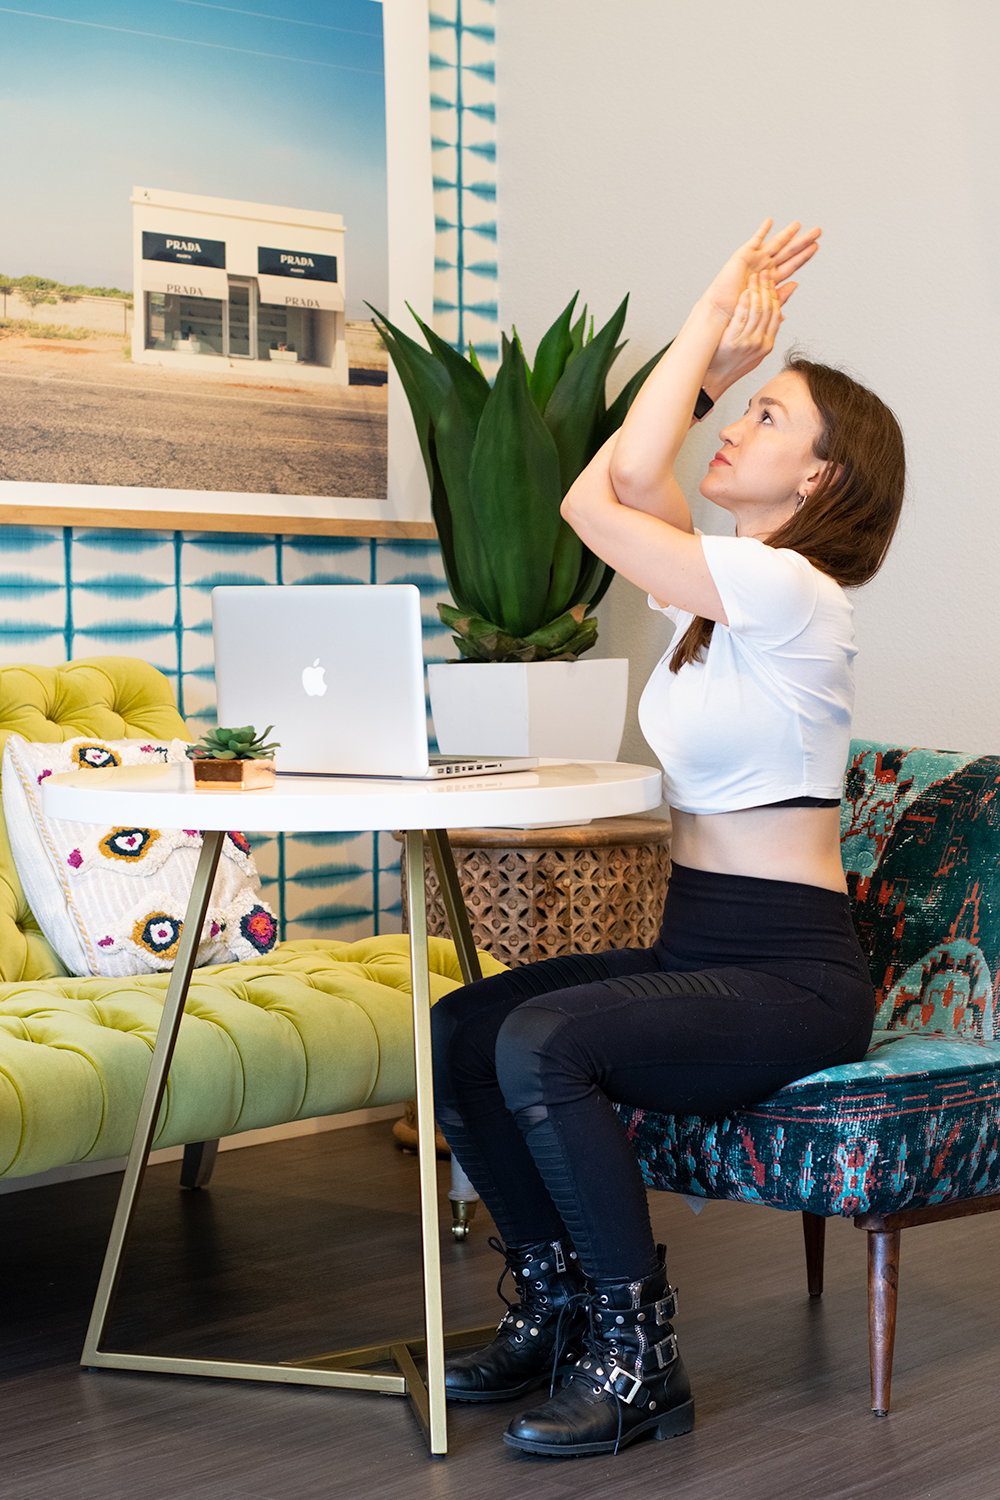
    5 » Eagle Arms

    Seated Chair Yoga Poses Eagle Arms » From the Infinite Embers blog

    Seated Chair Yoga Poses Eagle Arms » From the Infinite Embers blog

    • Cross your R elbow on top of the L. Wrap your forearms around to press your palms against each other.
    • Draw your shoulders down away from your ears and lift your elbows up, possibly to shoulder-height or as high as you can.
    • Press your hands away from your to increase the stretch.
    • Focus on stretching through the upper back, right between the shoulder blades. Breathe and try to relax!
    • If you want even more, try tilting backwards from your shoulder blades, reaching your heart up to the sky as you lift your elbows.
    • Switch sides.
    • Note: Can’t get your hands to wrap? Try pressing the backs of your hands against each other instead. I break down all the modifications in the video above, so be sure to watch it for help!

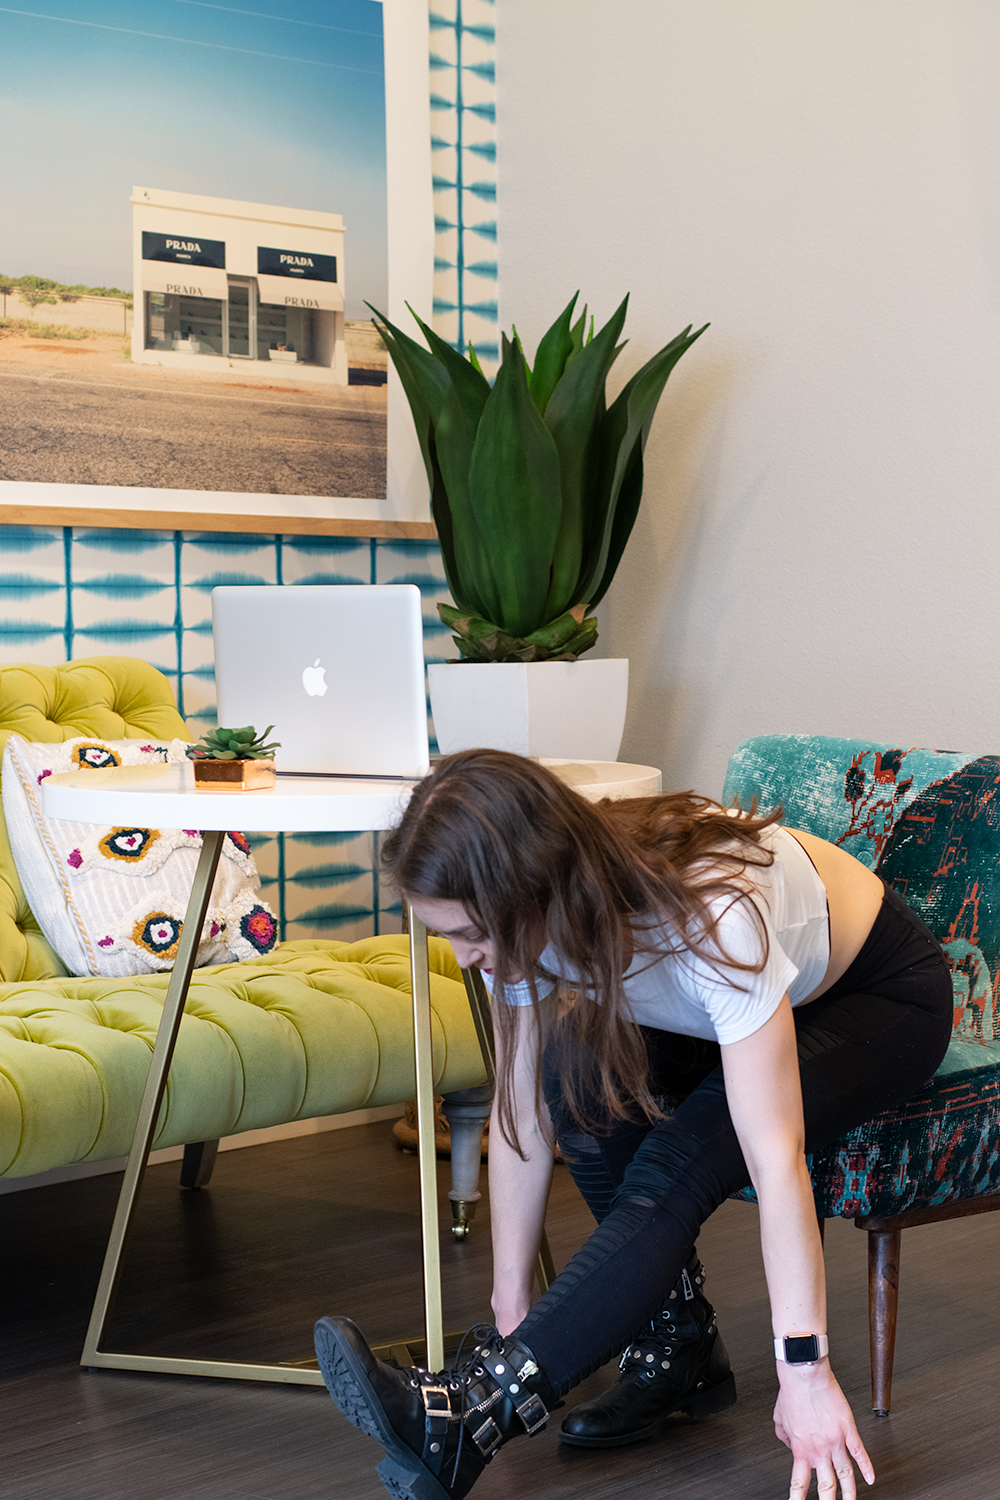
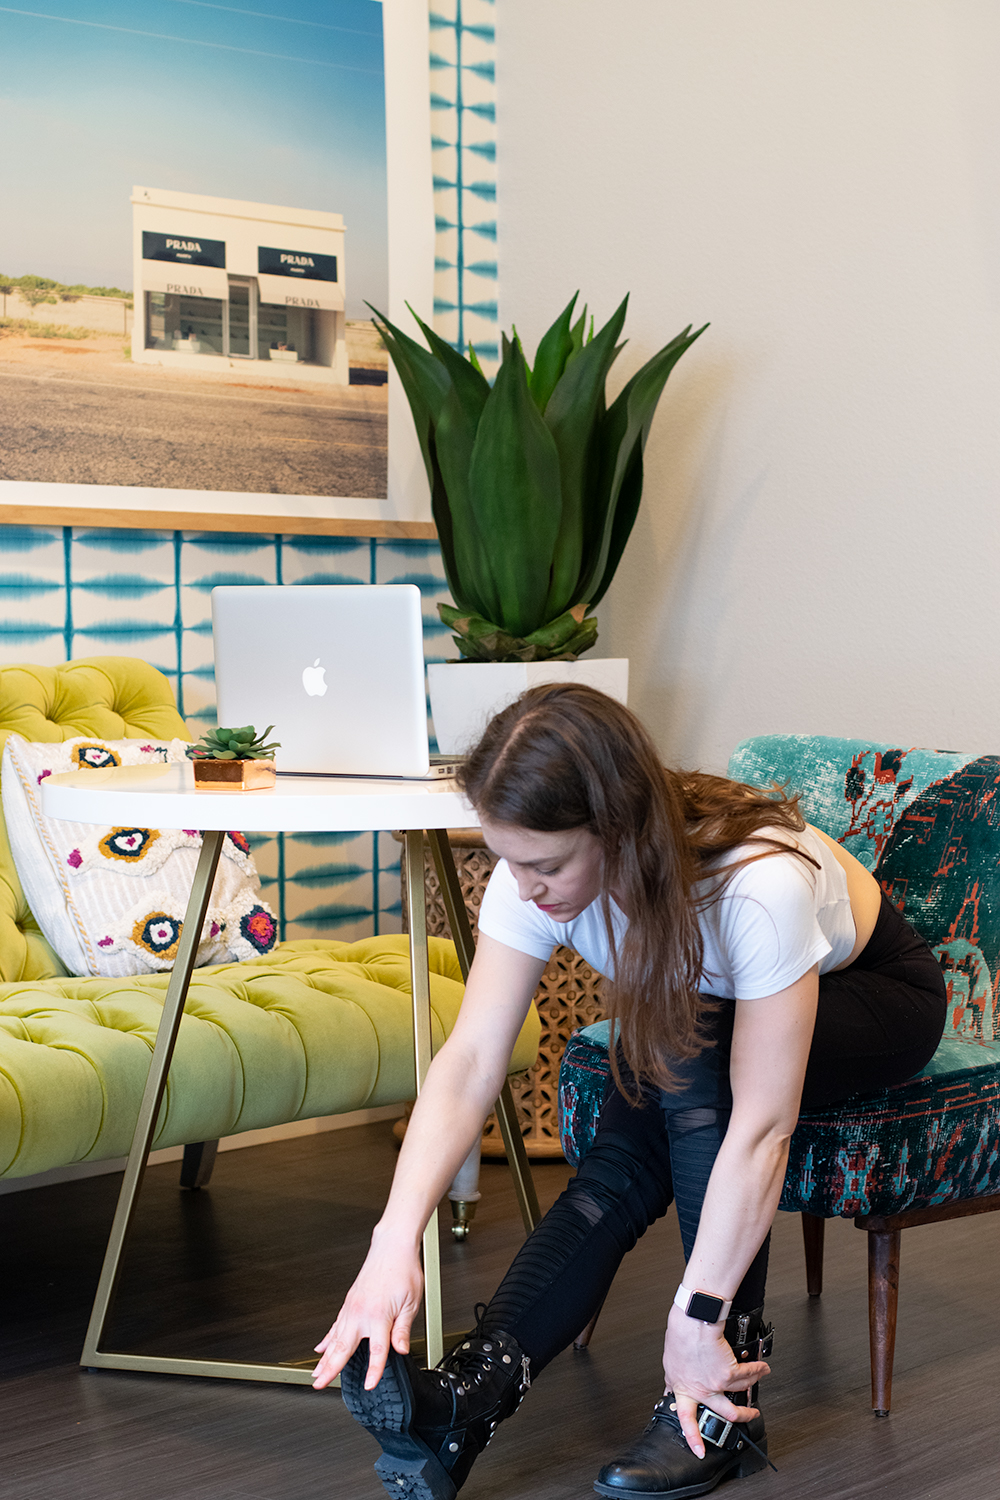
    6 » Hamstring Stretch/Half Splits

    Seated Chair Yoga Poses Hamstring Stretch » From the Infinite Embers blog

    Seated Chair Yoga Poses Hamstring Stretch » From the Infinite Embers blog

    • Sit on the edge of your chair, if you can.
    • Extend your R light out in front of you, as straight as you can get it. Flex your R foot.
    • Start to tilt forward from your hips, keeping your your chest open. Maybe take your hands all the way down to the floor if you feel open enough.
    • Focus on the stretch down the back of your leg, in your hamstring. Make sure not to lock out your knee and keep your foot flexed, extending out through your heel while pulling the R hip back.
    • Repeat on the L side.

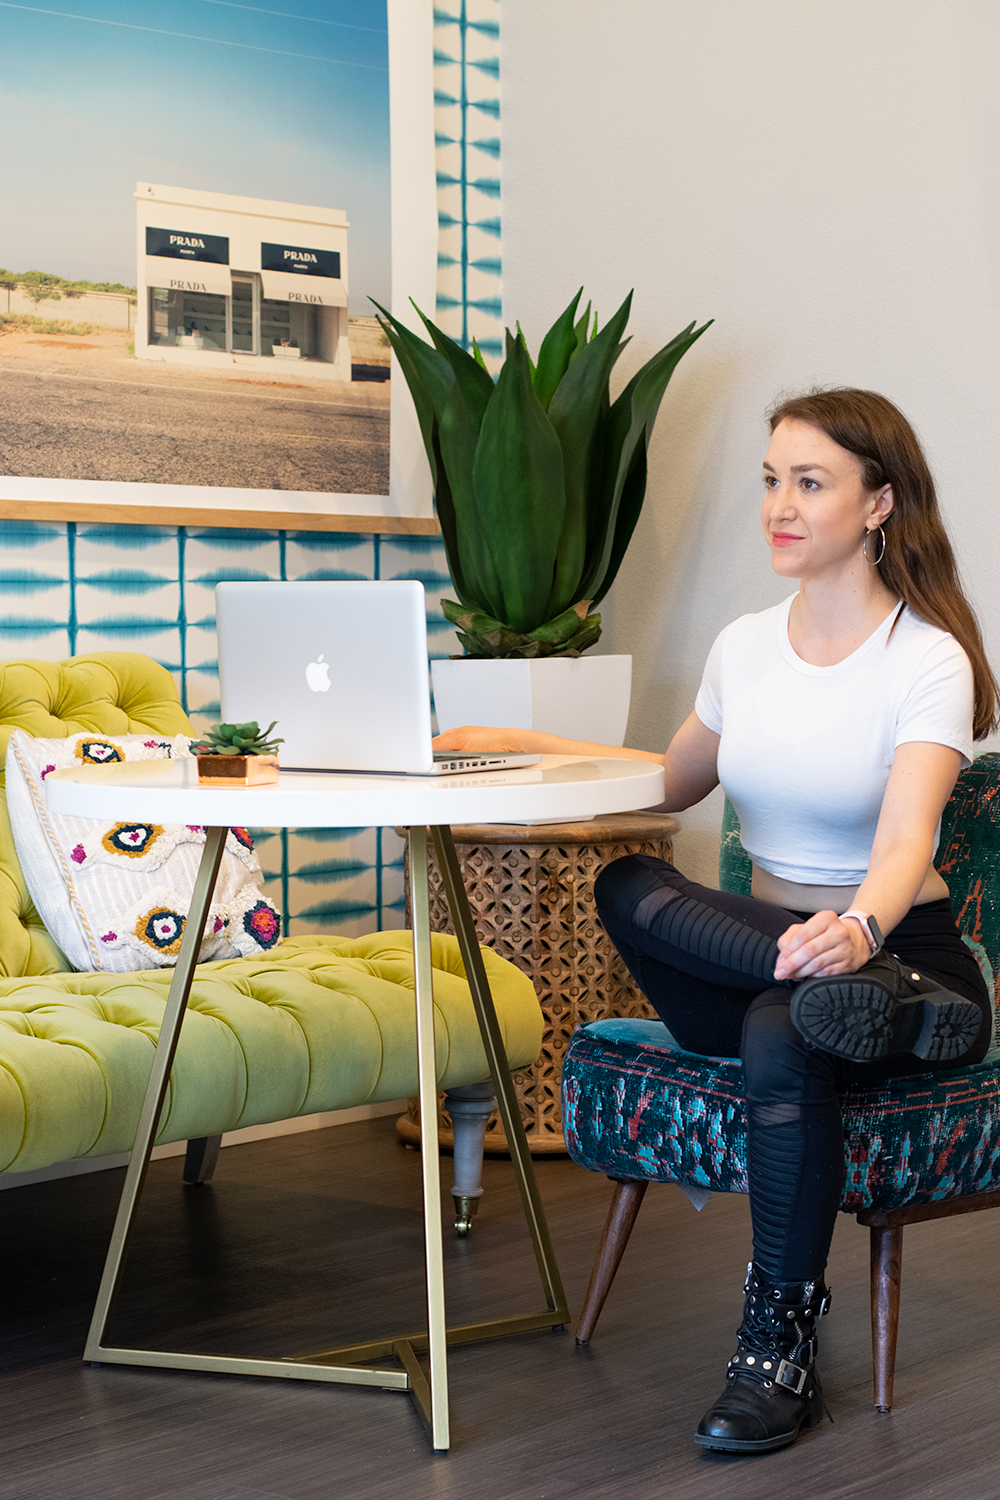
    7 » Figure 4/Seated Pigeon

    Seated Chair Yoga Poses Pigeon » From the Infinite Embers blog

    Seated Chair Yoga Poses Pigeon » From the Infinite Embers blog

    • Start with your feet back on the ground at hips’ distance.
    • Flex your R foot and cross your R ankle over your L knee. Keep the foot flexed.
    • Maybe start to tilt forward at your hips to fold over your R shin and increase the stretch.
    • Repeat on the L side.
    • Note: If this is too intense for you, try simply hugging your R knee into your chest. Move it around in small motions if that feels good to help loosen up through the hips! I show you how in the video above. Also, try out these outer hips stretches when you’re back on your mat!

    8 » Neck Stretch

    Seated Chair Yoga Poses Neck Stretch » From the Infinite Embers blog

    Seated Chair Yoga Poses Neck Stretch » From the Infinite Embers blog

    • Adjust your posture again and sit up tall.
    • While reaching out through the crown of your head, tilt your R ear down to your R shoulder, stretching out the L side of your neck.
    • Be very gentle! Your neck is sensitive.
    • If you want more, you can place your R hand lightly on top of your head (do not pull down!) and extend your L arm out to the side and slightly behind you (you can play around with the placement of your arm to vary the stretch).
    • Return back to center with an inhale. I like to reset by rolling my shoulders out/shaking out my head.
    • Repeat on the other side.
    • Note: You can check out even more neck stretches here!

    9 » Wrist Circles

    Seated Chair Yoga Poses Wrists » From the Infinite Embers blog

    • Give your wrists some love! This isn’t so much a stretch as finding some mobility, moving your wrists around to prevent stiffness or pain.
    • Roll your wrists out in circles, shake them side to side, or flap them up and down. This is especially important if you’ve been spending a lot of time typing! (like yours truly—I literally just took a break to circle out my wrists for a second as I type this)

    10 » Child’s Pose

    Seated Chair Yoga Poses Childs » From the Infinite Embers blog

    • If you’re lucky enough to be seated at a counter (an airplane tray table works!), take a Seated Child’s Pose.
    • Stack your hands, with your elbows out to the side.
    • Rest your forehead down on your hands.
    • Soften your shoulders away from your ears. Try to relax all tension from your upper body.
    • Close your eyes and breathe.
    • This is an especially good posture to take if you feel stressed, tired, or unfocused.

    Bonus » End with Savasana for as long as you want!

    Seated Chair Yoga Poses » From the Infinite Embers blog

    • You can take Savasana in your Seated Child’s Pose, or simply sit up, close your eyes, and breathe.
    • Try to relax your entire body. I like to imagine my skeleton sitting with perfect posture, all my bones effortlessly stacked in alignment, with my muscles draping over the bones like wet clothes on a clothesline. For some reason that visual really helps me let go of tension in my body.
    • Don’t worry about where your mind wanders. Give yourself permission to simply be, in this moment. I meditate this way on most flights I take, because I find it’s the best time to give my mind a break.
    • It’s a benefit that you’re sitting, because your body can more easily go into a meditative state without much risk of falling asleep! If you have extra time and earbuds and want to dive into a full meditation, check out my favorite meditation apps.

    I hope you enjoy this sequence! Remember to do it as often as possible to keep your body and mind feeling great.

    » Song Vibes «

    Are there any other seated chair yoga stretches you love? Share them with the class in the Comments below!

    xo,

    Amy


  • Bean + Veggie Vegan Stir Fry (Gluten Free, Soy Free)

    Vegan Bean Stir Fry » From the Infinite Embers blog

    God, I’m drooling just thinking about this vegan stir fry.

    It is, if I’m being honest, a near-perfect recipe. And I can’t take the credit: this goes to my former husband Matt, who created this masterpiece (I’ve always told him he has a future as a vegan chef), and it’s honestly too good not to share with you all. If you remember, I’m definitely not the most skilled in the kitchen—but this is a recipe I pull out to impress. Now that we’re not together, I’ve had to re-learn how to take care of myself by cooking for one. I made this vegan stir fry for one of my best friends, Domonic (a meat eater), when she came down from LA to visit me, and she loved it. And she tells it like it is. So yeah—if I can make it, YOU can make this recipe, no sweat.

    As a vegan, I have to tell you, nothing makes me happier than impressing a non-vegan with an incredibly healthy and delicious meal I made myself.

    It’s a big pat-on-the-back moment for myself, so I hope you’ll try it and love it, too, because it will make me feel great. ha! But also mostly because this food will make YOU feel great. This is a meal Matt and I carefully put together to deliver maximum nutrition and flavor. Because life is too short for blah food.

    Here’s why I love this vegan stir fry:

    • It’s 100% plant-based and vegan. It feels good to help the environment and reduce animal cruelty, doesn’t it?
    • It’s also gluten-free, in case you have an allergy/Celiac. But in a low-key, natural way, with brown rice as a whole grain rather than some funky tapioca starch wheat substitute.
    • It’s also SOY-free! So basically it’s perfect for a party where everyone’s got an intolerance going on (sounds like a sexy party, doesn’t it? lol). This is a big one for me, because a LOT of vegan meals are centered around soy, because it’s a cheap, easy, wonderful protein substitute. BUT most of us we eat way too much soy (it sneaks its way into many foods), which can interfere with our bodies’ hormone production. Less is more.
    • The combination of beans + rice means this meal provides a complete protein. This is like getting the golden ticket of vegan meals, except instead of a trip to a Chocolate Factory you win the satisfaction of knowing that it really is possible to easily get all the protein you need through a plant-based diet! Eating legumes (beans) with rice provides your body with all the amino acids it needs to turn the food into muscle. Get strong.
    • It has allll the veggies. Look at that rainbow of color! You can literally use any vegetables you want, so feel free to play around and use what’s available in season at your local farmers’ market for the cheapest and freshest food. Go crazy, and try to incorporate as many colors as you can! A rainbow means you’ll be getting a wide variety of nutrients.
    • It’s fucking delicious. Need I say more?

    Vegan Bean Stir Fry » From the Infinite Embers blog

    So let’s cut to the recipe already!

    Note: The list of ingredients is long, but simple. And cheap. So don’t get intimidated. And as I mentioned above, all the vegetables listed are really suggestions—use whatever you have. Try veggies you normally don’t eat. Almost anything can be added! Like what the F is watercress but we tried it for the first time in this meal and it’s like a beautiful neutral-tasting green that I now love (but really only eat in this meal).

    Need help finding a Farmer’s Market near you? I gotchu: check out the full directory on the U.S. Department of Agriculture’s site. Plug in your zip code to find one in your area. Be sure to bring lots of bags with you when you go!

    Bean + Veggie Vegan Stir Fry

    Makes a LOT. Approx. 8 servings.

    Ingredients:

    Brown rice

    2 tbsp coconut oil

    1 tbsp peanut oil

    3 cloves garlic, minced

    1 Tbsp ginger minced or shredded

    Minced whites of 3 green onion stalks

    1-2 Tbsp red chili paste

    1-2 Tbsp Sriracha (my faaaaave)

    1/4 cup tamari sauce

    2 pinches red pepper flakes

    (optional) 1 Tbsp tahini paste

    1 can chickpeas

    1 can kidney beans

    1 green bell pepper, chopped

    1 red bell pepper, chopped

    1 head broccoli, chopped

    Handful of snap peas, chopped

    1 zucchini, chopped

    1 eggplant, chopped

    2 carrots, shaved

    1 onion chopped

    Greens of three stalks of green onion

    3-4 handfuls of spinach

    (optional) 2 handfuls watercress, any veggies of your choice

    Directions:

    Precook some brown rice. (BTW, I have a tendency to overcook rice, so I’m telling you, a rice cooker is a game changer. I’ve had mine for over 10 years, and I couldn’t live without it. It’s not made anymore but after doing some research I recommend you get this one. It’s near fail-proof.)

    In a large wok, heat up the oils on medium low.

    Throw in the garlic, ginger, and green onion whites. Let that cook for a minute or two, then add the chili paste, half the Sriracha, half the tamari, your red pepper flakes, and the tahini if you’re using it.

    Once it all liquefies (30 seconds to a minute), add the beans and all the rest of your veggies except the spinach and watercress. Stir all that up together for about 5-10 minutes.

    Add in the other half of your Sriracha and tamari, then the last of the greens. Stir it all up and pay attention to the aroma. Add more tamari or Sriracha as needed. (There should be a nice amount of liquid sauce in the wok)

    Once it’s all cooked up, plate atop of a bed of brown rice and enjoy!

    Vegan Bean Stir Fry » From the Infinite Embers blog

    Yeah, I really should not be writing this post at lunchtime.

    So I know what I’m cooking this weekend… how about you?

    » Song Vibes «

    (I had to lol)

    Let me know when you try out this recipe! I want to hear what you think in the Comments.

    xo,

    Amy

    This post is not sponsored, but there are affiliate links throughout this post, all for stuff I genuinely love and recommend!

  • 6 Yoga Stretches For Tight Outer Hips

    Yoga Poses Outer Hips Stretch » From the Infinite Embers blog

    We all got some tight outer hips.

    As a yoga instructor, I’ve noticed a lot of my clients ask for help with stretching their outer hips. Also known as your adductors, this area includes the gluteus medius, gluteus minimus, and tensor fasciae latae (TFL). It’s common to be so tight there because in our everyday lives we’re moving primarily in one plane: front and back, not side to side. Plus common actions like running or sitting for long periods of time can tighten your outer hips.

    Tight muscles are weak muscles, and vice versa. Tight outer hips can lead to low back pain and poor posture (you know that’s important to me). By loosening the muscles back up, we free them to move through their full range of motion and start generating enough power to become stronger, as well as more flexible.

    It’s so important to stretch your outer hips to prevent injury.

    Think about it: your hips are the hinge point for your body. If you have issues in this region, tension will travel either up your spine or down your legs, or both! Mobile hips keeps both halves of your body operating properly.

    Don’t worry: I’ve got 6 yoga stretch poses that will loosen up your outer hips!

    Hold each of these poses for about 1 minute (longer if desired or shorter if needed).

    Remember, go slow. Listen to your body. Breathe deeply and try to soften into each asana (“pose”). The goal, as always with yoga, is to move mindfully so you can feel better.

    » Side note: I LOVE the leggings I’m wearing in these photos. They were gifted to me by my friend and mentor Elka Haeckel of Elka Yoga & Wellness. They’re FFIT Apparel, a Brazilian active wear line. I love them so much I wanted to give them a shoutout. If you click on any of the photos to zoom in, you can see this pair has this super cute mesh detailing on the outside. I keep getting compliments on them! (The bra is Victoria’s Secret, their most supportive model, another favorite of mine.)

    Let’s do this:

     1 » Half Chair Pose, aka Ardha Utkatasana

    Yoga Poses Outer Hips Stretch » From the Infinite Embers blog

    • Start standing. Holding onto a sturdy surface is ideal, like a counter, or you can stabilize yourself against the wall like me.
    • Flex your Right (R) foot and cross it over your Left (L) ankle.
    • Pull your hips back and bend your standing leg into a squat, or chair pose.
    • Be mindful to keep your back straight and upright, and your standing leg’s knee stacked directly over your ankle (don’t let it jut forward).
    • Repeat on the other side.

    2 » Sidebending Mountain Pose, aka Parsva Tadasana

    Yoga Poses Outer Hips Stretch » From the Infinite Embers blog

    • Start standing. With or without a wall, lift through the top of your head and reach your arms overhead.
    • Lean your upper body to the L while pressing your hips to the R. Breathe down the side of the R leg.
    • If you’re using a wall, press against it to help you deepen the arch of your stretch. If you’re not using a wall, try interlacing your fingers to help you stretch through your ribs.
    • Repeat on the other side.

    3 » Reclining Pigeon Pose, aka Supta Kapotasana

    Yoga Poses Outer Hips Stretch » From the Infinite Embers blog

    • Lie down and start with your legs bent, feet on the ground.
    • Just like in Half Chair Pose, flex your R foot and cross your ankle over your L knee.
    • If you want more intensity, thread your arms through and grab on behind your L hamstring or shin. Use your arms to draw your legs in closer.
    • Keep your entire spine down on the ground, especially your tailbone. Relax your head and shoulders.
    • You can use your R elbow to gently coax the R thigh bone further away from you, deepening the stretch.
    • Repeat on the other side.

    4 » Supine Spinal Twist, aka Supta Matsyendrasana

    Yoga Poses Outer Hips Stretch » From the Infinite Embers blog

    • Hug your R knee into your chest and extend your L leg so it’s straight and heavy on the ground.
    • Check that your spine is in a neutral position, with that slight curve in your low back. You may need to not draw your R knee in so close.
    • Reach your R arm out to the side like a T and use your L hand to guide your R knee up and over towards the L.
    • Stop as soon as you feel your R shoulder try to lift up. Keep both shoulders down on the ground. If you’re lifting up, you’ve gone too far.
    • You can keep your L hand on your knee or stretch it out to straighten that arm, as well.
    • If it feels okay on your neck, turn your head to look to the R.
    • If you need extra support, try placing a block underneath your knee.
    • Repeat on the other side.

    Yoga Poses Outer Hips Stretch » From the Infinite Embers blog

    5 » Cow Face Pose, aka Gomukhasana

    Yoga Poses Outer Hips Stretch » From the Infinite Embers blog

    • Flex both of your feet and cross your R knee over your L. If this pose is inaccessible to you because your hips are too tight, you can do another round of Reclining Pigeon Pose or skip ahead to Pigeon.
    • Use your hands to hold on to your ankles. Try to keep your shins level and guide your legs closer to your chest.
    • Keep your entire spine down on the ground, especially your tailbone. Relax your head and shoulders.
    • Repeat on the other side.

    6 » Pigeon Pose, aka Eka Pada Rajakapotasana

    Yoga Poses Outer Hips Stretch » From the Infinite Embers blog

    • Roll up to all fours: hands under shoulders, knees under hips.
    • Slide your R knee up to your R wrist.
    • Extend your L leg straight back behind you. (Check over your shoulder to make sure it’s not twisted.)
    • Keep your R foot flexed and start to lower your hips to the floor.
    • If you can’t keep your hips level, slide a block under your R hip for extra support.
    • Feel free to start to fold forward over your R leg, maybe lowering to your forearms or to the floor. Keep your spine long and straight.
    • For more intensity, try sliding your R foot away from you to start to bring the leg to more of a 90° angle.
    • Repeat on the other side.

    Bonus » End with Savasana for as long as you want!

    Lie down, take some deep breaths, and allow your hips to sink down into the ground as you relax.

    I hope this sequence has your outer hips feeling mobile, strong, and restored. Remember that with flexibility, consistency over a long period of time is key to get results, so be sure to practice these poses daily, even if just for a moment.

    » Song Vibes «

    Do you have tight outer hips? Know any other great stretches that help? Share in the Comments below!

    xo,

    Amy